

Noise discount could be an vital a part of a photographer’s workflow. On this information, I’m going to check a number of the hottest noise discount software program purposes available on the market, to present you an concept of which may be finest for you. Particularly, I’ll be evaluating Topaz DeNoise AI in opposition to On1 NoNoise AI, DxO PureRAW, and Adobe Lightroom Traditional 11.
As knowledgeable photographer who additionally teaches pictures on-line, I’m all the time striving to get the most effective out of my photographs. While it’s good to get every thing proper in digital camera, that isn’t all the time potential, and noise is commonly an unavoidable facet impact of pictures.
I’ve spent quite a lot of time modifying photographs and making an attempt out a variety of noise discount instruments, which I take advantage of in my pictures workflow regularly. My diploma in laptop science means I really get pleasure from testing software program, and I all the time relish the chance to mix two of my pleasures (computer systems and pictures) in a evaluation like this.
I’m going to cowl a number of issues on this submit. Naturally I’ll be evaluating the options and precise noise discount efficiency of the software program which I’ll do utilizing my very own photographs. I’ll additionally evaluate how every software suits into your pictures workflow, have a look at how simple they’re to make use of, and have a look at how shortly they course of photographs. I’ll additionally have a look at any additional options that the software program might need.
In addition to the efficiency and options comparability, I’m additionally going to undergo what you need to be excited about when selecting a noise discount software. First although, let’s check out what noise and noise discount is in pictures, and why you may wish to spend money on a noise discount software like these I’m reviewing at the moment.
What’s “Noise” in Pictures?
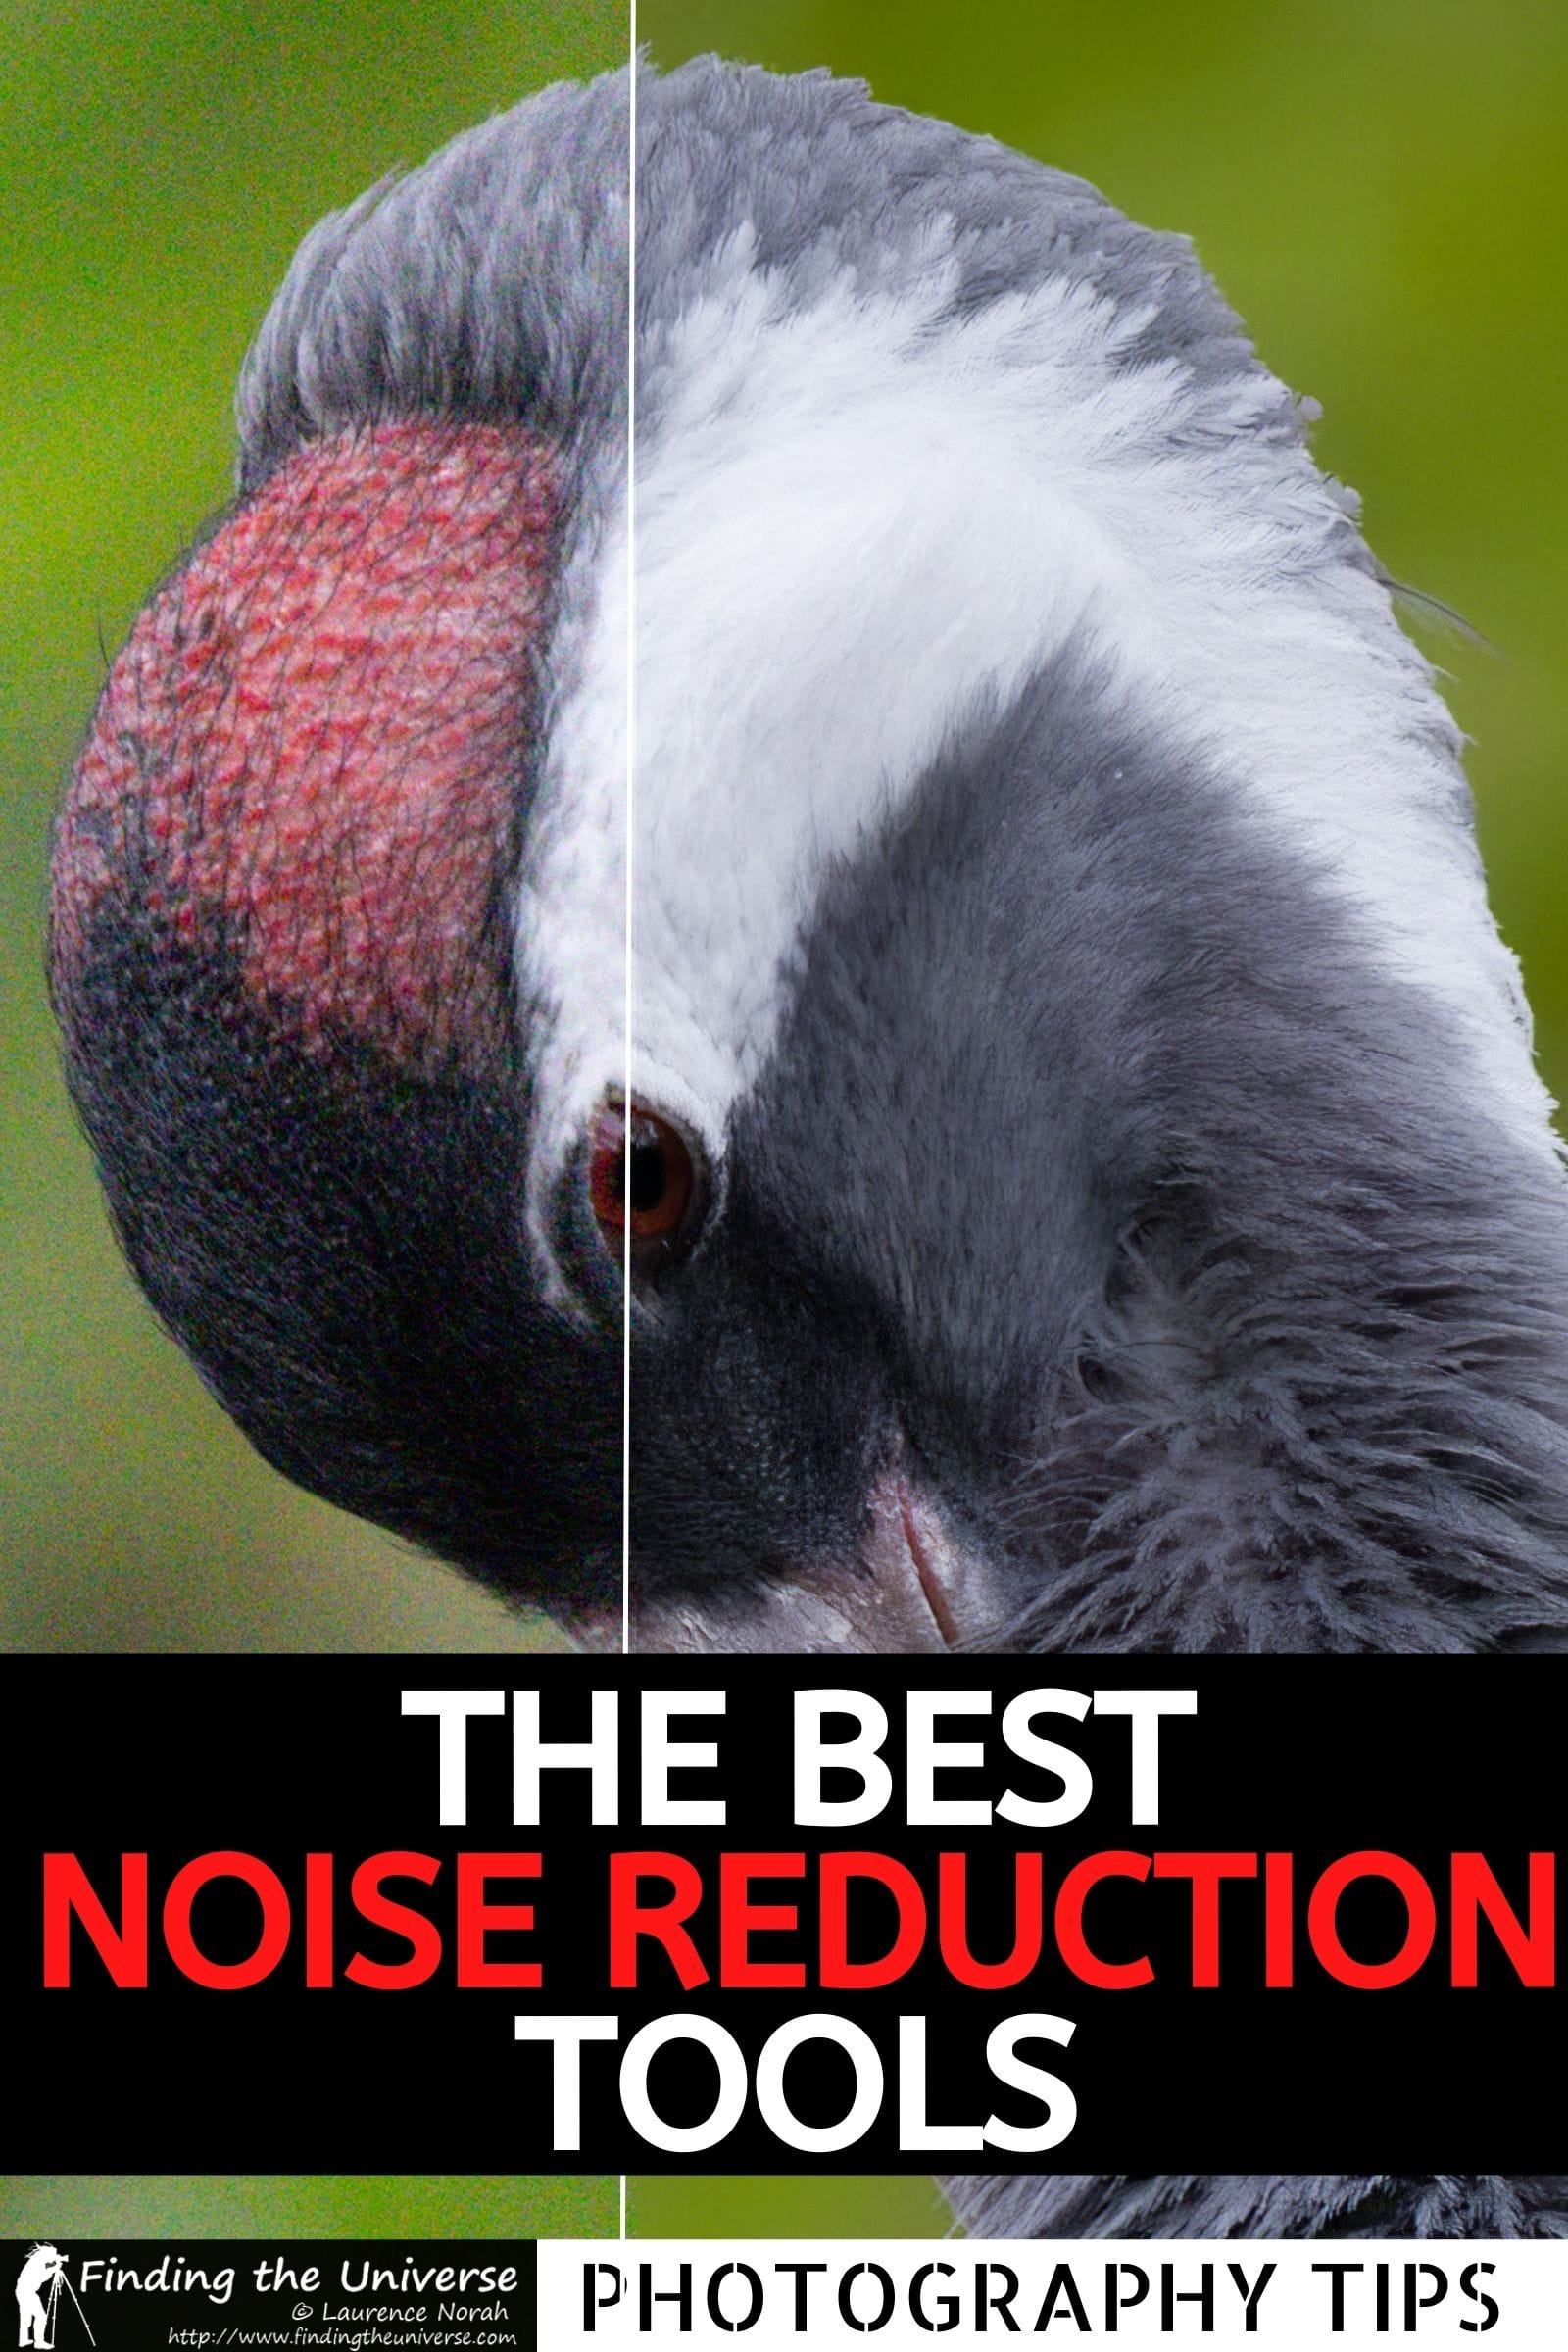
Noise seems as random colour or brightness variations throughout a picture, which may give it a grainy or splotched look on shut inspection.
There are two sorts of noise in digital pictures, colour noise and luminance noise. The previous seems as coloured speckles and the latter seems as a grainy impact. You may see each sorts of noise within the beneath picture.
Each sorts of noise seem in some kind in all digital photographs, nonetheless there are a variety of things which may trigger elevated noise. The primary of those is the ISO setting of your digital camera. As a common rule and all else being equal, the upper the ISO, the noisier the picture shall be.
It is because the ISO setting works a bit just like the acquire on an amplifier. As you enhance the acquire on an amplifier, the sound will get louder, however any errors or undesirable sounds additionally get amplified. As you enhance the ISO on a digital camera sensor, the prospect of random errors being recorded additionally will increase. Photographs shot in decrease mild are typically noisier as a result of excessive ISOs utilized in these scenes.
The scale of the sensor and the bodily measurement of the pixels recording the sunshine on the sensor additionally contribute to picture noise. Smaller sensors with greater megapixel counts are inclined to create noisier photographs. Bigger sensors with smaller megapixel counts are inclined to create much less noisy photographs.
While noise is often undesirable in pictures, there could also be occasions the place a photographer doesn’t thoughts noise in a photograph and even needs it. For instance, if making an attempt to realize a sure impact for a classic or grungy model of photograph, noise may be of worth.
Nonetheless, noise is usually one thing most photographers what to keep away from. When it will possibly’t be prevented in digital camera through the use of low ISOs, then you’ll want to use noise discount software program to take away it out of your processed picture recordsdata.
What’s Noise Discount in Pictures?
Noise discount is mainly the elimination of digital noise which may seem in a picture.
As a result of noise is random, it usually seems all throughout a picture in an arbitrary method. This makes eradicating noise a little bit of a problem, because the noise discount software wants to have the ability to appropriately establish which pixels are undesirable noise, and which are literally a part of the picture. The undesirable noise pixels must be changed with pixels that seamlessly mix into the prevailing picture.
An excessive amount of noise discount can lead to misplaced picture element, giving a picture a tender, virtually plastic look. Too little noise discount means your photographs can appear to be a grainy speckled mess. Good noise discount ought to end in a clear noise-free picture that appears pure.
Do You Want Noise Discount?
While noise discount is vital to make sure your photographs look their finest, operating devoted noise discount software program isn’t obligatory for each photographer. It relies upon quite a bit on what you may be utilizing your photographs for.
It is because if you resize a picture to a smaller measurement, it turns into quite a bit more durable to see the noise. When you primarily share your photographs on the internet and on social media websites the place they’re usually seen at a fraction of their unique measurement, then the advantages of devoted noise discount instruments shall be far much less apparent. Your photograph modifying software program’s built-in noise discount will typically do a adequate job.
Nonetheless, should you plan to enlarge your photographs, print them out, or are frequently tightly cropping your photographs (akin to with wildlife pictures), then noise discount can turn into very helpful.
What to Search for in Noise Discount Software program
Earlier than evaluating each bit of noise discount software program and evaluating them, I wish to undergo the assorted options that noise discount software program presents so you recognize what to contemplate when evaluating the accessible choices.
Noise Discount Efficiency
After all, the very first thing to search for in noise discount software program is how nicely it really performs. I’ll be testing each bit of noise discount software program on my photographs and sharing my ideas on this submit to present you some pointers. Nonetheless, I strongly urge you to do some testing of your individual with your individual picture recordsdata from your individual digital camera.
It is because each digital camera and lens mixture will output barely totally different outcomes, and you’ll undoubtedly wish to take a look at how your setup works together with your noise discount software program. The software program additionally performs otherwise relying in your {hardware} setup, so it’s vital to test that on your laptop system as nicely.
Lastly, what counts as “good” noise discount is kind of subjective, like many issues in pictures. What seems to be nice to me may look too tender or synthetic to you, and vice versa. Testing the software program in opposition to your photographs and adjusting the settings to see what outcomes appear to be in your photographs is the one technique to actually ensure. You may obtain trial variations of every model of the software program, and plenty of of them additionally include a a refund assure.
Listed below are hyperlinks to every noise discount software on take a look at so you’ll be able to obtain them and take a look at them out your self.
Observe that Lightroom isn’t a devoted noise discount software. I’m utilizing it on this submit primarily as a comparability because it’s the photograph modifying software of alternative for a lot of photographers and it has built-in noise discount instruments.
RAW Assist
You’d usually look to scale back the noise in your photographs as early in your photograph modifying workflow as potential. Assuming you might be taking pictures in RAW, which means the noise discount software you might be utilizing might want to help the RAW format that your digital camera produces.
Each digital camera producer has their very own RAW file format, and these can differ between digital camera fashions from the identical producer. For instance, Canon have CR2 and CR3 recordsdata, Nikon have NEF recordsdata and Sony has ARW recordsdata.
Any photograph modifying software, together with noise discount software program, wants to have the ability to learn the RAW file with a view to make any modifications to it. So, if you end up evaluating noise discount software program, you’ll want to test that it helps your digital camera mannequin.
If it doesn’t, there may be the choice to transform the RAW file right into a extra common RAW format like Adobe’s DNG format. Alternatively, you should utilize an edited format like TIFF, and apply noise discount a bit of in a while in your modifying workflow. Extra on when to use noise discount in one other a part of this information.
Observe that noise discount instruments also can usually work with photographs not shot in RAW, akin to JPG recordsdata from smartphones. The outcomes are more likely to be much less spectacular as these recordsdata will have already got been processed, and a few type of noise discount will seemingly have already got been utilized.
Value
While the noise discount efficiency of the software program is clearly vital, worth can be going to be a consideration in terms of select the correct software program for you.
Noise discount software program is offered at a variety of costs, ranging from round $70 USD as much as over $120.
Shopping for a bit of software program that focuses on one perform may appear to be an extravagance, otherwise you may really feel it’s a vital buy. When evaluating costs, undoubtedly evaluate the efficiency of the product in addition to extra options to see if it’s the correct possibility for you.
In some instances, the noise discount software program may additionally be offered as a part of a extra full-featured photograph modifying software which is offered for a bit of bit extra. This may usually have a full vary of photograph modifying instruments, in addition to the noise discount capabilities of the standalone software program.
For instance, On1 sells their NoNoise AI software as a standalone product, however it’s additionally a part of the On1 PhotoRAW product. This latter is considered one of our favorite Lightroom alternate options for photograph modifying and photograph administration, and it’s solely round $30 extra for the complete suite.
As an alternative of spending $69 for a product that does one factor, you can spend $99 on a product which does many issues together with noise discount. In case you are already available in the market for a photograph editor, this may be a wonderful possibility.
GPU Acceleration
Noise discount, as I’ve already alluded to, is an advanced course of. The noise discount software must appropriately establish the 2 sorts of noise (colour noise and luminance noise), after which take away them from the picture.
Nonetheless, clearly it will possibly’t simply delete the pixels – they should be changed with one thing else. A digital picture isn’t made up of layers, so the place you delete a pixel there isn’t something behind it.
Most noise discount software program works by analysing the world round noisy pixels, and utilizing that evaluation to determine what to interchange the noisy pixels with. This evaluation is essential, and is why some noise discount software program can lead to a plastic and overly smoothed look. In case you are working with particulars of pores and skin or feathers, it’s important that the changed noise pixels match the prevailing texture so the outcome seems to be pure.
This pixel degree picture evaluation takes an enormous quantity of processing energy, and the upper your digital camera’s megapixel depend, the longer it can take because the software has to analyse extra pixels.
To enhance the pace at which they work, many noise discount instruments leverage the ability of a Graphics Processing Unit, or GPU. These are additionally generally referred to as graphics playing cards.
Graphics playing cards are a specifically designed piece of {hardware} inside a pc that are generally used for graphically intensive workloads akin to laptop video games. Nonetheless, they can be utilised for different particular duties, akin to picture manipulation.
While a pc’s central processing unit, or CPU, also can deal with these duties, their general-purpose nature means they aren’t often as quick at it as a devoted graphics processor. A high-end graphics card will typically be sooner at these particular duties than a quick CPU.
Nonetheless, the noise discount software program does should be specifically coded with a view to help offloading duties to the GPU as an alternative of the CPU. When you have a graphics card in your desktop or laptop computer laptop that you just wish to make the most of for noise discount duties, you’ll wish to make sure to buy noise discount software program which helps GPU acceleration. That is usually made clear within the promotional materials, and there may also often be choices throughout the software program to allow or disable the characteristic.
I’d usually advise shopping for noise discount software program which does embrace GPU acceleration, even should you don’t have a graphics card presently, because it future proofs it is best to you improve to a GPU at a later date.
When you have an present graphics card, do evaluate efficiency between utilizing the GPU and simply utilizing the CPU. In some instances, particularly in case you have a more moderen CPU and an older GPU, the CPU may really be sooner.
In case you are available in the market for a brand new laptop, try my information to the most effective laptops for photograph modifying. Many of those have built-in GPUs that will help you get probably the most out of your photograph modifying purposes.
Batch Enhancing
When you typically work with a lot of related photographs, then you’ll want to take into consideration the batch modifying choices that the noise discount software program presents.
For instance, you may be a marriage photographer who has taken numerous pictures of an occasion or a wildlife photographer with a number of pictures of animals.
While you may be blissful to sit down down and tweak the noise in each picture individually, the possibilities are that lots of your photographs shall be related sufficient that you just’ll be making use of related settings to all of them. Instruments like Lightroom permit you to apply the identical edits to a number of photographs without delay, so this type of characteristic is helpful to search for in noise discount software program too.
Noise discount software program also can take time to run, so the choice to load up a number of photographs as a batch and have them course of while you do one thing else can be an actual profit.
Automation and Management
One other characteristic to take a look at is what degree of automation the software presents. This may differ relying on the software program. It may be a one-click resolution, the place you merely load the picture and noise discount is utilized completely robotically with minimal consumer enter. Alternatively, it’d require totally guide modifying of assorted sliders.
Ideally, the software program will include a better of each worlds strategy. There must be a totally automated mode, the place the software program performs an evaluation of the picture and suggests the right settings. Then it is best to have the choice to regulate and tweak to fit your wants.
After all, you may desire a extra guide or extra automated strategy. It’s as much as you. The principle factor is to select the software program that matches into your workflow.
AI Options
You should have seen that the phrase “AI” is tacked on to the tip of a number of the merchandise in our round-up at the moment. This stands for “Synthetic Intelligence”, and means that these particular instruments are able to one thing a bit particular.
Let me clarify what’s really taking place. When these producers consult with AI, what they imply is that their software program has been skilled utilizing one thing referred to as machine deep studying. Mainly, the software program has been introduced with thousands and thousands of photographs, to get an concept of what an excellent noise-free picture seems to be like and what a foul noisy picture seems to be like.
While you load up your noisy picture, this machine studying helps the software determine, based mostly on its in depth coaching on the thousands and thousands of photographs in its dataset, which areas of your picture are noisy and what to interchange them with.
This can lead to much more pure and spectacular outcomes than the extra conventional pixel degree evaluation, the place close by pixels are used to mix in to present pixels. Nonetheless, it will possibly additionally generally get it improper, resulting in lower than spectacular outcomes.
General, my testing leads me to suggest a noise discount software with AI capabilities, because the outcomes on the entire are typically extra spectacular. Nonetheless, I do suggest you take a look at any software out earlier than making a last resolution.
Masking
In pictures, masking primarily refers to an space of the photograph that you’ve got chosen in an modifying software. After getting chosen, or “masked” an space, you’ll be able to select to solely apply edits to that space. It’s also possible to invert the masks, and apply edits in all places else.
Most photograph modifying instruments include vary of masking choices, and it’s one thing I cowl intimately within the modifying part of my on-line pictures course.
Some noise discount software program additionally presents masking controls. These permit you to extra fastidiously outline which areas of the picture you wish to apply noise discount to. That is useful particularly with a number of the AI powered instruments which don’t all the time get it excellent, that means you’ll be able to tweak the outcomes.
Plugins for different Picture Apps
Many photographers in search of noise discount software program have already got an present pictures workflow in place. Meaning you most likely already use a photograph modifying software like Adobe Lightroom to edit and handle your photographs.
If that’s the case, discovering a noise discount software that seamlessly integrates into your present setup will make your photograph modifying workflow a bit of bit simpler. Many noise discount instruments ship with plugins for Adobe Lightroom and Photoshop, which is arguably the commonest photograph administration and modifying product available on the market.
A plugin makes it simpler to ship a picture from Lightroom to the noise discount software, apply the noise discount, after which have the adjusted picture come again to Lightroom the place you’ll be able to proceed to work on it.
Some software program additionally ships with plugins for different software program, like Seize One or On1 Picture RAW, however as these are much less generally used, this isn’t as customary.
After all, a plugin isn’t completely obligatory, and you’ll nonetheless use noise discount instruments completely standalone with out a plugin. However it’s a good to have characteristic.
Further Options
When evaluating noise discount instruments and their worth, it’s good to check any extra options they may provide on prime of noise discount.
For instance, some instruments embrace built-in lens profile correction and picture sharpening instruments. As these are widespread duties to carry out on most photographs, having these built-in to the noise discount software can additional improve your workflow.
These aren’t typically deal breakers, however in case you are struggling to determine between two related merchandise, options like this may be the place your resolution is made.
When to Use Noise Discount Software program
You may be questioning which level in your workflow is finest to use noise discount. In my view, you wish to apply noise discount as early as potential. It is because as you begin to edit the photograph, you apply modifications to the picture that are additionally utilized to the noise. For the noise discount software program to be only, operating it on an unedited RAW photograph means it will possibly get to work on the unadulterated model of the picture.
As beforehand talked about, you too can often run noise discount instruments on JPG recordsdata, nonetheless this is not going to yield the most effective outcomes in comparison with utilizing them on RAW recordsdata as JPG recordsdata are already processed.
Every noise discount software will usually have a suggestion as to the most effective level in your workflow to run it for the most effective outcomes. Nonetheless, you might need a particular workflow that you just desire. For instance, in case you are planning to crop your photographs, you may desire to crop first after which simply apply noise discount to the cropped space of the picture.
Noise discount generally is a time intensive course of, so it can save you time by solely decreasing noise on the world of the picture you propose to make use of. You may also desire to make some primary tonal edits in your photograph modifying software earlier than eradicating noise.
In my testing, there may be not an enormous distinction between utilizing noise discount earlier than doing any modifying, versus making use of noise discount after performing some primary edits. Nonetheless, you need to be cautious of any default settings utilized. For instance, Lightroom applies each colour noise discount and sharpening to pictures robotically if you load them. In my expertise, you could flip these changes off earlier than sending the picture to the noise discount software to do its finest work.
Relying on the noise discount software you select, you won’t have a alternative, as some will solely work on RAW recordsdata previous to modifying them.
Noise Discount Software program
There are a selection of noise discount merchandise available on the market at the moment. I’ve picked 4 of my favorites to evaluation on this information. In every case I’ve used the latest accessible model of the software program. If these merchandise replace in any means that meaningfully modifications how they carry out, I’ll replace this information accordingly.
I’ve primarily targeted on standalone noise discount instruments on this round-up, on the belief that you have already got a picture editor you employ. Nonetheless, a few of these instruments are additionally accessible as a part of a photograph modifying software, so in case you are additionally in search of a photograph editor then considered one of these choices may make extra sense. I’d additionally suggest studying my information to the finest photograph modifying purposes available on the market for extra strategies. I’ve additionally included Lightroom because it’s a preferred software with many photographers, and it has noise discount instruments built-in.
It’s additionally price noting that in some instances, you get extra management over the noise discount course of with the complete photograph editor in comparison with the standalone noise discount software. It is because the standalone instruments are designed to fit into an present workflow and simply get the job performed with minimal consumer intervention. Nonetheless, should you desire to have extra management over your modifying course of from finish to finish, that is one thing to bear in mind when evaluating.
First, I’m going to go over all 4 choices and description their options and professionals and cons. Then, I’ll have a look at how every software program really performs, each by way of the pictures produced, and likewise by way of processing pace and file measurement output.
Topaz DeNoise AI
Topaz Labs have a variety of instruments which concentrate on particular duties, together with an picture sharpening software and an picture upscaling software.
On this information, we’re clearly taking a look at their denoise software, which is known as Topaz DeNoise AI. The “AI” within the identify displays the truth that the software makes use of machine studying to take away noise. Topaz Labs practice their denoise engine utilizing thousands and thousands of photographs. It compares your picture in opposition to this dataset with a view to get the most effective outcomes on your picture.
By way of the place it suits in your workflow, Topaz often recommends operating DeNoise AI earlier than you make another modifications to your picture. Nonetheless, they do additionally say which you can run DeNoise wherever you need in your workflow and it ought to work okay.
Topaz Labs supplies a plugin for Lightroom, so should you use Lightroom, you’ll be able to ship your picture over to Topaz for denoising at any level in your modifying workflow. When you select to do that, I recommend turning off the default sharpening and noise discount in Lightroom earlier than you ship the picture to DeNoise AI.
It’s also possible to load RAW recordsdata straight into Topaz should you desire, though you must do that exterior of Lightroom.
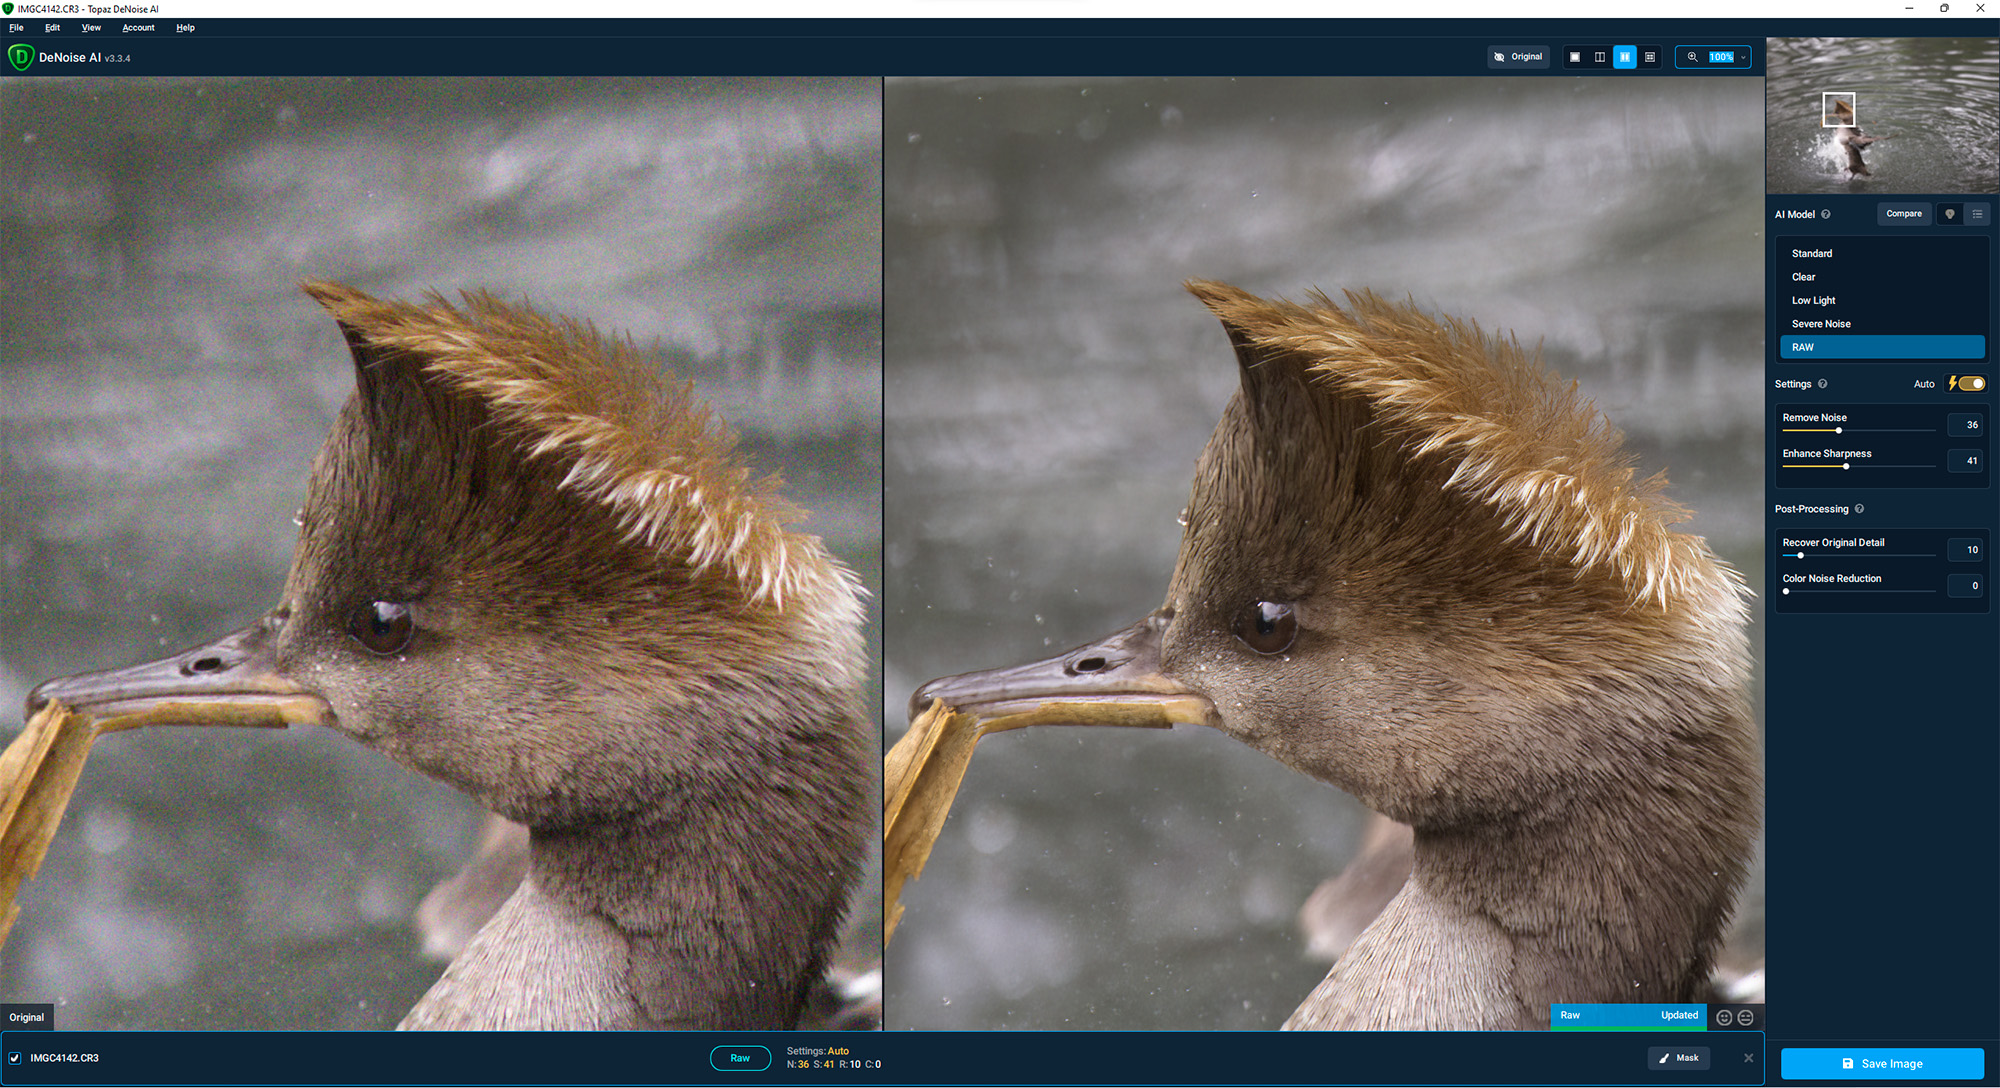
With regards to choices, DeNoise has quite a lot of controls to supply. First, there are 5 noise discount fashions to select from: Normal, Clear, Low Gentle, Extreme Noise, and RAW. Every of those is designed for a unique quantity of noise, and if you load a picture into Topaz it can analyse it robotically and choose what it thinks is the most effective mannequin. Nonetheless, you too can change the mannequin, and evaluate totally different fashions. The 5 fashions are designed for various ranges of noise, and Topaz describes them as follows:
- Normal – nicely rounded noise discount and element preservation
- Clear – for easy surfaces akin to petals, pores and skin and water
- Low Gentle – for difficult lighting situations with numerous noise
- Extreme Noise – for extreme noise from taking pictures at a excessive ISO
- RAW – for processing RAW recordsdata. Solely accessible should you load a digital camera RAW file, though you too can use one of many different 4 fashions.
When you’ve chosen the AI mannequin, there are a variety of extra settings. You may select to have the software program apply the settings it thinks are finest, or you’ll be able to manually modify the settings for noise and sharpness. There are additionally sliders to tweak colour noise particularly.
In addition to the worldwide changes, Topaz Denoise comes with a masking software, so you’ll be able to manually modify areas the place the noise discount is utilized. In my use of Topaz Denoise, I’ve seen uncommon events the place it’d get it improper on an space of the picture, and the masking software is a straightforward technique to right that. For many photographs this isn’t obligatory, however it’s good to have.
Topaz DeNoise AI additionally has batch modifying, so you’ll be able to load plenty of photographs into the software program, modify the settings, after which batch course of them. The one draw back of that is that you just do have to load up and preview every picture to set off the AI evaluation previous to operating the noise discount. You may’t simply load up a bunch of photographs and hit a button – there may be nonetheless some work to be performed earlier than you’ll be able to course of all the pictures. If you would like batch processing with minimal enter, I’d recommend trying out DxO PureRAW.
The excellent news is that Topaz DeNoise AI is designed to be performant. By default, it solely hundreds part of the picture you might be engaged on, and it shows the noise discount of that space somewhat than making use of noise discount to the entire picture (which might be fairly gradual). It’s additionally GPU accelerated, that means it takes benefit of your graphics card to enhance efficiency.
The draw back is that should you pan across the picture or change the output settings, the picture preview needs to be regenerated which takes a number of extra seconds.
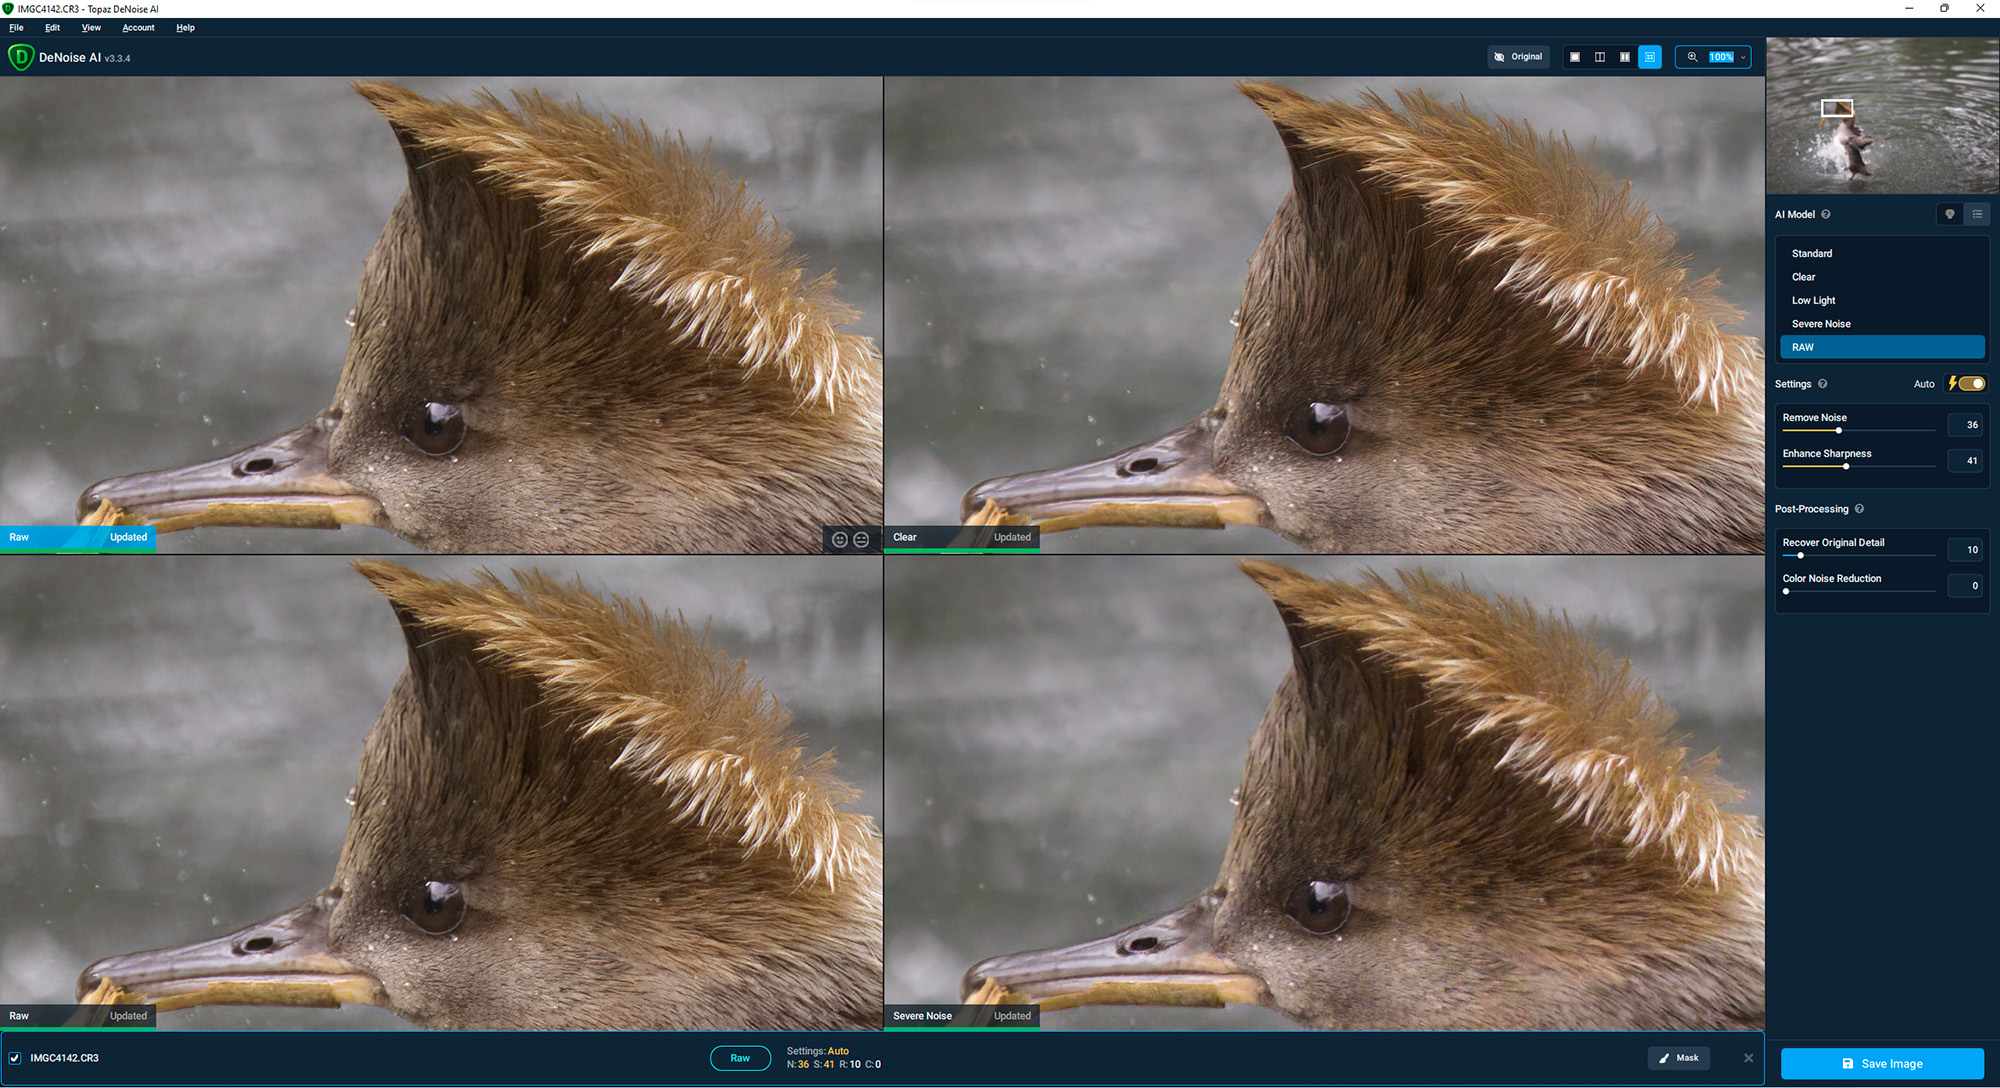
I do just like the interface and the assorted choices Topaz DeNoise AI has for displaying the preview. You may select a break up display view, the place you progress a slider to shortly swap between the unique and the edited model. You may select a side-by-side view, with the unique file on one facet and the edited model on the opposite. You may even select to load 4 AI fashions previews without delay so you’ll be able to select which you like.
After getting your picture settings dialled in, both manually or you might be pleased with the automated settings chosen by the AI, you’ll be able to course of the picture.
Time smart, it will differ relying on the scale of the picture and the quantity of noise. The facility of your laptop and any GPU you have got put in may also make a large distinction. Anticipate it to absorb the area of some seconds as much as round a minute to course of a picture.
Talking of outcomes, Topaz was constantly close to or on the prime by way of the picture high quality in my assessments, which you’ll be able to see additional on on this submit. Nonetheless, it did produce the most important file sizes of all of the instruments by fairly a margin.
General, I actually like Topaz DeNoise AI for noise discount. The interface may be very clear, it really works nicely, and the outcomes are nice. I like that it integrates with Lightroom or can be utilized by itself. It additionally has loads of management choices, despite the fact that the automated settings work nicely nearly all of the time.
After all, like many instruments in our spherical up, this can be a one-trick pony, with a singular concentrate on noise discount. Topaz do produce other merchandise, and you should buy them as a bundle, however all of them load individually and there’s nobody unifying interface. The value can be very cheap, among the many most cost-effective devoted noise discount instruments in our roundup, particularly with the low cost code.
Value: $79.99 (save 15% with code FRIEND15)
Lightroom Plugin Out there: Sure
GPU Accelerated: Sure
Think about If: You’re in search of a robust but simple to make use of noise discount software that delivers nice outcomes
Don’t Think about If: You need extra from a bit of software program than one perform
Trial Out there: Sure, obtain right here
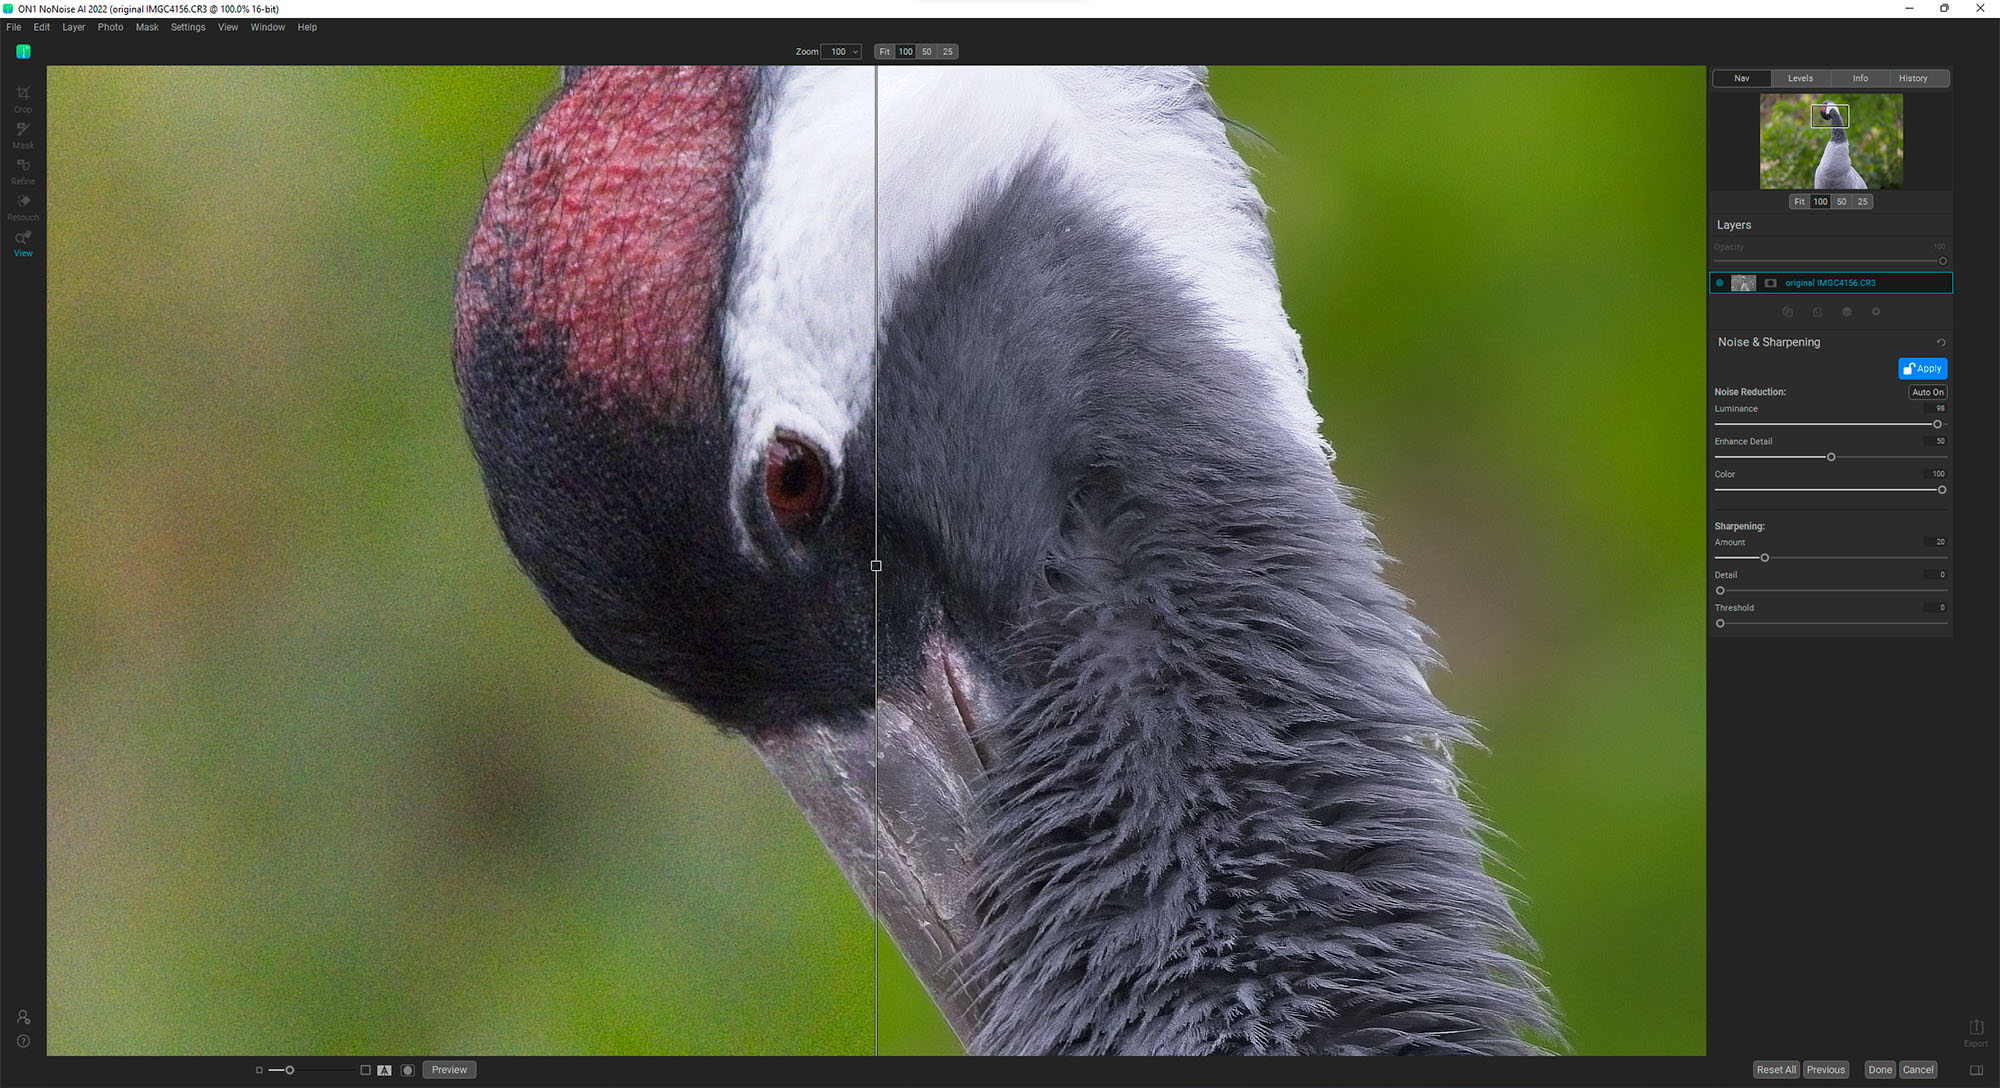
On1 NoNoise AI
On1 NoNoise AI is a standalone noise discount software from On1, who make a variety of photograph modifying software program together with On1 Picture RAW.
On1 designed NoNoise AI from the bottom as much as be one of many quickest noise discount instruments available on the market, a objective they seem to have achieved as you’ll see within the assessments a bit of additional on within the submit.
One factor that NoNoise AI does otherwise to the opposite noise discount instruments on this roundup is that it applies the noise discount to the entire picture if you load it.
While it does this shortly in comparison with different instruments, it does imply that loading a picture appears to take quite a bit longer in comparison with a software like Topaz DeNoise, which solely processes a small preview space. So despite the fact that general NoNoise AI is quicker finish to finish, it doesn’t all the time really feel like it’s as a result of you must await the picture to course of earlier than you see it.
Nonetheless, as soon as the picture is loaded, you have got a variety of choices, and also you don’t have to attend for the engine to replace the preview each time you progress a slider. It’s all very snappy and responsive as soon as your picture is definitely loaded.
As soon as the picture is loaded, you’ll be able to modify the noise discount settings and sharpening or go away them on the robotically adjusted settings. You may preview your modifications in actual time, and use a break up display view to check the unique and your edit. When you’ve acquired the noise discount and sharpening dialled in, you then have the choice to additional refine the noise discount utilizing the masking instruments, and you too can crop your picture.
On1’s masking instruments are by far probably the most highly effective of all of the devoted noise discount instruments on this spherical up. In addition to manually masking utilizing a brush, there’s an AI powered topic choice masks, radial masks and graduated masks. There’s even luminosity masking.
That’s not all although. The software additionally comes with On1’s topic elimination and heal instruments, so you’ll be able to take away undesirable objects as nicely. There’s additionally layer help, supplying you with much more flexibility over your modifying.
I’ll be sincere, while these options are good to have, most individuals are going to be shopping for this software for noise discount. Having additional options is sweet, however most customers will seemingly discover them of their important photograph modifying software.
Because the noise discount engine utilized by On1 NoNoise is similar because the one which is utilized by On1 Picture RAW, if you need these sorts of instruments, you’d be higher off choosing the complete product. It’s solely a bit of bit dearer, and also you get all of the modifying controls in addition to picture administration instruments.
One factor I did discover with the DNG recordsdata output by On1 NoNoise AI is that they misplaced my lens and digital camera profile, so Lightroom couldn’t apply any auto corrections. That is barely vexing, however hopefully one thing a future replace will resolve.
Value: $69
Lightroom Plugin Out there: Sure, additionally permits export of unedited DNG recordsdata in addition to TIFF recordsdata
GPU Accelerated: Sure
RAW Assist: Sure
Think about If: You’re in search of the quickest noise discount software on a funds which additionally has some additional options and highly effective masking
Don’t Think about If: You need the best-in-class noise discount
Trial Out there: Sure, obtain right here
DxO PureRAW
I’ve used DxO software program for plenty of years, primarily for the PRIME noise discount characteristic which has all the time performed an incredible job of noise discount particularly on pores and skin tones. So I’m undoubtedly to see how DxO PureRAW stacks up in opposition to the competitors.
Like On1, DxO has two variations of its noise discount software program. It has a standalone product referred to as DxO PureRAW, and a full featured photograph editor referred to as DxO PhotoLab Elite.
The noise discount system is similar, the distinction is that PureRAW focuses purely on noise discount, while PhotoLab is a full featured photograph editor. It’s price noting that PhotoLab provides you extra management over the noise discount, while PureRAW is extra of a single click on resolution.
That is by design. PureRAW is designed to suit into your workflow earlier than you do another modifying. It takes in utterly unedited RAW recordsdata and applies DxO’s noise discount. These are output as DNG recordsdata which you’ll be able to then load into your regular photograph administration and modifying app.
You don’t get any preview of the outcomes, though you’ll be able to have a look at them as soon as it’s performed modifying for a earlier than and after comparability.

You do have some choices in terms of RAW processing. First, you’ll be able to select between three sorts of noise discount, that are HQ, PRIME and DeepPRIME. DxO describes these as follows:
HQ is for photographs taken in regular lighting situations with out extreme quantities of noise. That is the quickest noise discount possibility.
PRIME is designed for photographs taken in low mild situations that are fairly noisy. This takes longer to course of than HQ.
DeepPRIME is probably the most superior noise discount software DxO presents, which makes use of deep studying AI to provide the most effective outcomes. Additionally it is by far the slowest by an order of magnitude, and the one processing possibility which helps offloading to a GPU. Nonetheless, it’s also fairly choosy in regards to the GPU, needing a current mannequin.
In my testing on an outdated GPU, utilizing DeepPRIME both threw an error and output a clean picture, or it took for much longer (3x longer) in comparison with simply utilizing a CPU. Not one of the different noise discount instruments I used had any points with my older GPU, in order all the time, you’ll wish to take a look at in your platform. I’ve pace assessments and high quality assessments for all of the merchandise a bit of in a while within the submit.
In addition to noise discount, PureRAW additionally has the choice to use lens corrections and lens sharpening. These right for widespread points like chromatic aberration, lens distortions and vignetting. DxO have an enormous database of lens and digital camera combos, so the settings are tailor-made to the setup for every picture.
Nonetheless, you don’t have any fine-grained management by way of management sliders. You may solely choose one of many three processing engines, and elect to allow or disable the submit processing lens correction and picture sharpening choices.
There’s one other draw back to PureRAW that I ought to point out. The software is designed as a batch processor, so the thought is that you just load all of your photographs into DxO PureRAW, choose which mannequin to use, after which course of the pictures. Then you definately load them into your photograph modifying software.
The problem is that the settings you select are utilized to all the pictures in your batch. So in case you have some photographs shot at low ISOs with decrease noise, and a few at greater ISO with excessive noise, you’ll be able to’t have the software program robotically apply the totally different noise algorithms robotically. You can also’t select to use lens corrections and sharpening to a number of the photographs, it’s both all or nothing.
I’d prefer to see the software program both provide the possibility to pick out a processing methodology, or to suggest the denoise engine based mostly on a picture evaluation. As it’s, you must select the pictures you wish to course of with a particular noise algorithm and batch these collectively, which makes the workflow a bit much less environment friendly. In my testing, some photographs undoubtedly profit from the DeepPRIME know-how, while others look simply nearly as good with PRIME. Nonetheless, DeepPRIME takes on common twice as lengthy to course of a picture.
One other concern is the worth. At $129, DxO PureRAW is dearer than Topaz DeNoise AI or On1 NoNoise AI. It’s really much more costly than On1’s Picture RAW editor, which is a full pictures modifying and administration software that replaces Lightroom, and which has On1 NoNoise inbuilt.
I additionally assume PureRAW may additionally profit from the workflow that DxO PhotoLab comes with by way of Lightroom integration, on Home windows at the least. With PhotoLab, you’ll be able to ship a RAW file (or recordsdata) from Lightroom, apply noise and optical corrections (and another edits), after which ship them again to Lightroom as DNG recordsdata. These robotically seem in Lightroom subsequent to the unique file, making for a seamless workflow. I’d like to see PureRAW undertake this strategy.
It’s price stating that while DxO PureRAW doesn’t include Lightroom integration by default on Home windows (on Mac you’ll be able to drag recordsdata from Lightroom to DxO PureRAW), a consumer has put collectively this plugin for Lightroom which achieves the identical factor. This lets you choose recordsdata in Lightroom, ship them as RAW recordsdata to DxO PureRAW, after which for the RAW recordsdata to look in Lightroom as DNG. In my testing this works nice, and must be one thing that PureRAW ships with natively.
These quibbles apart, DxO PureRAW does shine in terms of ease of use and for processing your photographs previous to loading them into your modifying software. In my testing, which you’ll see additional on on this information, it additionally constantly produced a number of the finest outcomes. The sharpening and lens corrections are additionally glorious, working significantly nicely on older photographs and throughout an enormous vary of lens and digital camera physique combos.
If that workflow and have set sound good to you, DxO PureRAW ought to undoubtedly be in your shortlist to check out. If you would like extra management and integration with Lightroom, then try DxO PhotoLab as an alternative.
Value: $129
Lightroom Plugin Out there: No
GPU Accelerated: Sure, however requires a contemporary GPU
RAW Assist: Sure
Think about If: You desire a single click on possibility that produces nice outcomes previous to your modifying, with simple batch processing
Don’t Think about If: You need extra management over the noise discount course of or you might be on a funds
Trial Out there: Sure, obtain right here
Adobe Lightroom
Adobe Photoshop Lightroom barely wants an introduction. It’s one of many world’s hottest photograph administration and modifying instruments, and it’s additionally what I take advantage of for almost all of my photograph modifying.
As you’d count on from a photograph editor, Adobe Lightroom has noise discount inbuilt. It doesn’t characteristic any fancy AI instruments, counting on extra conventional pixel evaluation and comparability to provide outcomes.
By default, if you load a picture into Lightroom’s editor it can take away nearly all of colour noise. You may then additionally modify plenty of sliders to take away luminance noise.
For low noise photographs, the sharpening and noise discount in Lightroom is unquestionably adequate. Nonetheless, for greater noise photographs, my expertise is which you can undoubtedly get higher outcomes with a devoted software.
One other draw back of Lightroom is that it’s solely accessible as a subscription. In case you are available in the market for a photograph editor that doesn’t require a month-to-month or annual fee and which additionally has glorious noise discount inbuilt, you may take into account DxO PhotoLab Elite or On1 Picture RAW.
These Lightroom alternate options provide lots of the similar options at a one-off worth, with the benefit of highly effective noise discount instruments as nicely.
That stated, Lightroom remains to be the hub of my photograph administration and modifying workflow as I’ve not but discovered an software that does every thing it does fairly so nicely.
Value: $9.99 a month ($119.88 a yr)
Lightroom Plugin Out there: N/A
GPU Accelerated: Sure, however not for noise discount
RAW Assist: Sure
Think about If: You’re in search of an all-in-one possibility which incorporates cheap noise discount
Don’t Think about If: You don’t wish to do quite a lot of guide tweaking, or desire a one-click AI powered software that can seemingly produce higher outcomes.
Trial Out there: Sure, obtain right here
Noise Discount Software program Outcomes Comparability
I’ll now evaluate 4 totally different photographs to see how the assorted software program stacks up within the 4 software program packages. I’ll be utilizing unedited RAW recordsdata from my Canon EOS R5 and my Canon EOS 6D.
For DxO, I’m going to make use of all three output choices. For Topaz, I take advantage of the RAW AI mannequin and every thing else set to Auto. For On1, it makes use of the default settings. For Lightroom, I’ll tweak the sharpening and noise discount sliders to get the most effective outcome I can handle.
It’s price noting that each one the noise discount software program applies some type of sharpening, and this has been left to the default setting. JPG recordsdata to be used on this submit weren’t sharpened when creating them from the DNG recordsdata output from every noise discount software.
Noise Discount Check Picture 1
The primary picture is that this shot of a UK robin sitting on a department. It was in a shaded space, and this was shot on a Canon EOS R5 at 6400 ISO. The small model doesn’t present an excessive amount of noise, however should you click on by means of to the bigger model, you’ll see extra noise.
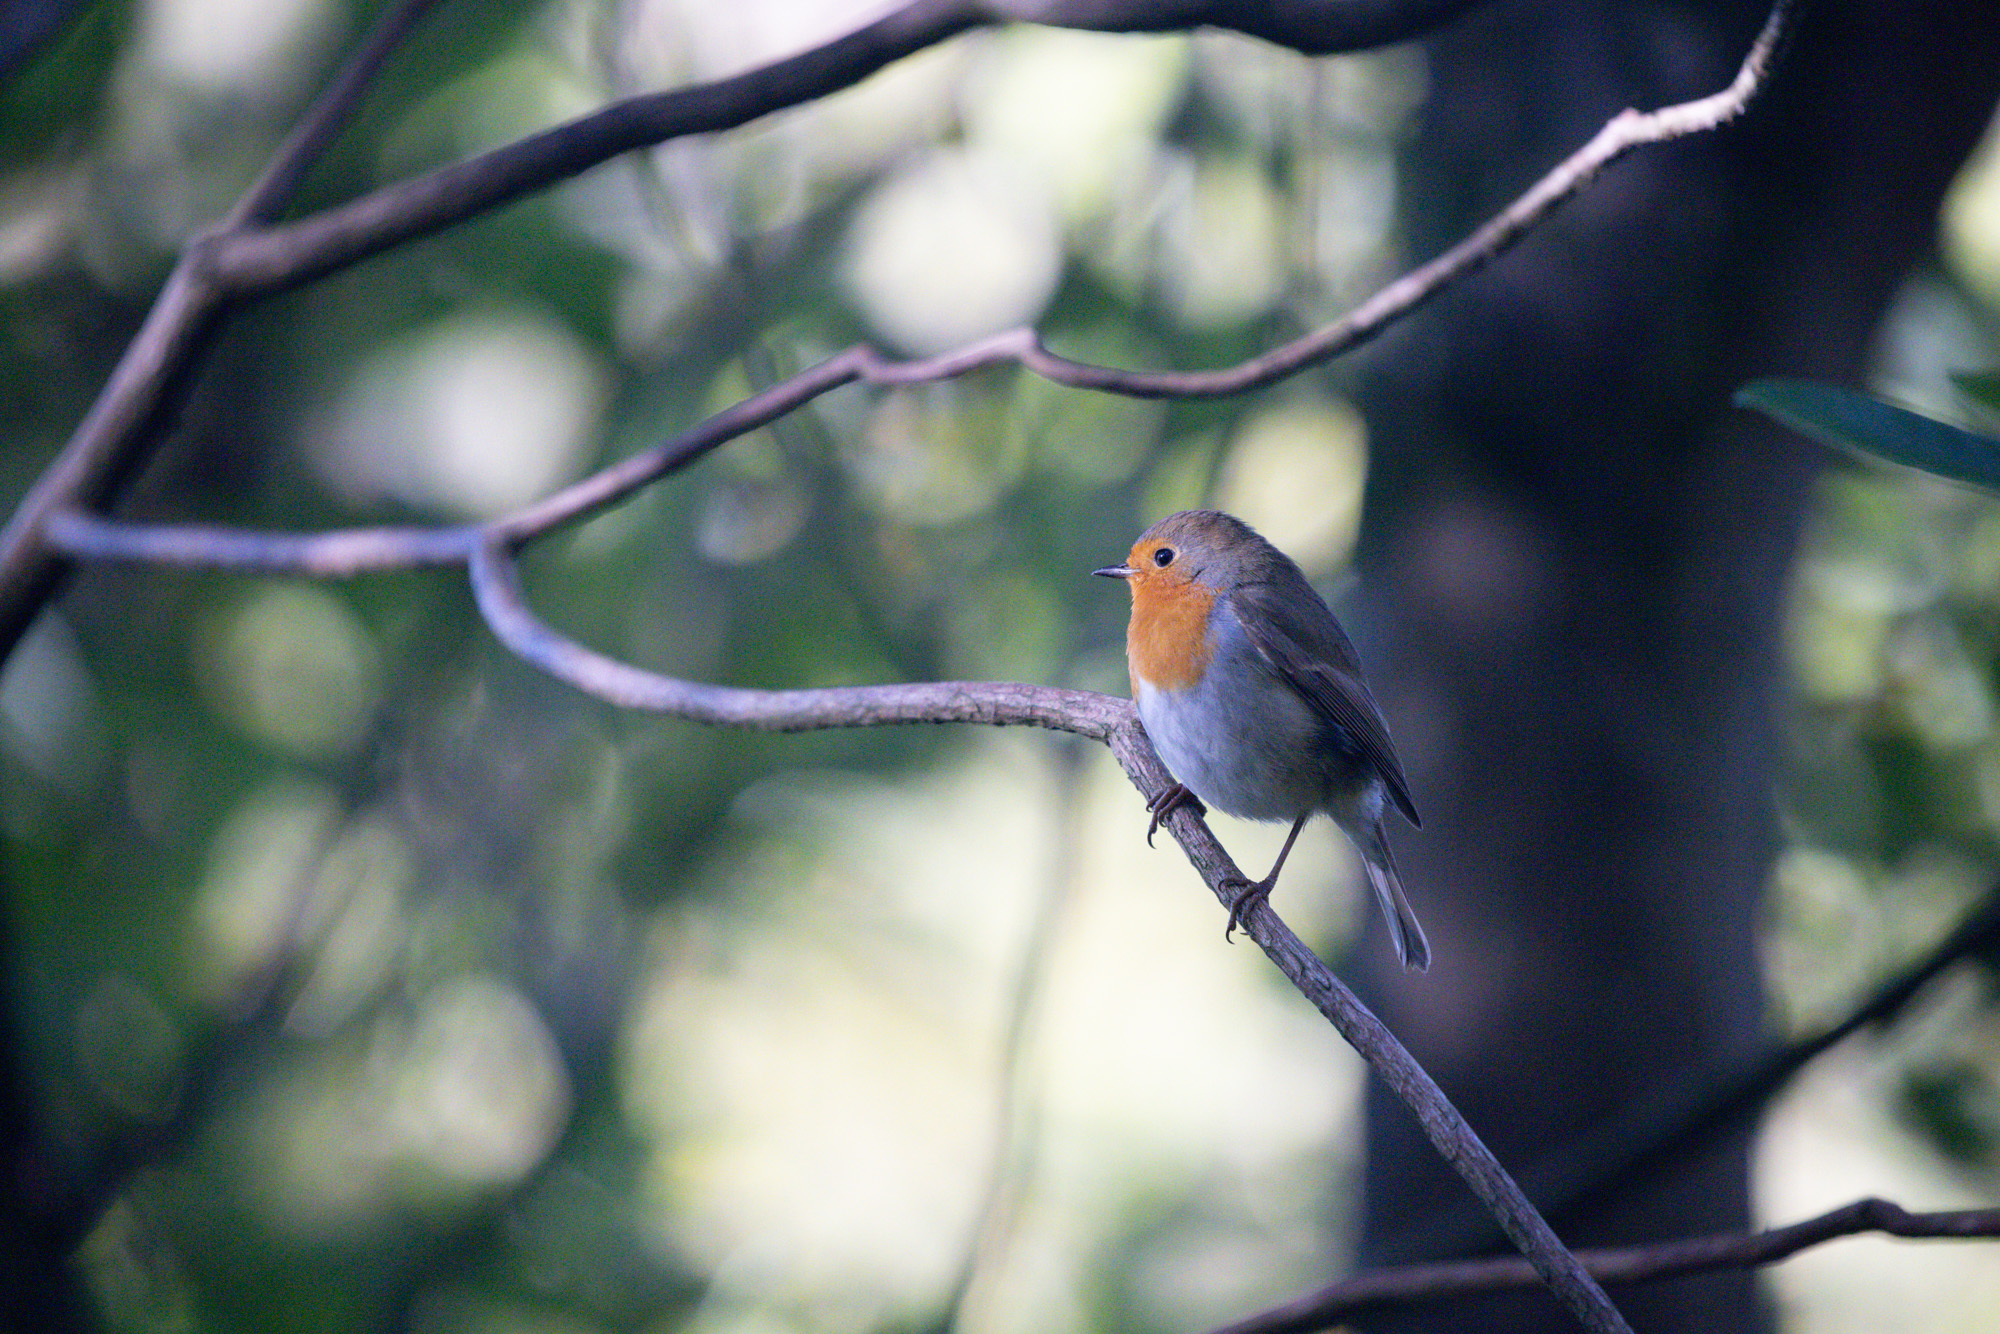
Now, let’s have a look at a 100% crop of the topic, which is what we’re involved in. We’ll look first on the unedited model, adopted by output from the noise discount instruments we’ve used. You may click on on every picture for a big model. For straightforward comparability, you may wish to open the full-size variations in several tabs and flip between them.


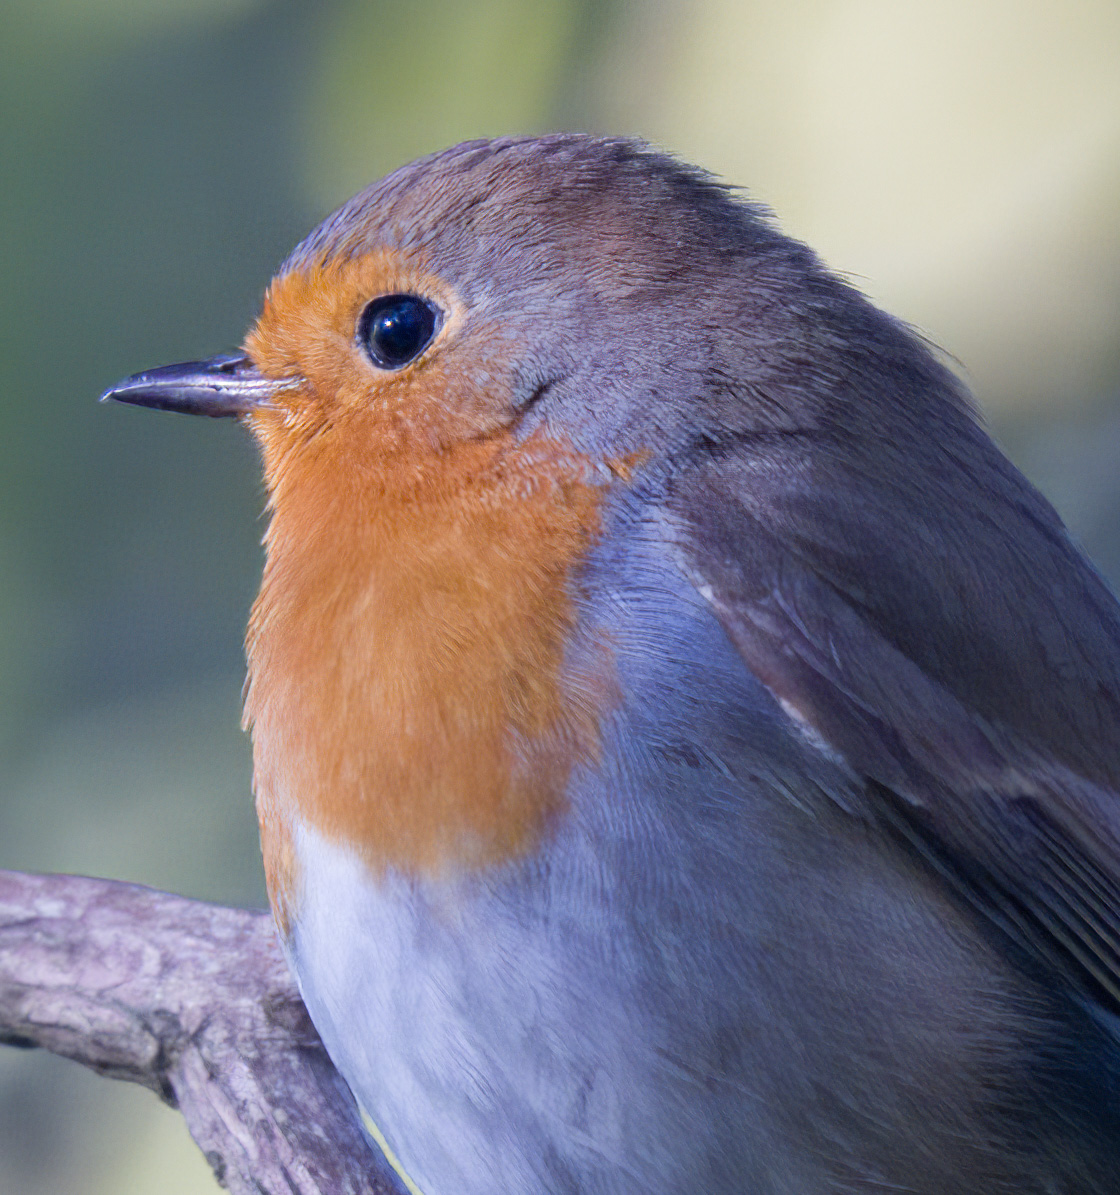
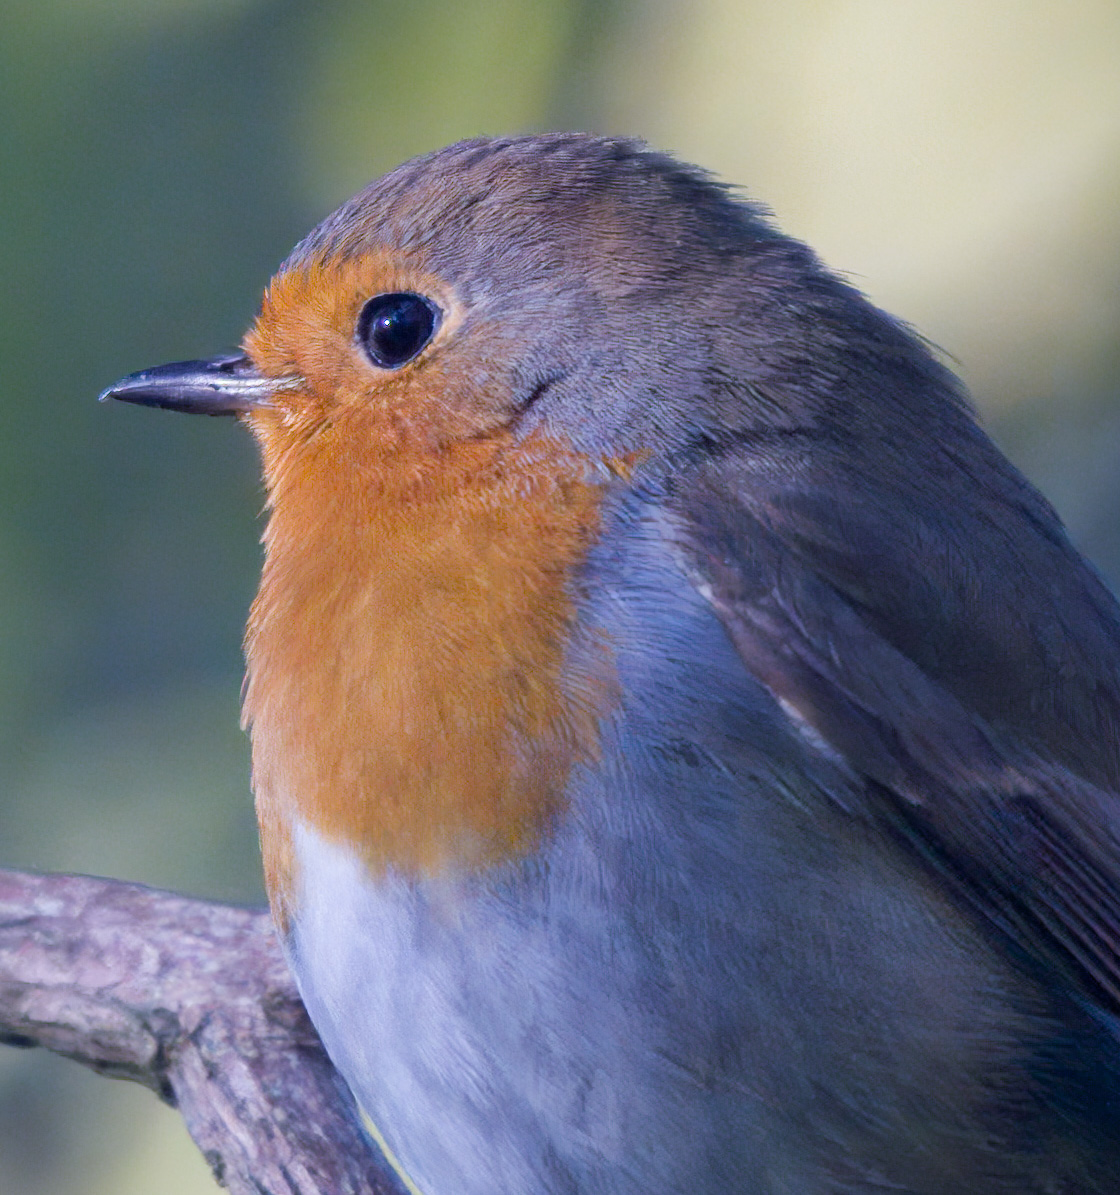

My choice from the above photographs is within the following order, however it is best to come to your individual conclusion:
- DxO PureRAW DeepPrime
- DxO PureRAW Prime
- Topaz DeNoise AI
- On1 NoNoise AI
- DxO PureRAW HQ
- Adobe Lightroom
Evaluating the pictures, I desire the way in which the topic seems to be utilizing DxO PureRAW DeepPrime, though the noise discount within the background space in Topaz DeNoise AI is a bit of cleaner.
It’s additionally price noting that none of those photographs have any extra sharpening utilized past the default in every software. If I apply a little bit of sharpening in Lightroom to the picture output by Topaz DeNoise AI, it finally ends up being fairly laborious to inform aside from the picture produced by DxO PureRAW DeepPrime for my part.
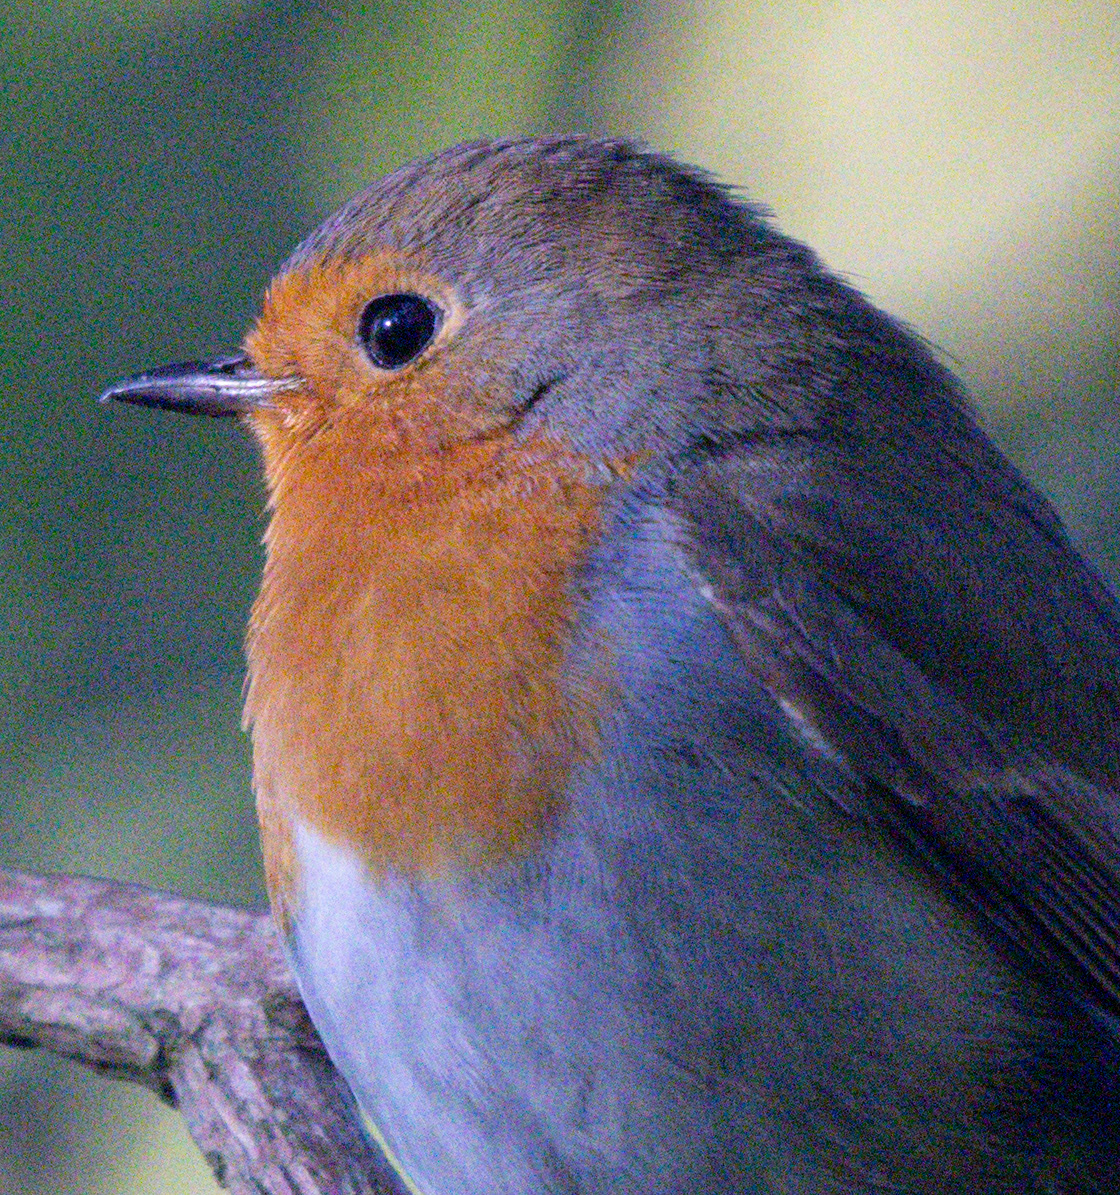
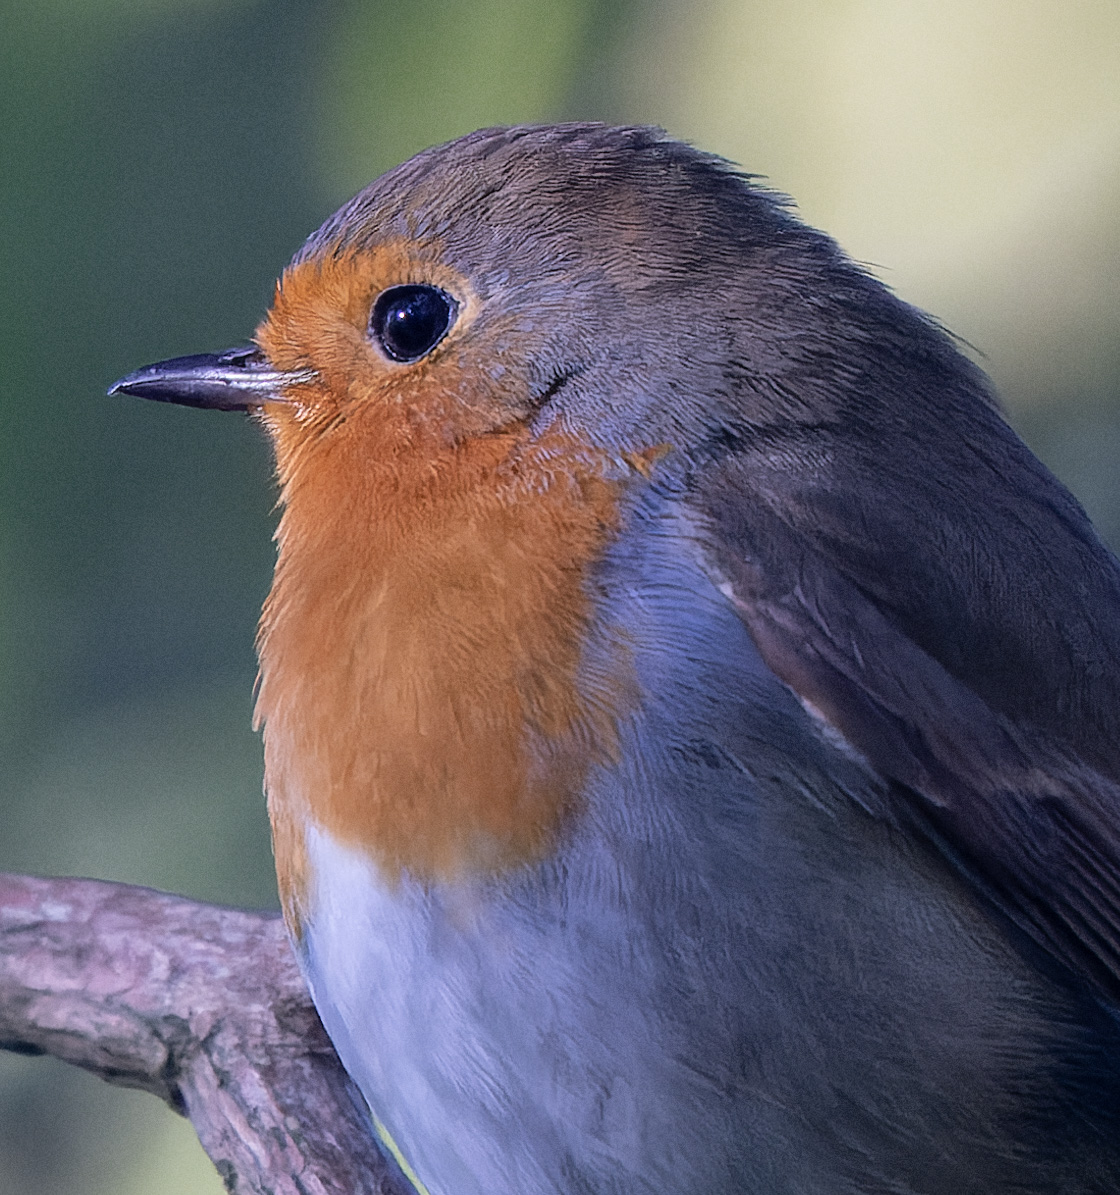
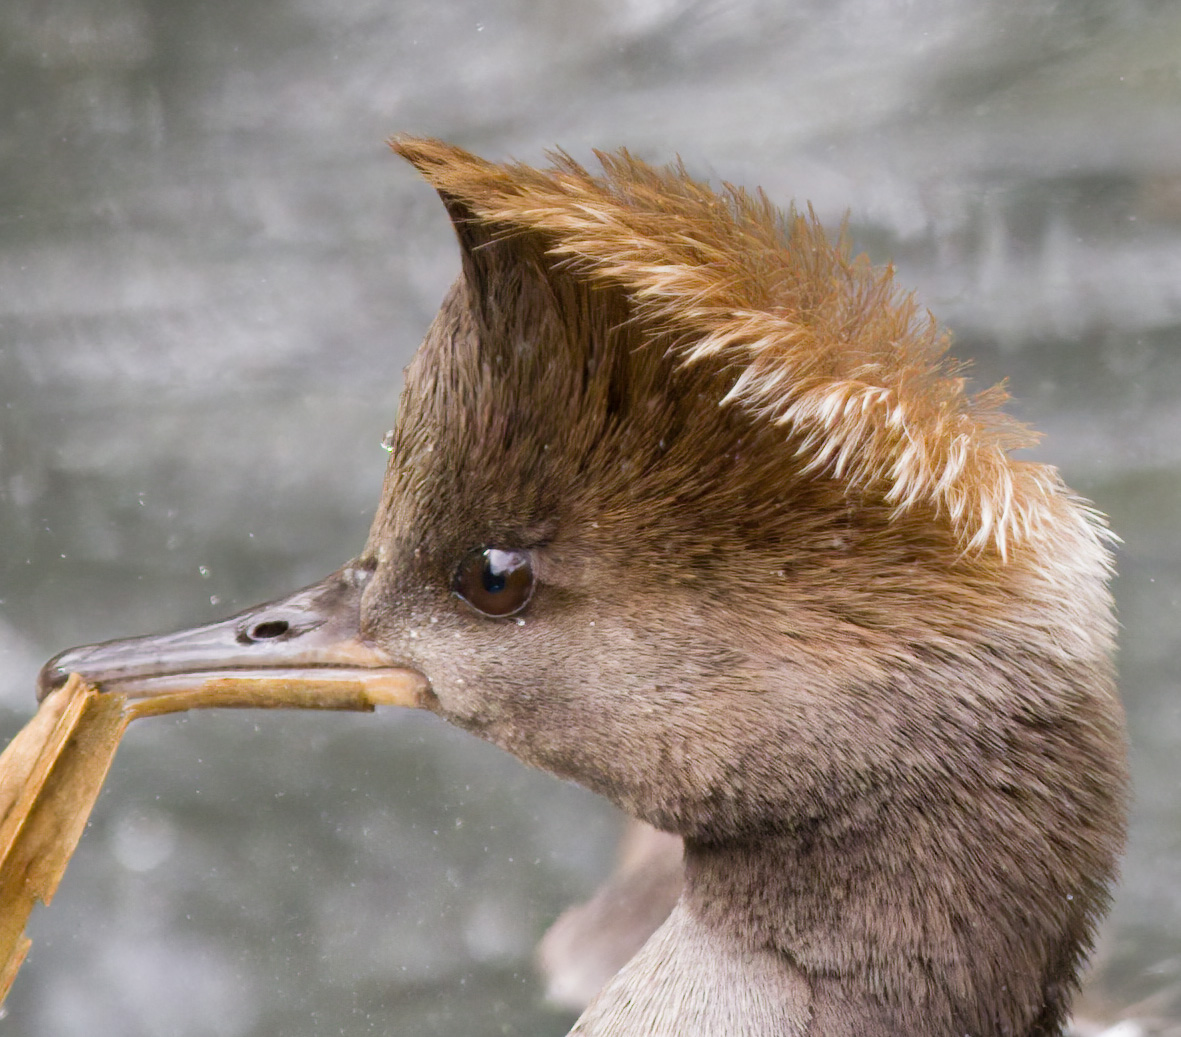
Noise Discount Check Picture 2
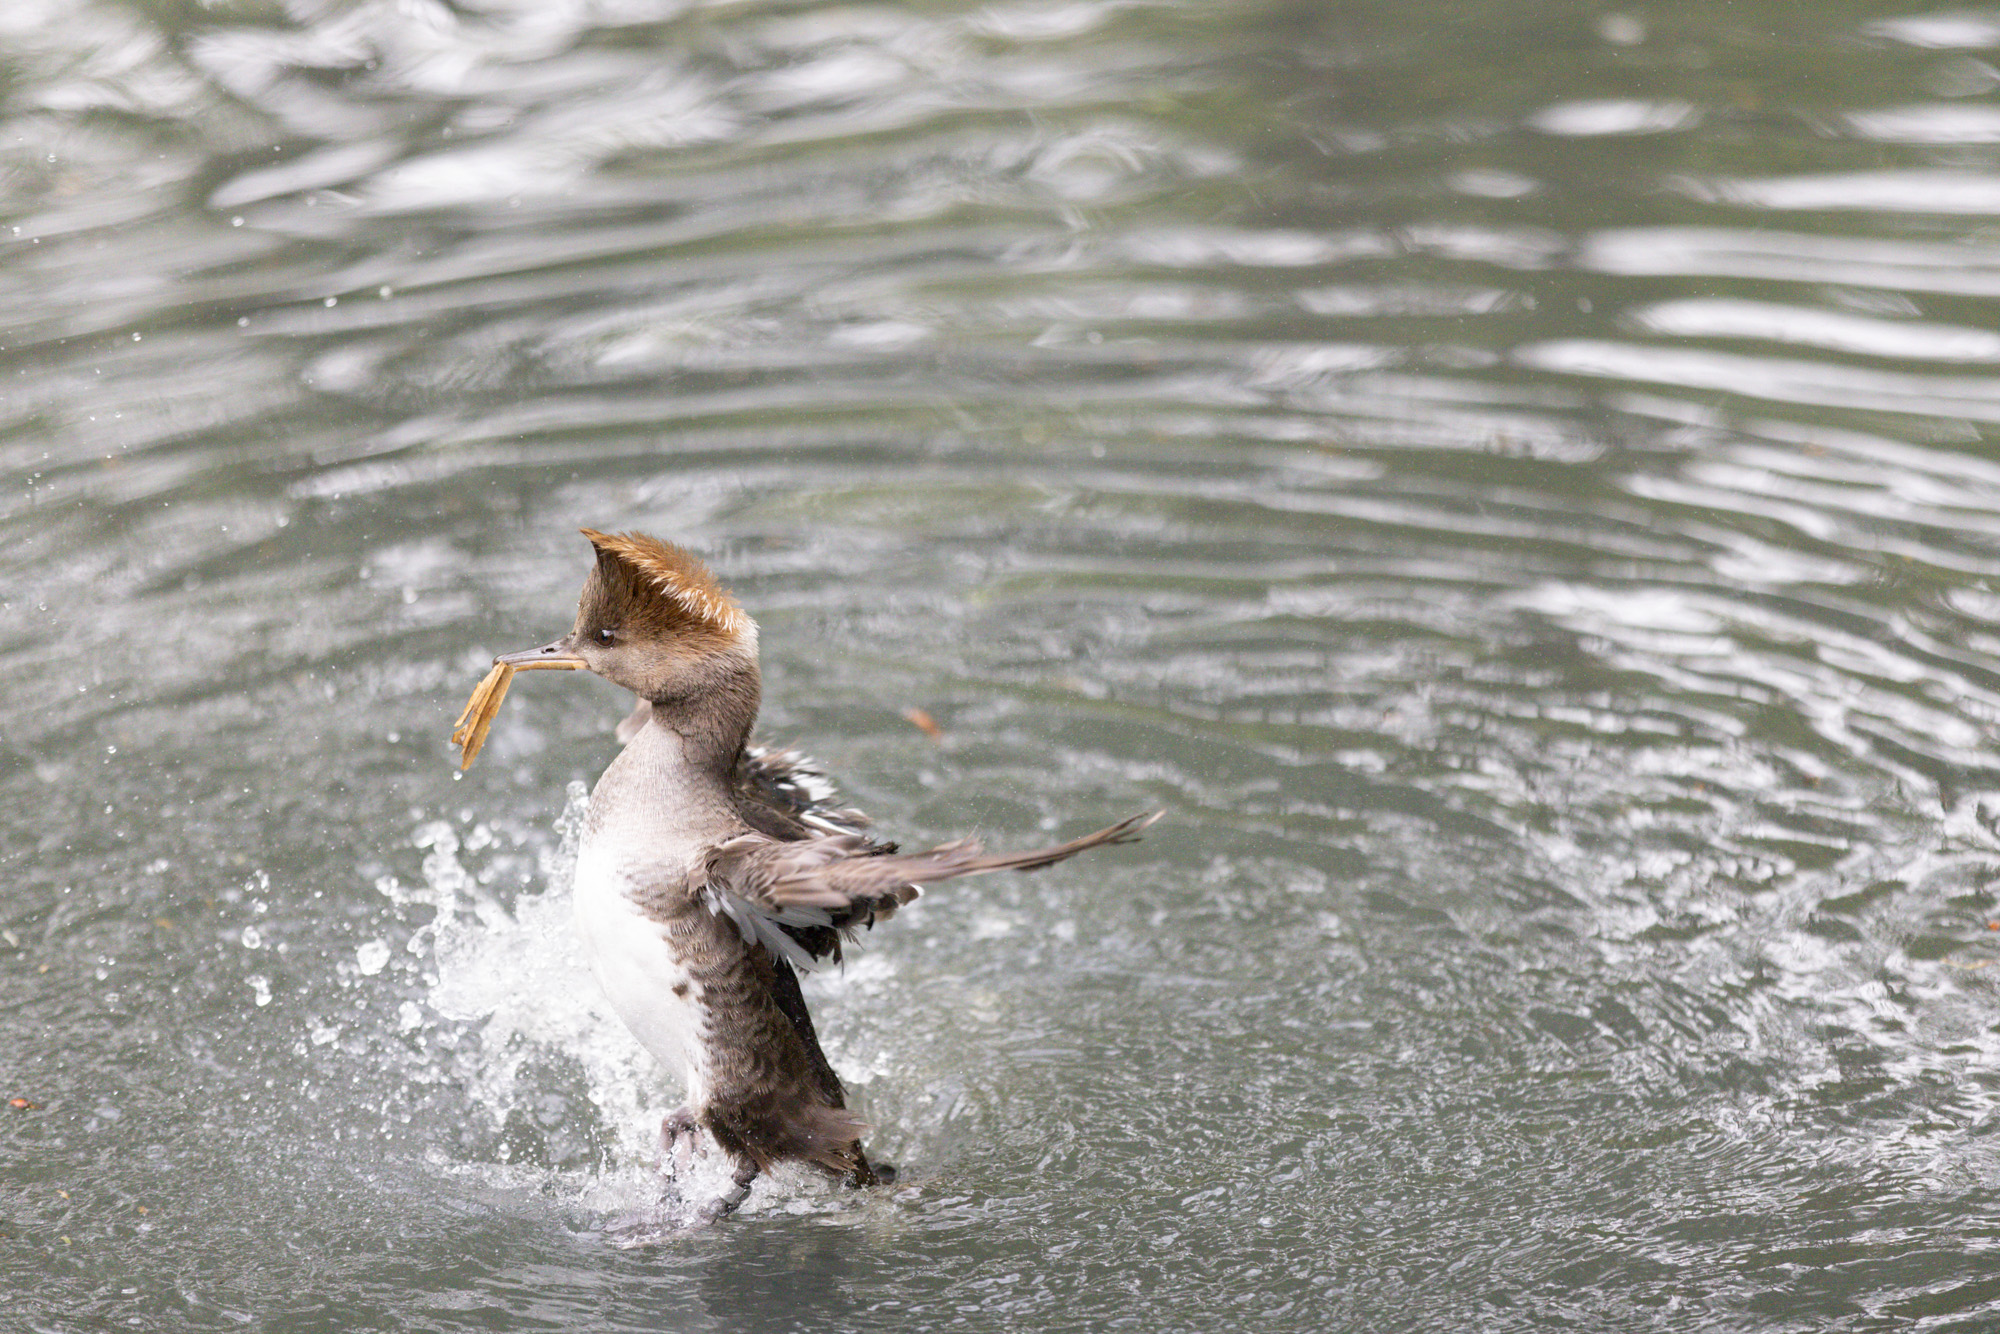
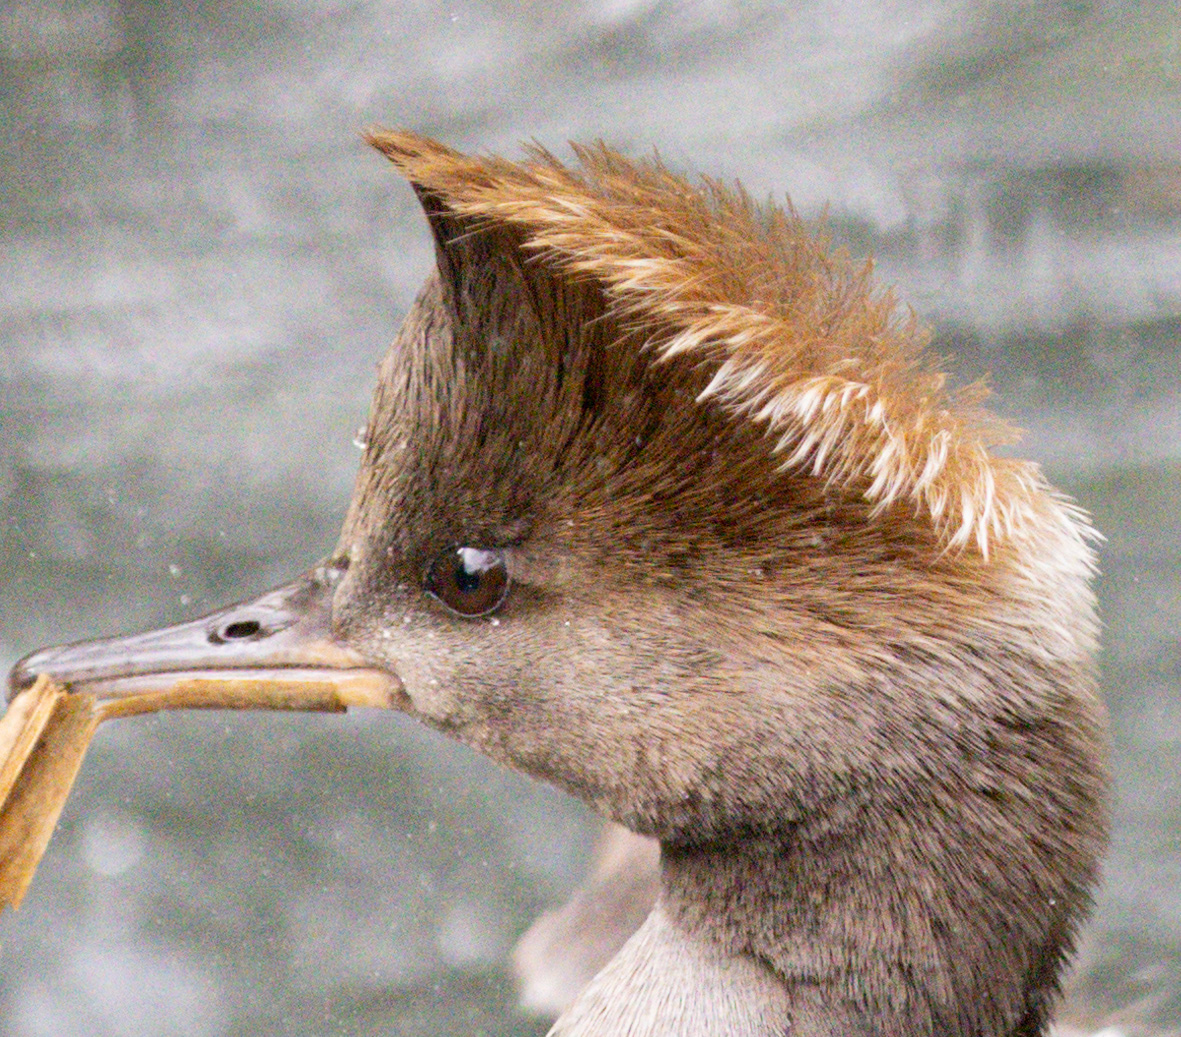
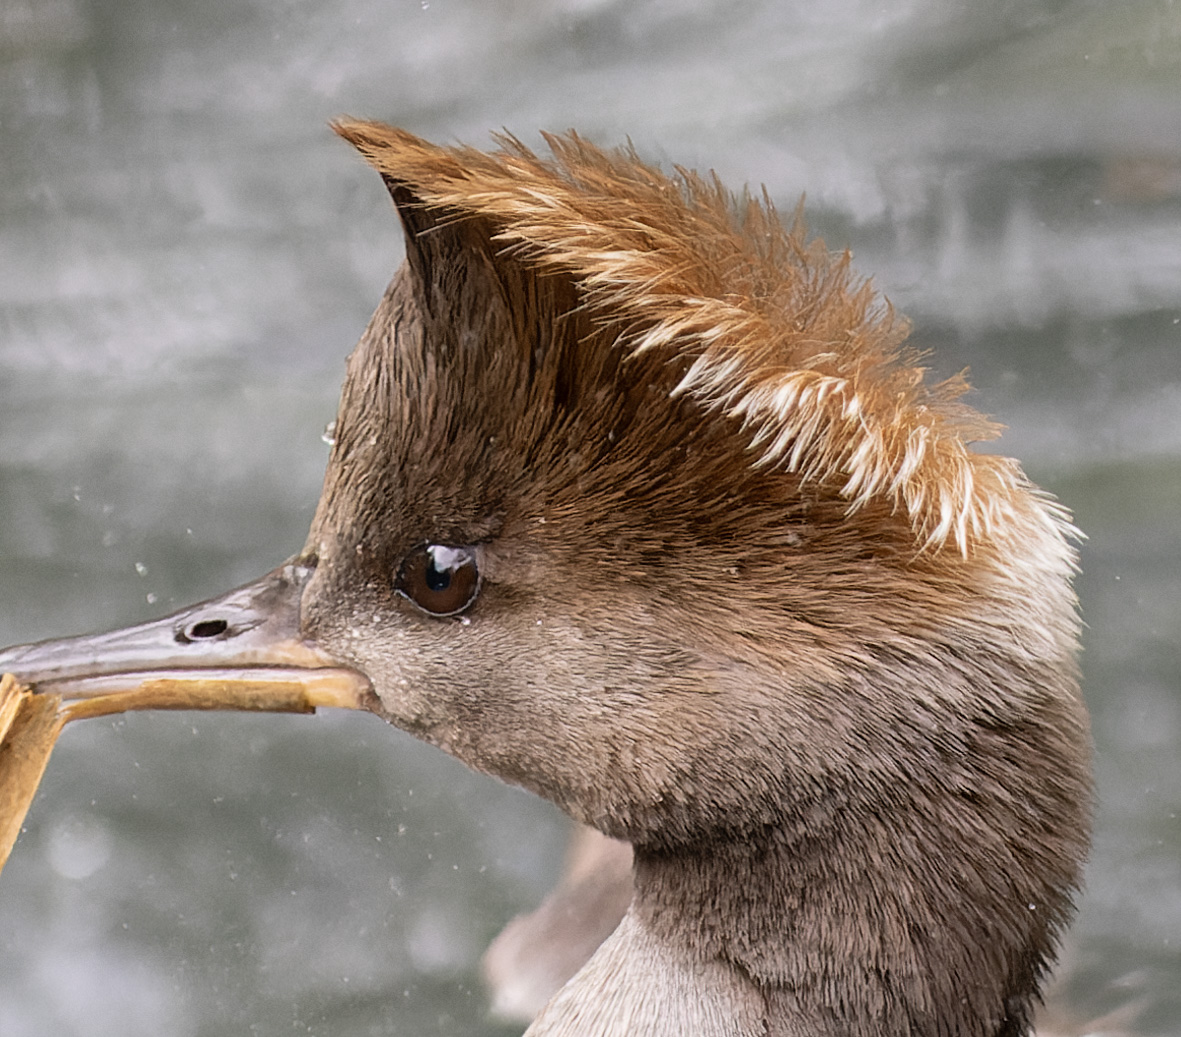
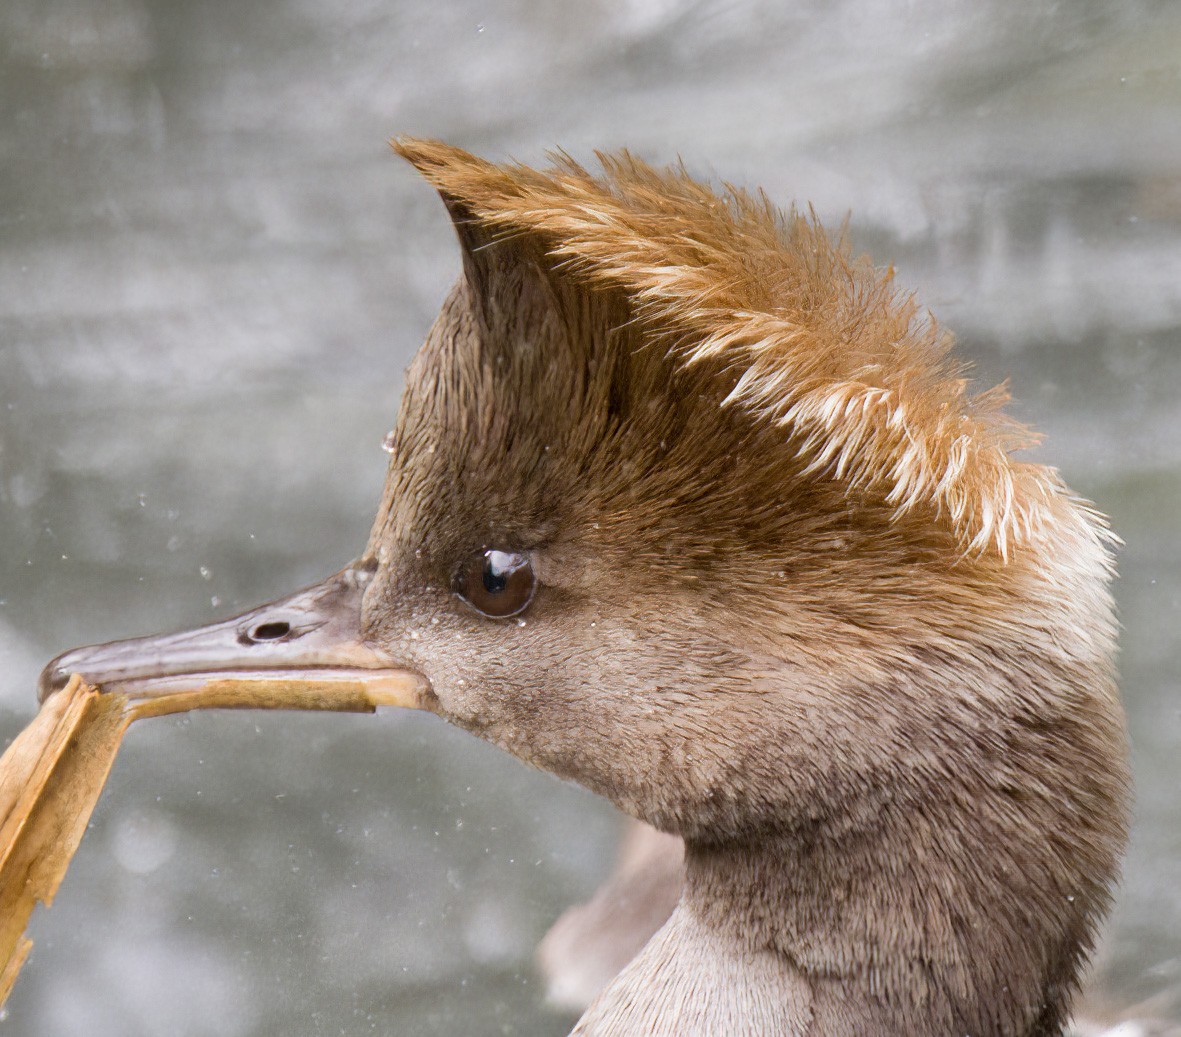
The second picture is a shot of a Merganser duck having a shower. As a result of quick movement, this was shot at a excessive shutter pace with a ensuing ISO of 5000. This was shot on a Canon EOS R5. Once more, the small model doesn’t present an excessive amount of noise, however should you click on by means of to the bigger model you’ll see extra noise.


My choice from the above picture variations is within the following order, however it is best to come to your individual conclusion:
- DxO PureRAW DeepPrime
- DxO PureRAW Prime
- Topaz DeNoise AI
- DxO PureRAW HQ
- On1 NoNoise AI
- Adobe Lightroom
General, I really feel that the output from the PureRAW DeepPrime is the superior possibility, adopted by PureRAW Prime – there’s extra of a marked distinction between these two processing choices this time spherical.
Once more, Topaz DeNoise takes third place, though with a bit of extra submit sharpening utilized in Lightroom it seems to be similar to the Prime and DeepPrime variations.
I believe the PureRAW HQ model seems to be marginally higher than NoNoise AI, they usually all look higher than what I can obtain in Lightroom.
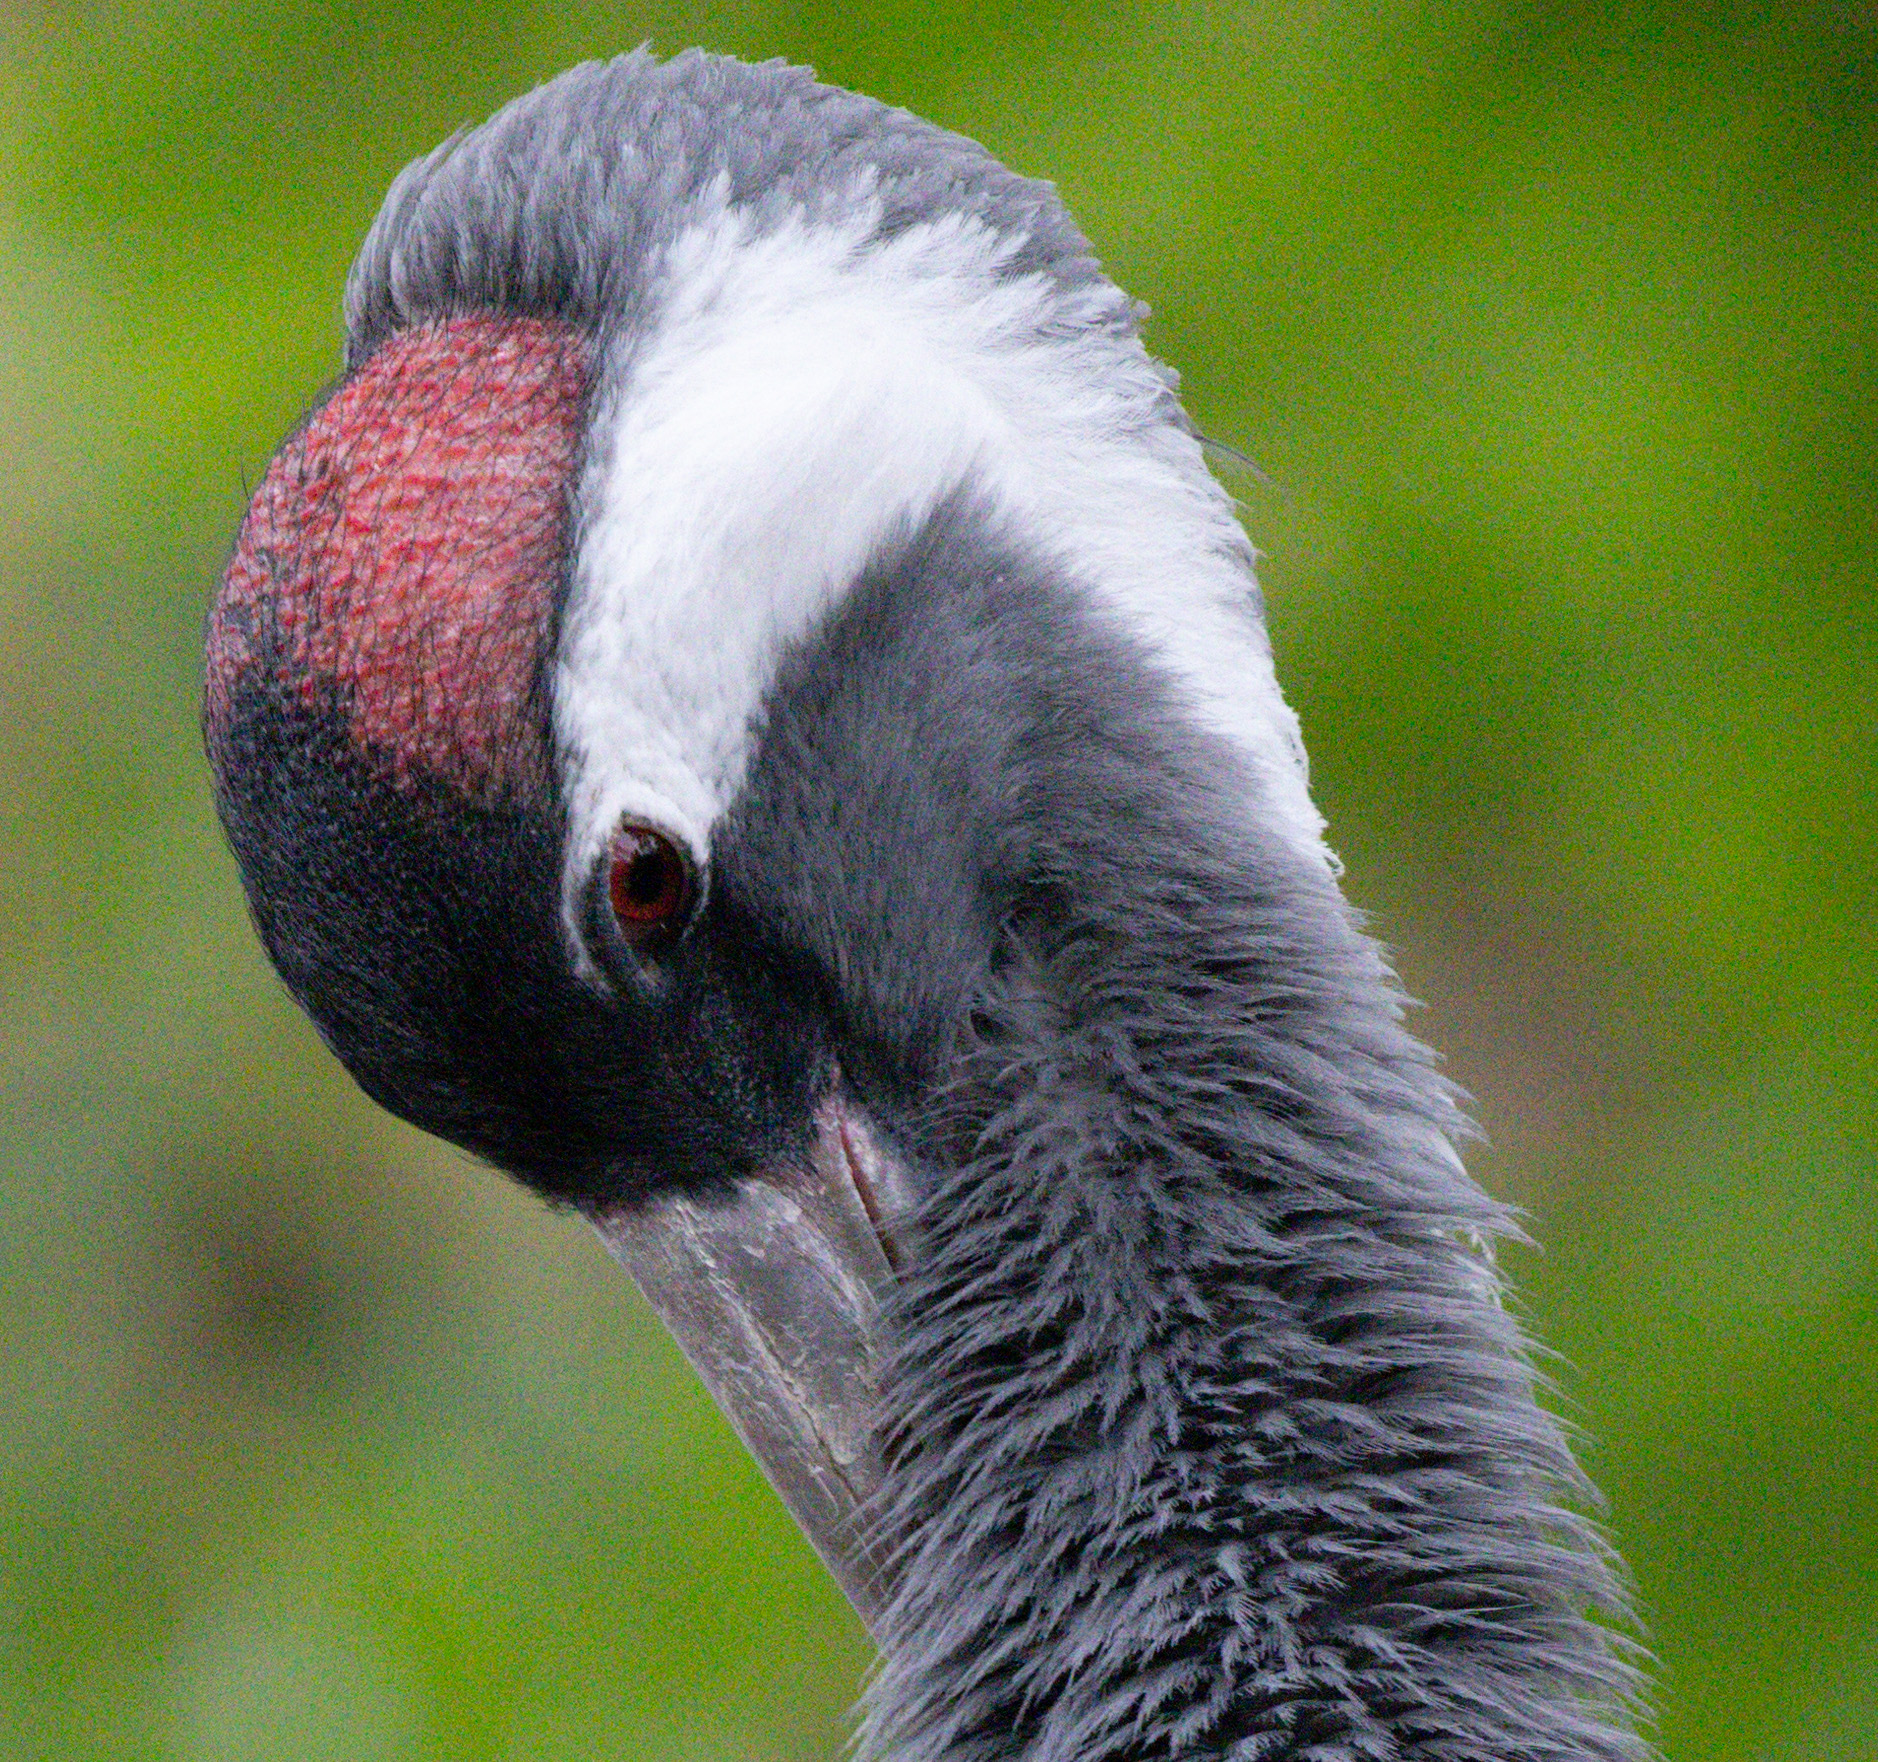
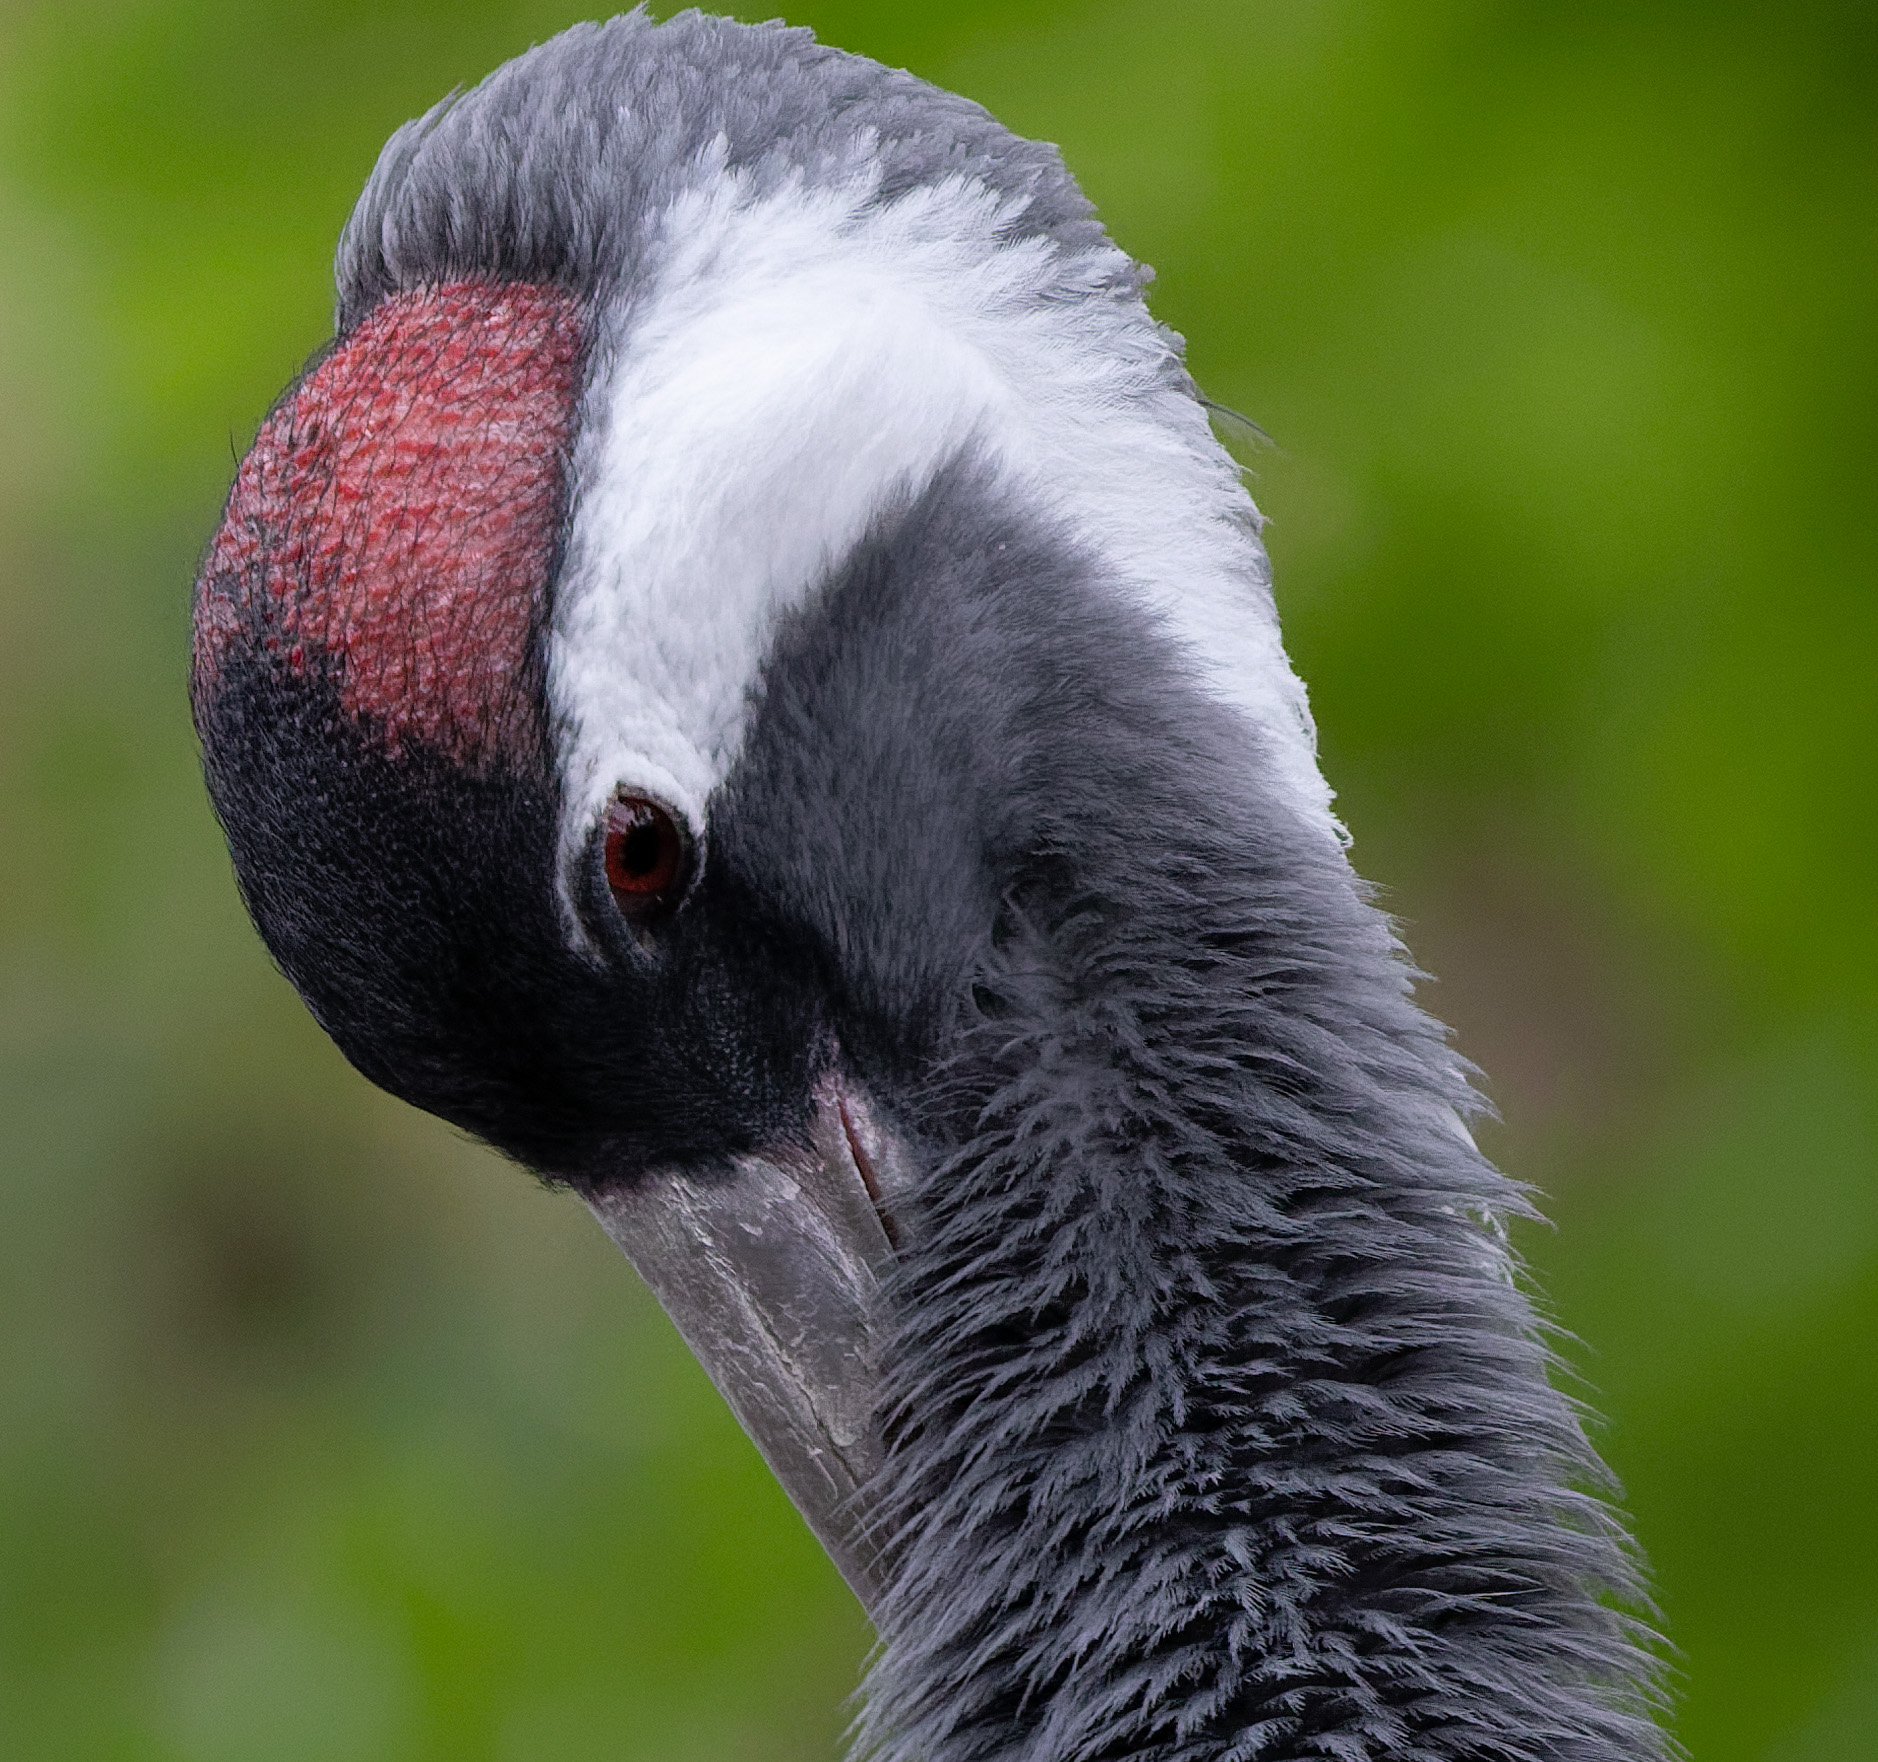
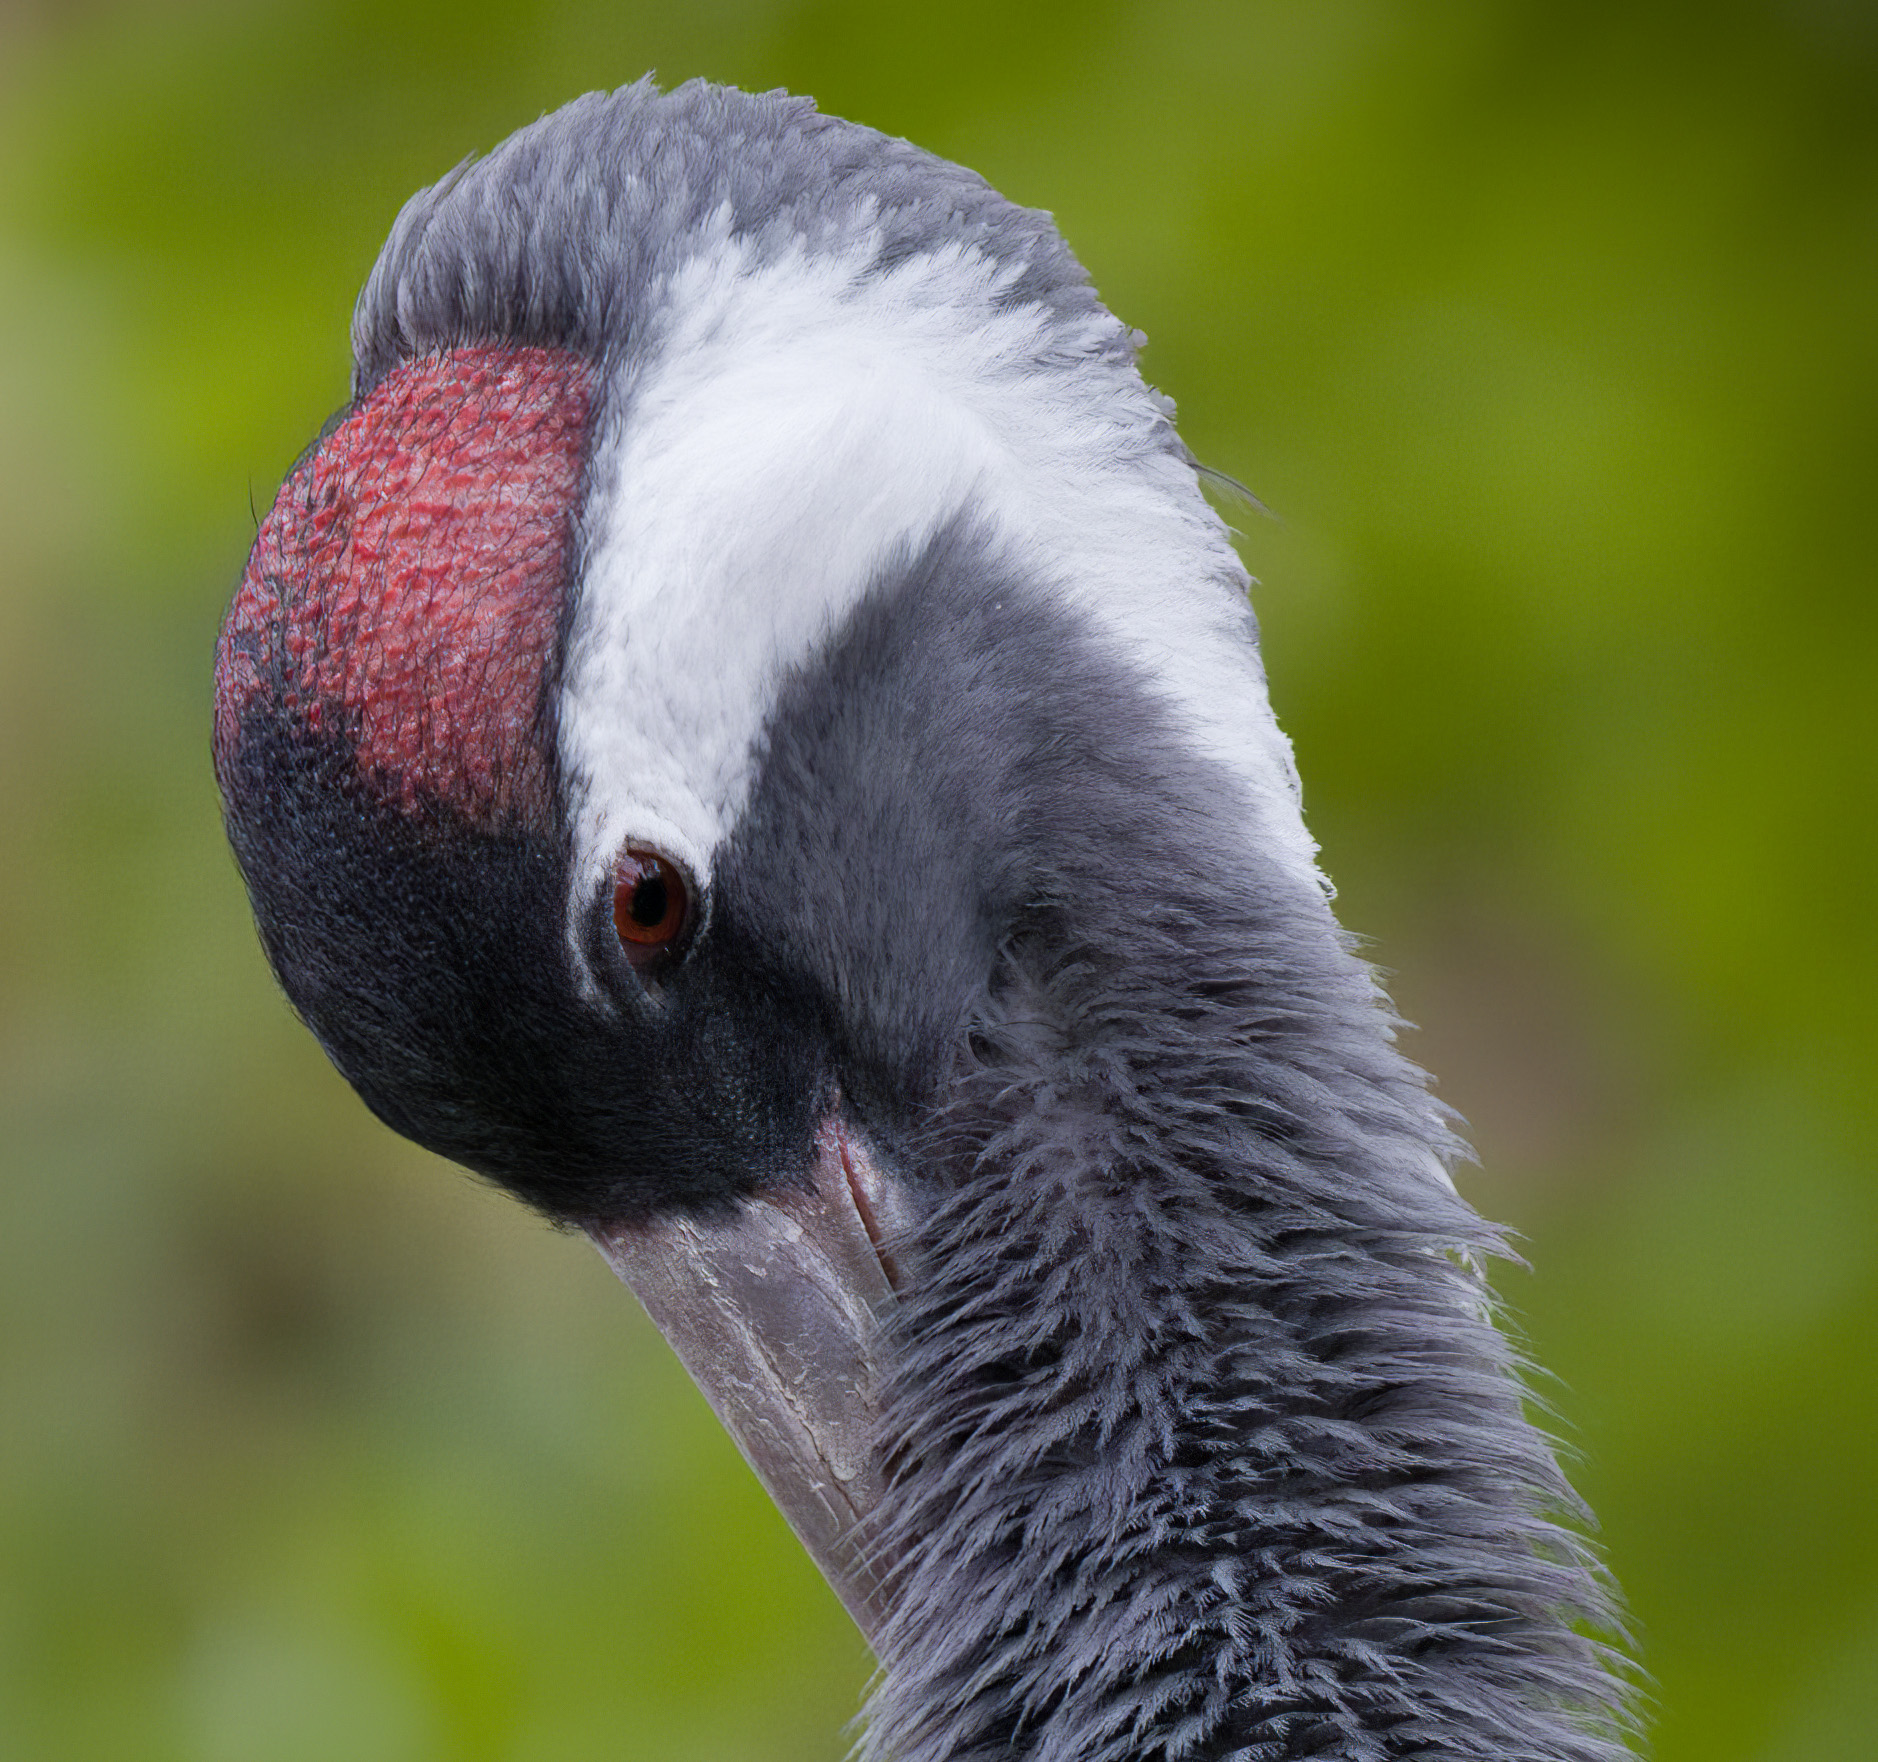
Noise Discount Check Picture 3
The third picture is of a standard crane preening itself. This was shot in comparatively low mild on a Canon EOS R5 at ISO 6400.


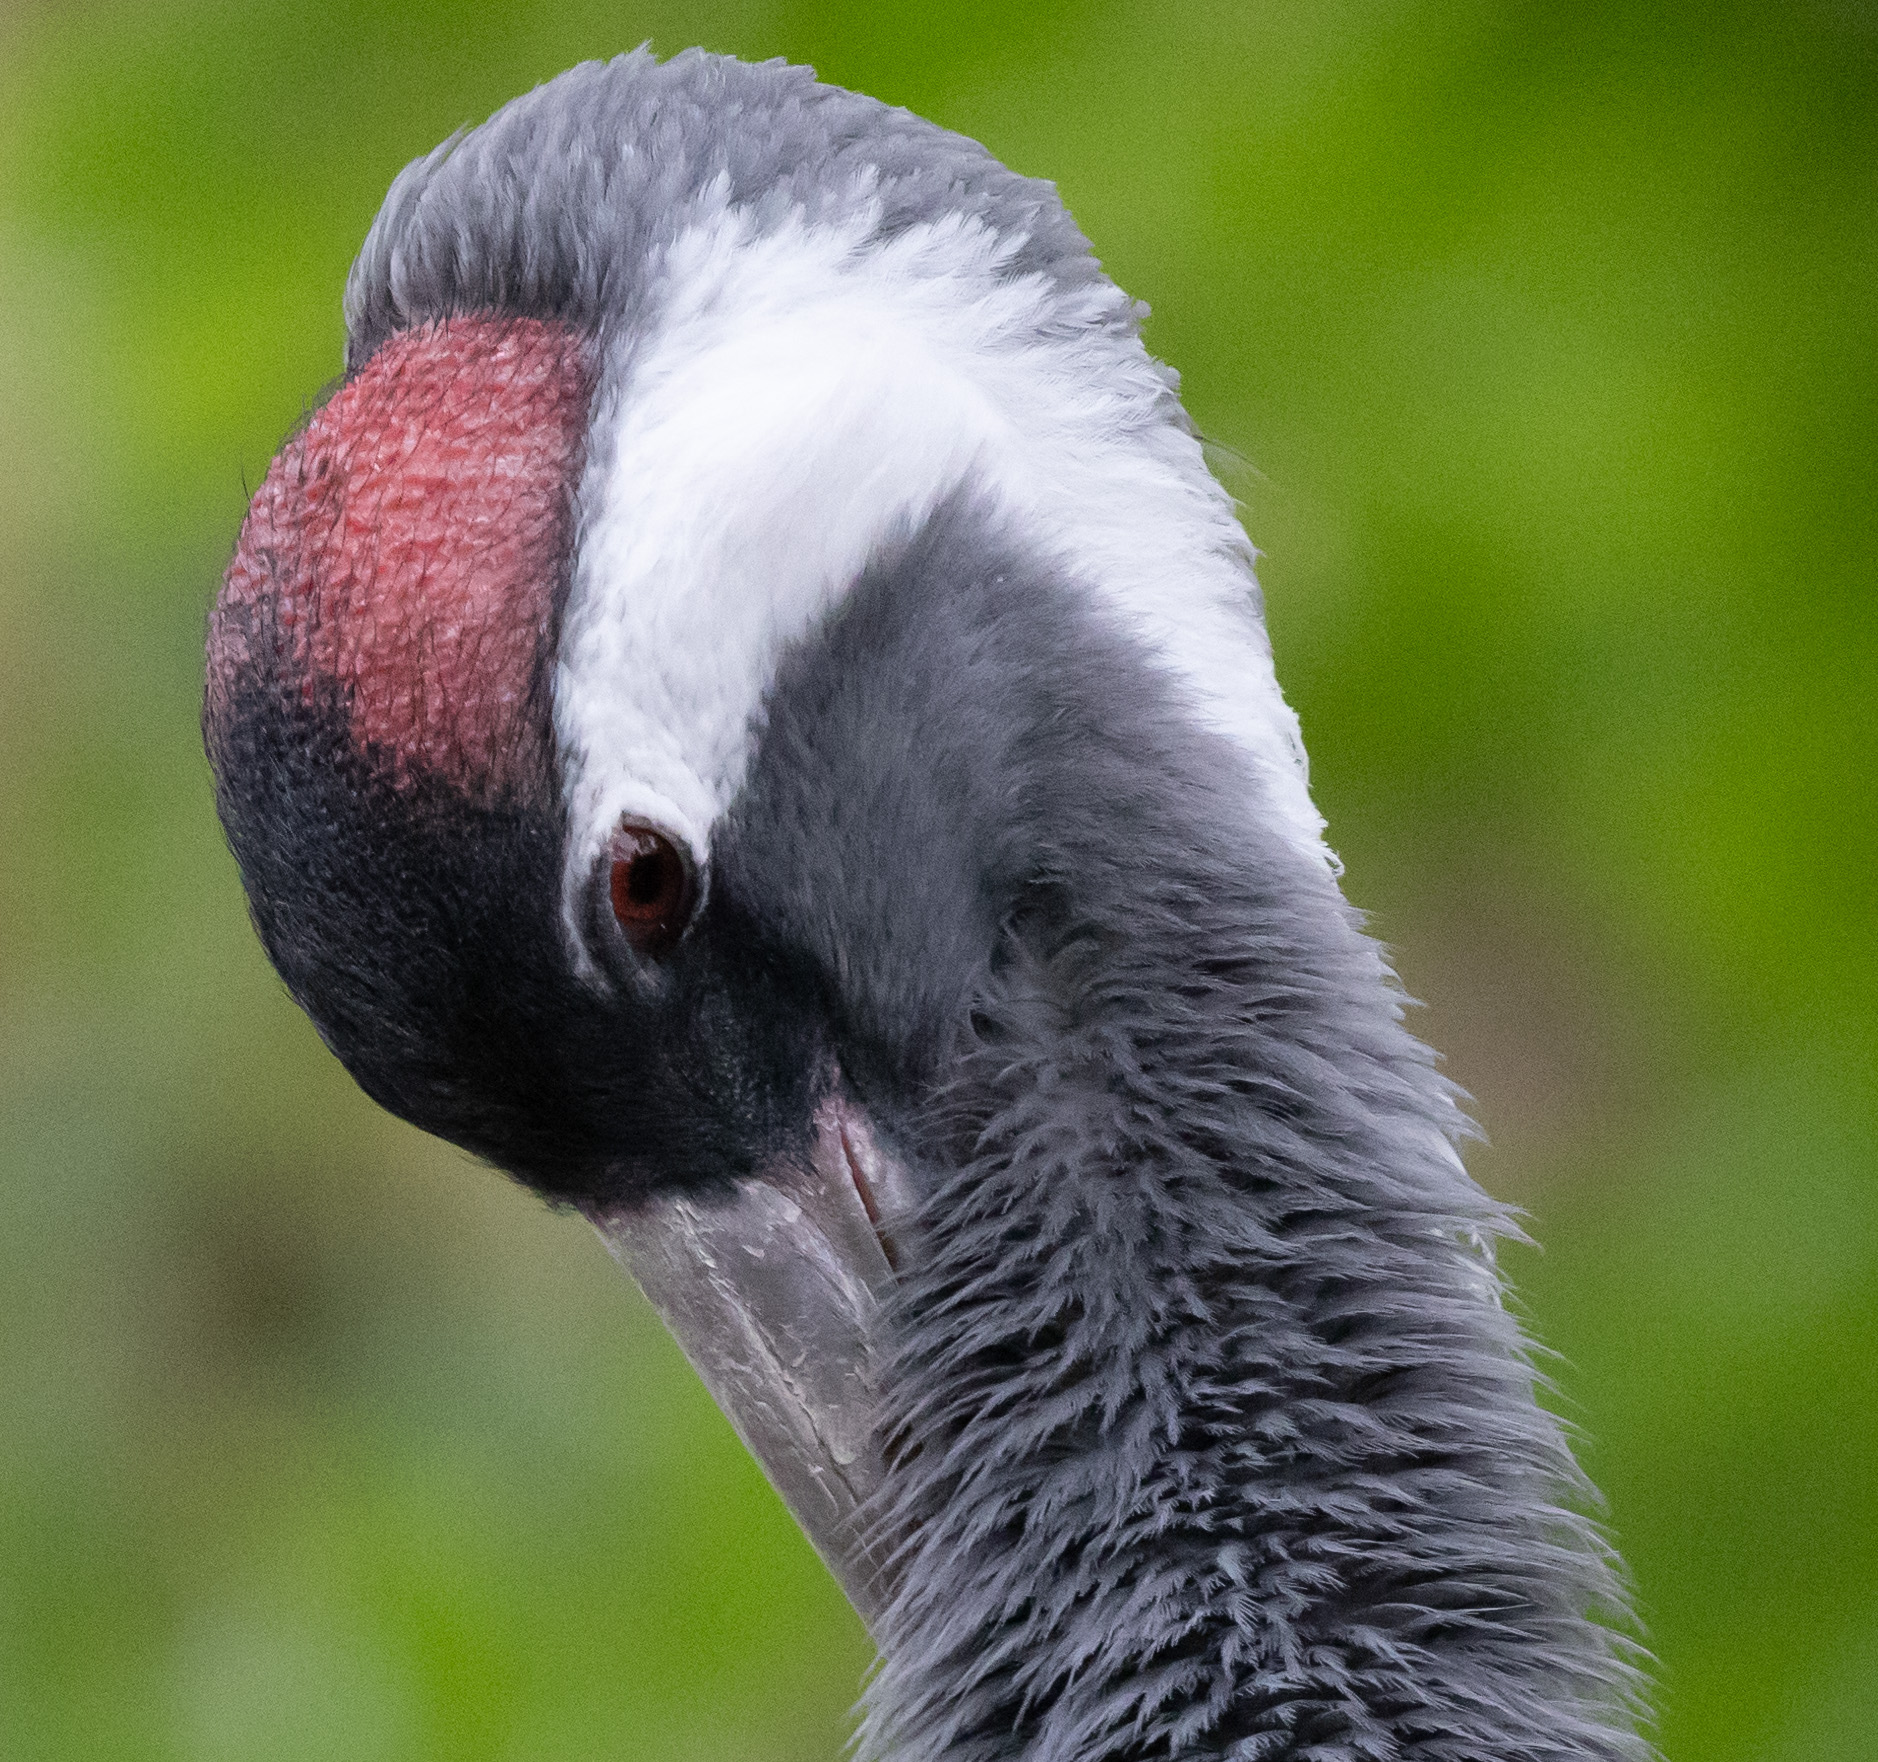
My choice from the above picture variations is within the following order, however it is best to come to your individual conclusion:
- Topaz DeNoise AI
- DxO PureRAW DeepPrime
- DxO PureRAW Prime
- On1 NoNoise AI
- DxO PureRAW HQ
- Adobe Lightroom
This time spherical I felt that the outcome from Topaz DeNoise AI edged out the DxO PureRAW DeepPrime and Prime variations as to me it seems to be a bit extra pure, particularly across the fringe of the neck feathers on the right-hand facet. This time NoNoise AI produced a greater model than the HQ model of PureRAW as nicely.
Noise Discount Check Picture 4
Persons are one of many more difficult topics for noise discount instruments to get proper. We’re extremely attuned to pores and skin tones and the way folks’s faces look, and even slight errors can damage a picture. Let’s see how these instruments do with this picture, shot at Paris practice station at evening on a Canon EOS 6D at 6400 ISO.
This shot was taken of my spouse who has a light-weight pores and skin tone. The instruments may fit otherwise with different pores and skin tones, so for individuals who shoot quite a lot of portrait and other people photographs I’d suggest testing in opposition to a wide range of pores and skin tones.
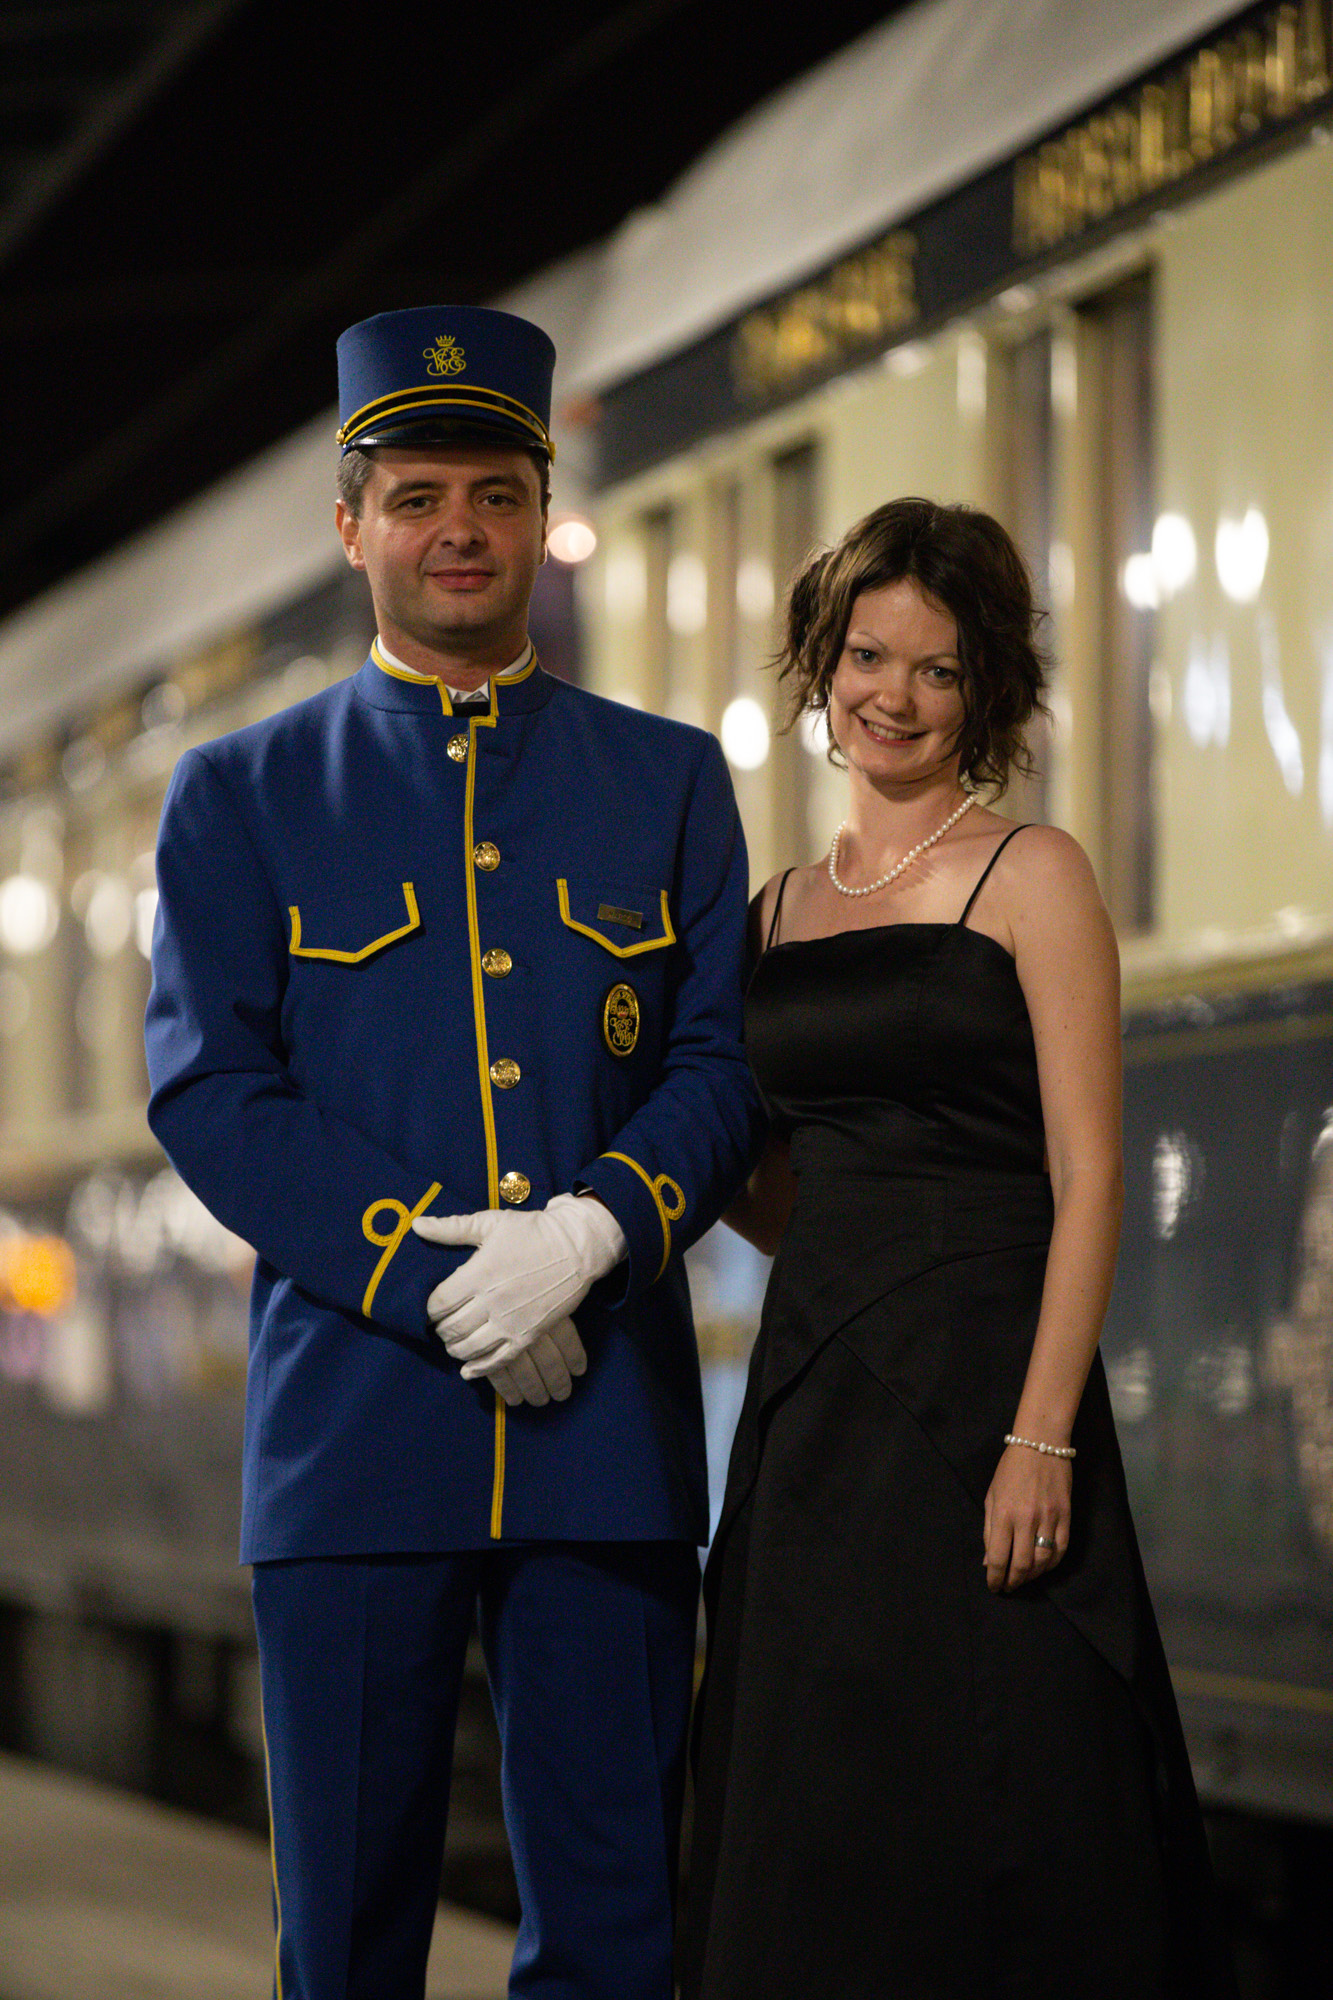


Of those photographs, my order of choice was as follows
- DxO PureRAW DeepPrime
- DxO PureRAW Prime
- Adobe Lightroom
- Topaz DeNoise AI
- On1 NoNoise AI
- DxO PureRAW HQ
I might say that the DeepPRIME model is leaps and bounds forward of the others, one thing I’ve typically seen in terms of noise processing the place pores and skin is concerned. Lightroom really put in a robust efficiency too.
Topaz and DeNoise produced very related outcomes – trying okay across the topic’s face, however the hair in direction of the highest left of the face seems to be a bit of odd. That is one thing that may very well be adjusted with masking after all, an possibility each instruments have.
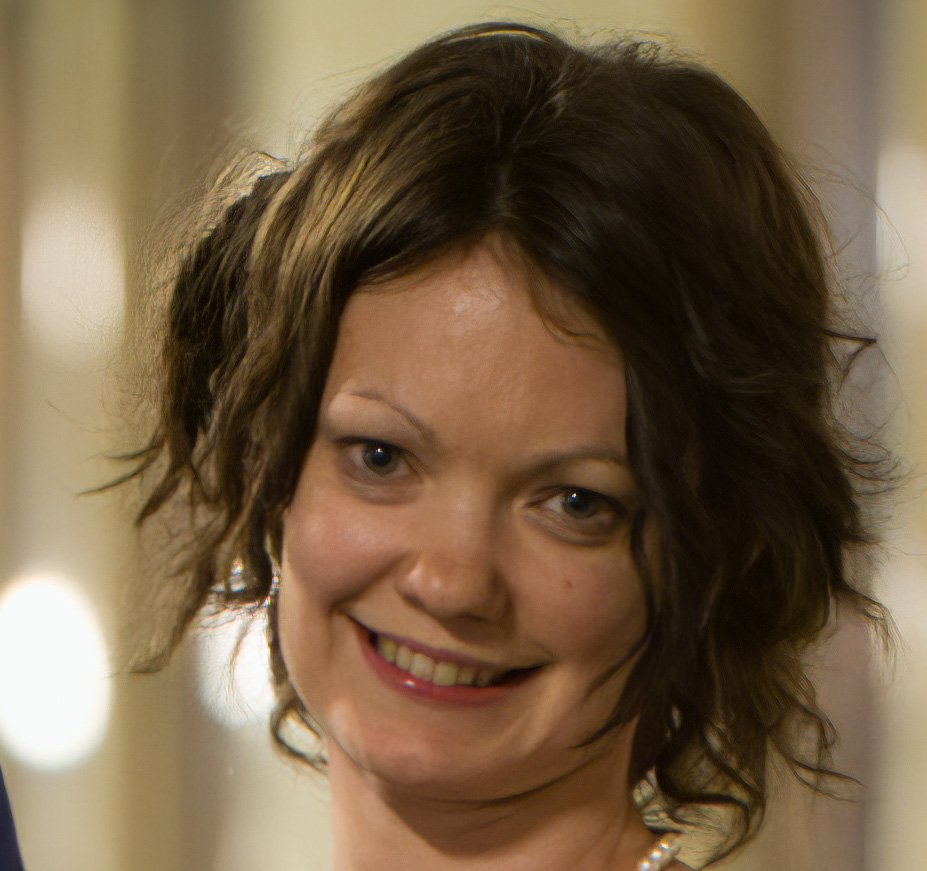
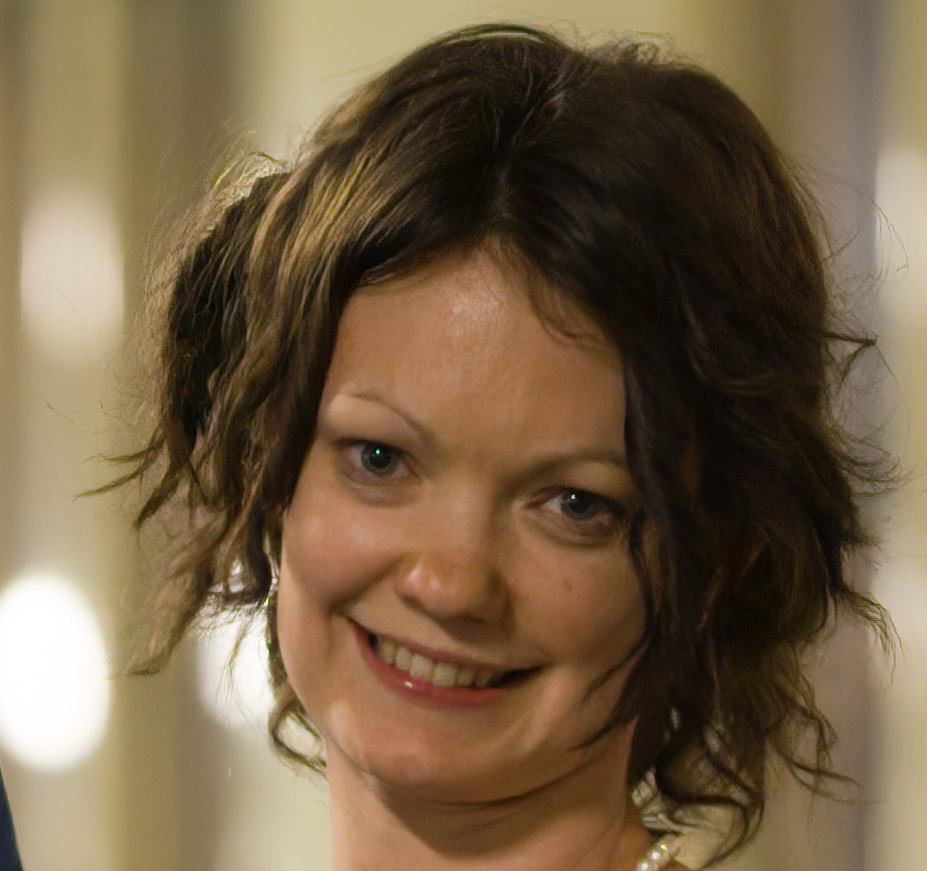
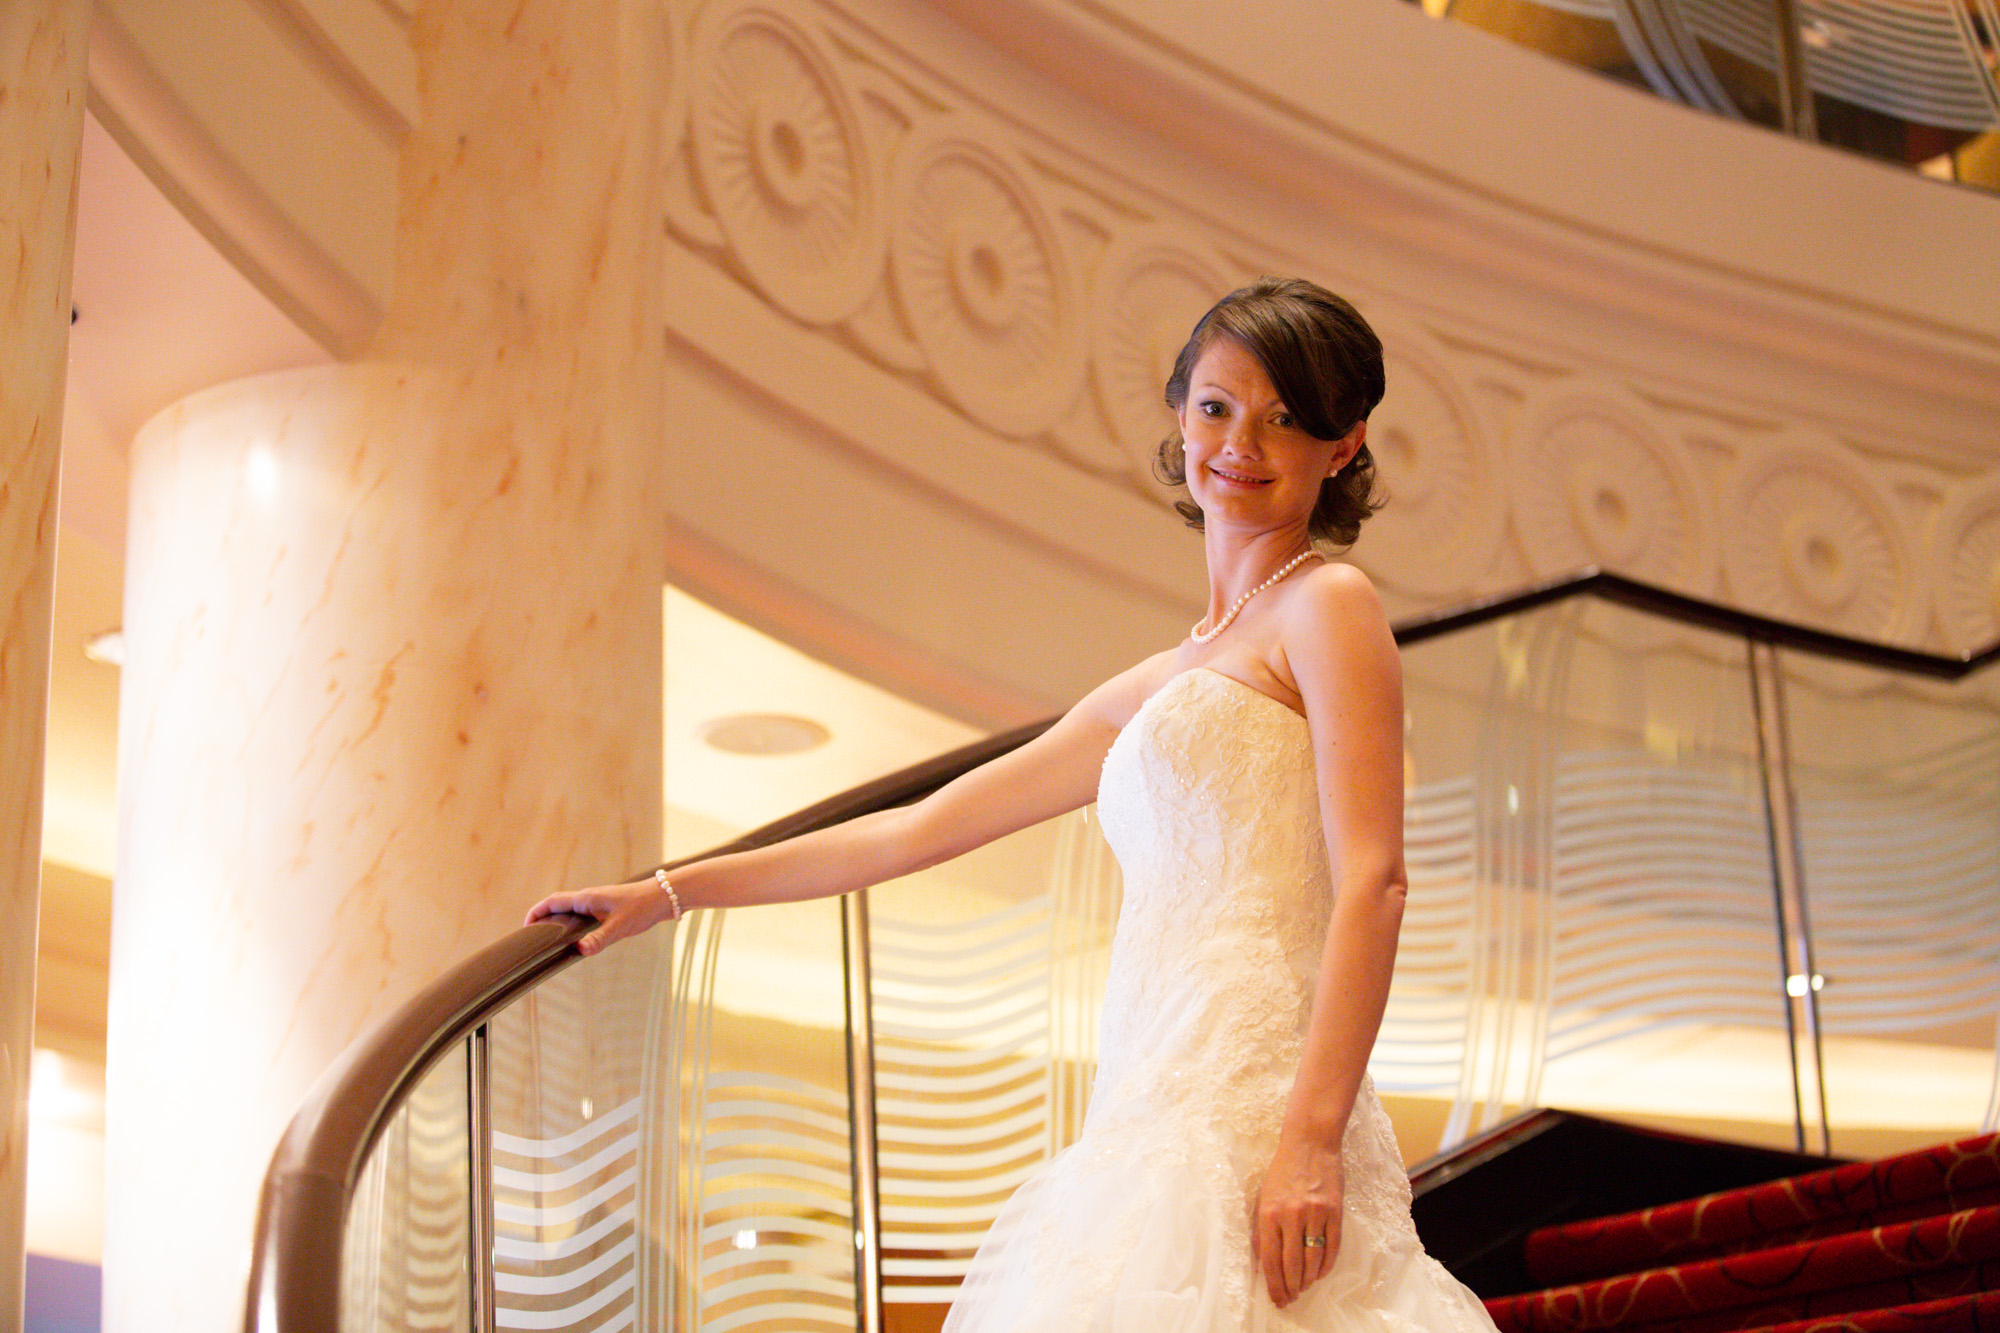
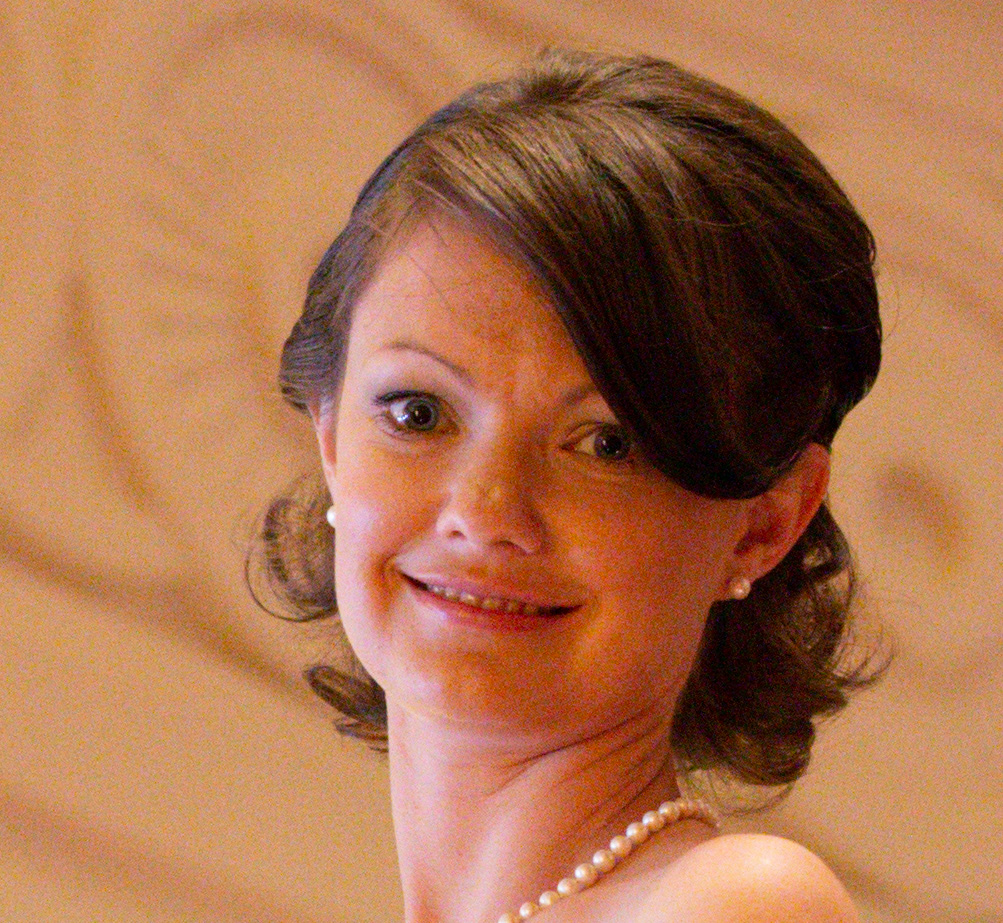
Noise Discount Check Picture 5
This picture was additionally taken indoors on a Canon EOS 6D. Marriage ceremony photographers have a tendency to seek out themselves taking pictures in low mild, so together with a marriage {photograph} for noise discount testing appeared like a good suggestion.


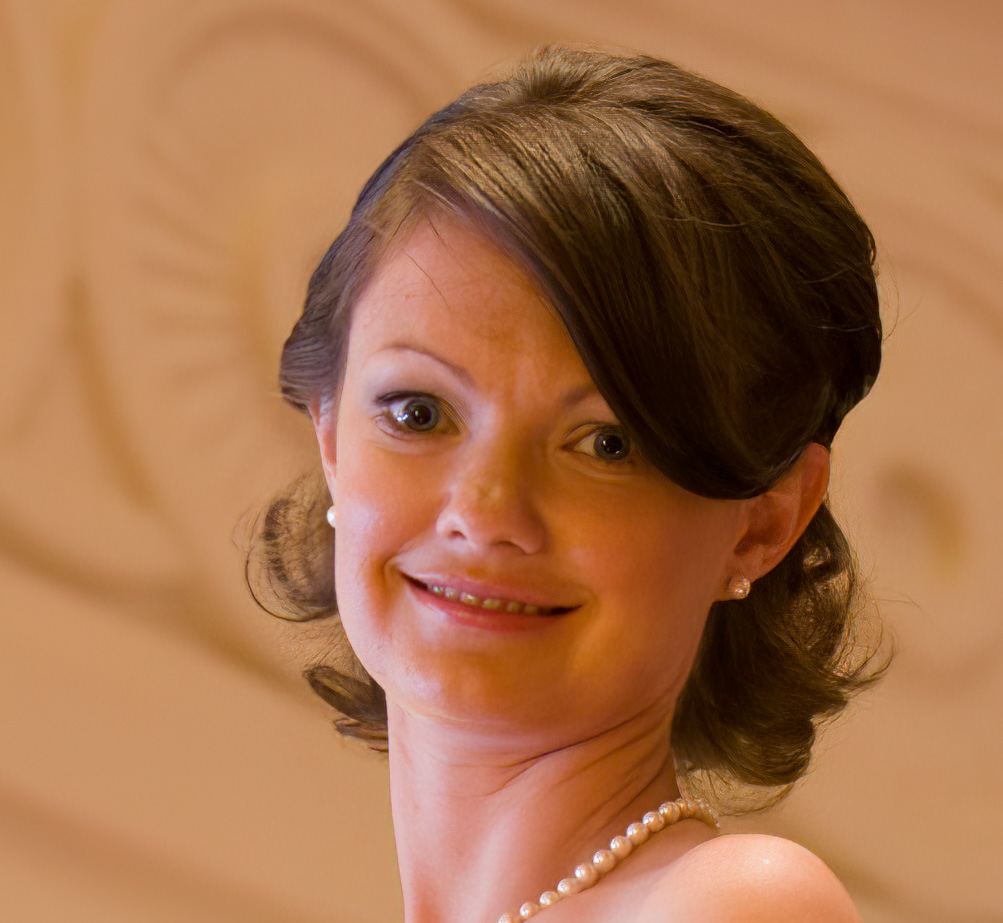
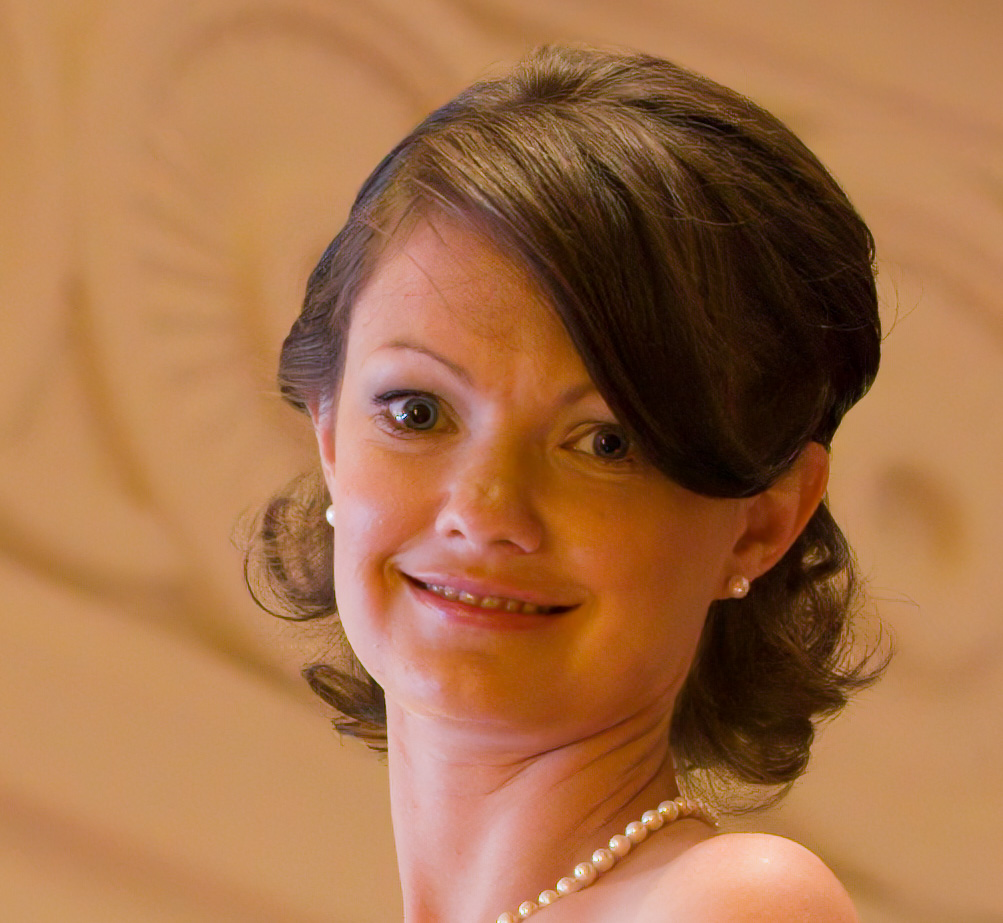
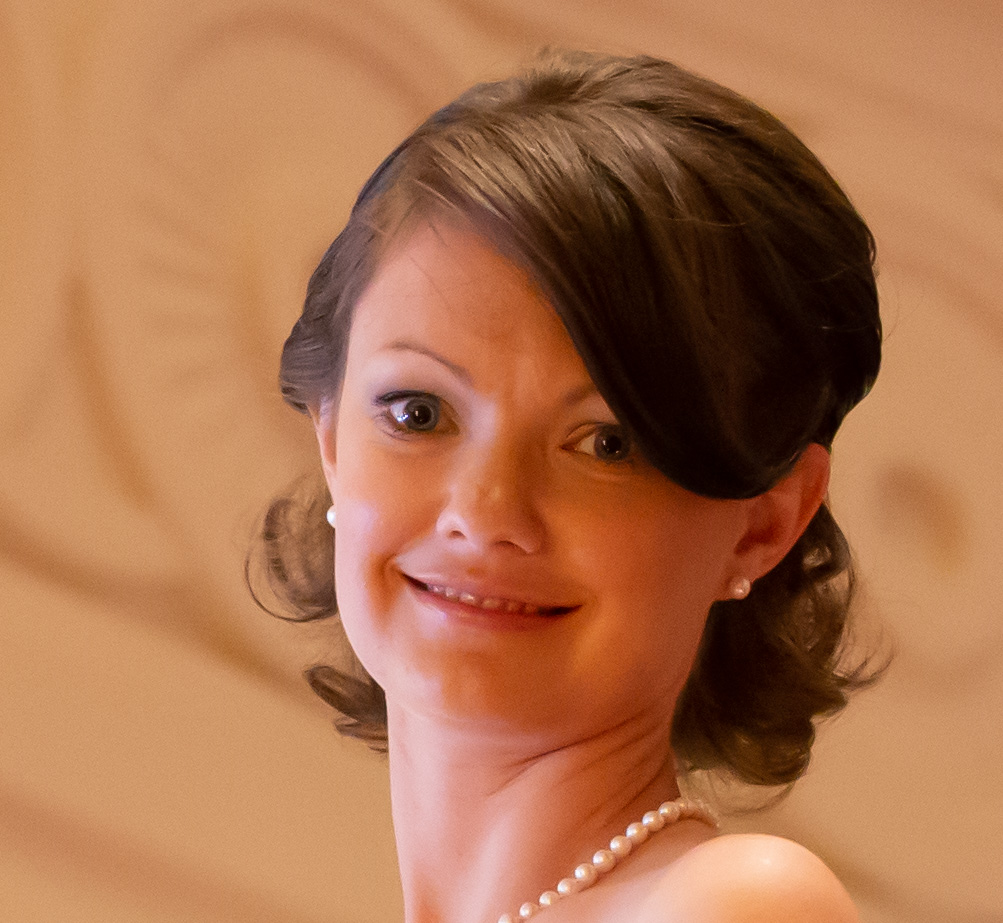
Of those photographs, my order of choice was as follows
- Topaz DeNoise AI
- On1 NoNoise AI
- DxO PureRAW Prime
- DxO PureRAW DeepPrime
- Adobe Lightroom
- DxO PureRAW HQ
This time spherical, I discovered Topaz DeNoise AI and On1 NoNoise AI to provide the extra pure trying outcomes. DxO PureRAW Prime edged forward of DeepPrime as a result of latter trying a bit over sharp for my part, though after all that is subjective.
Noise Discount Check Picture 6
This picture was additionally taken on a Canon EOS 6D. Indoor low mild pictures is often a time when excessive ISO photographs are output, so I needed to incorporate this picture which additionally doesn’t have folks or animals in it.
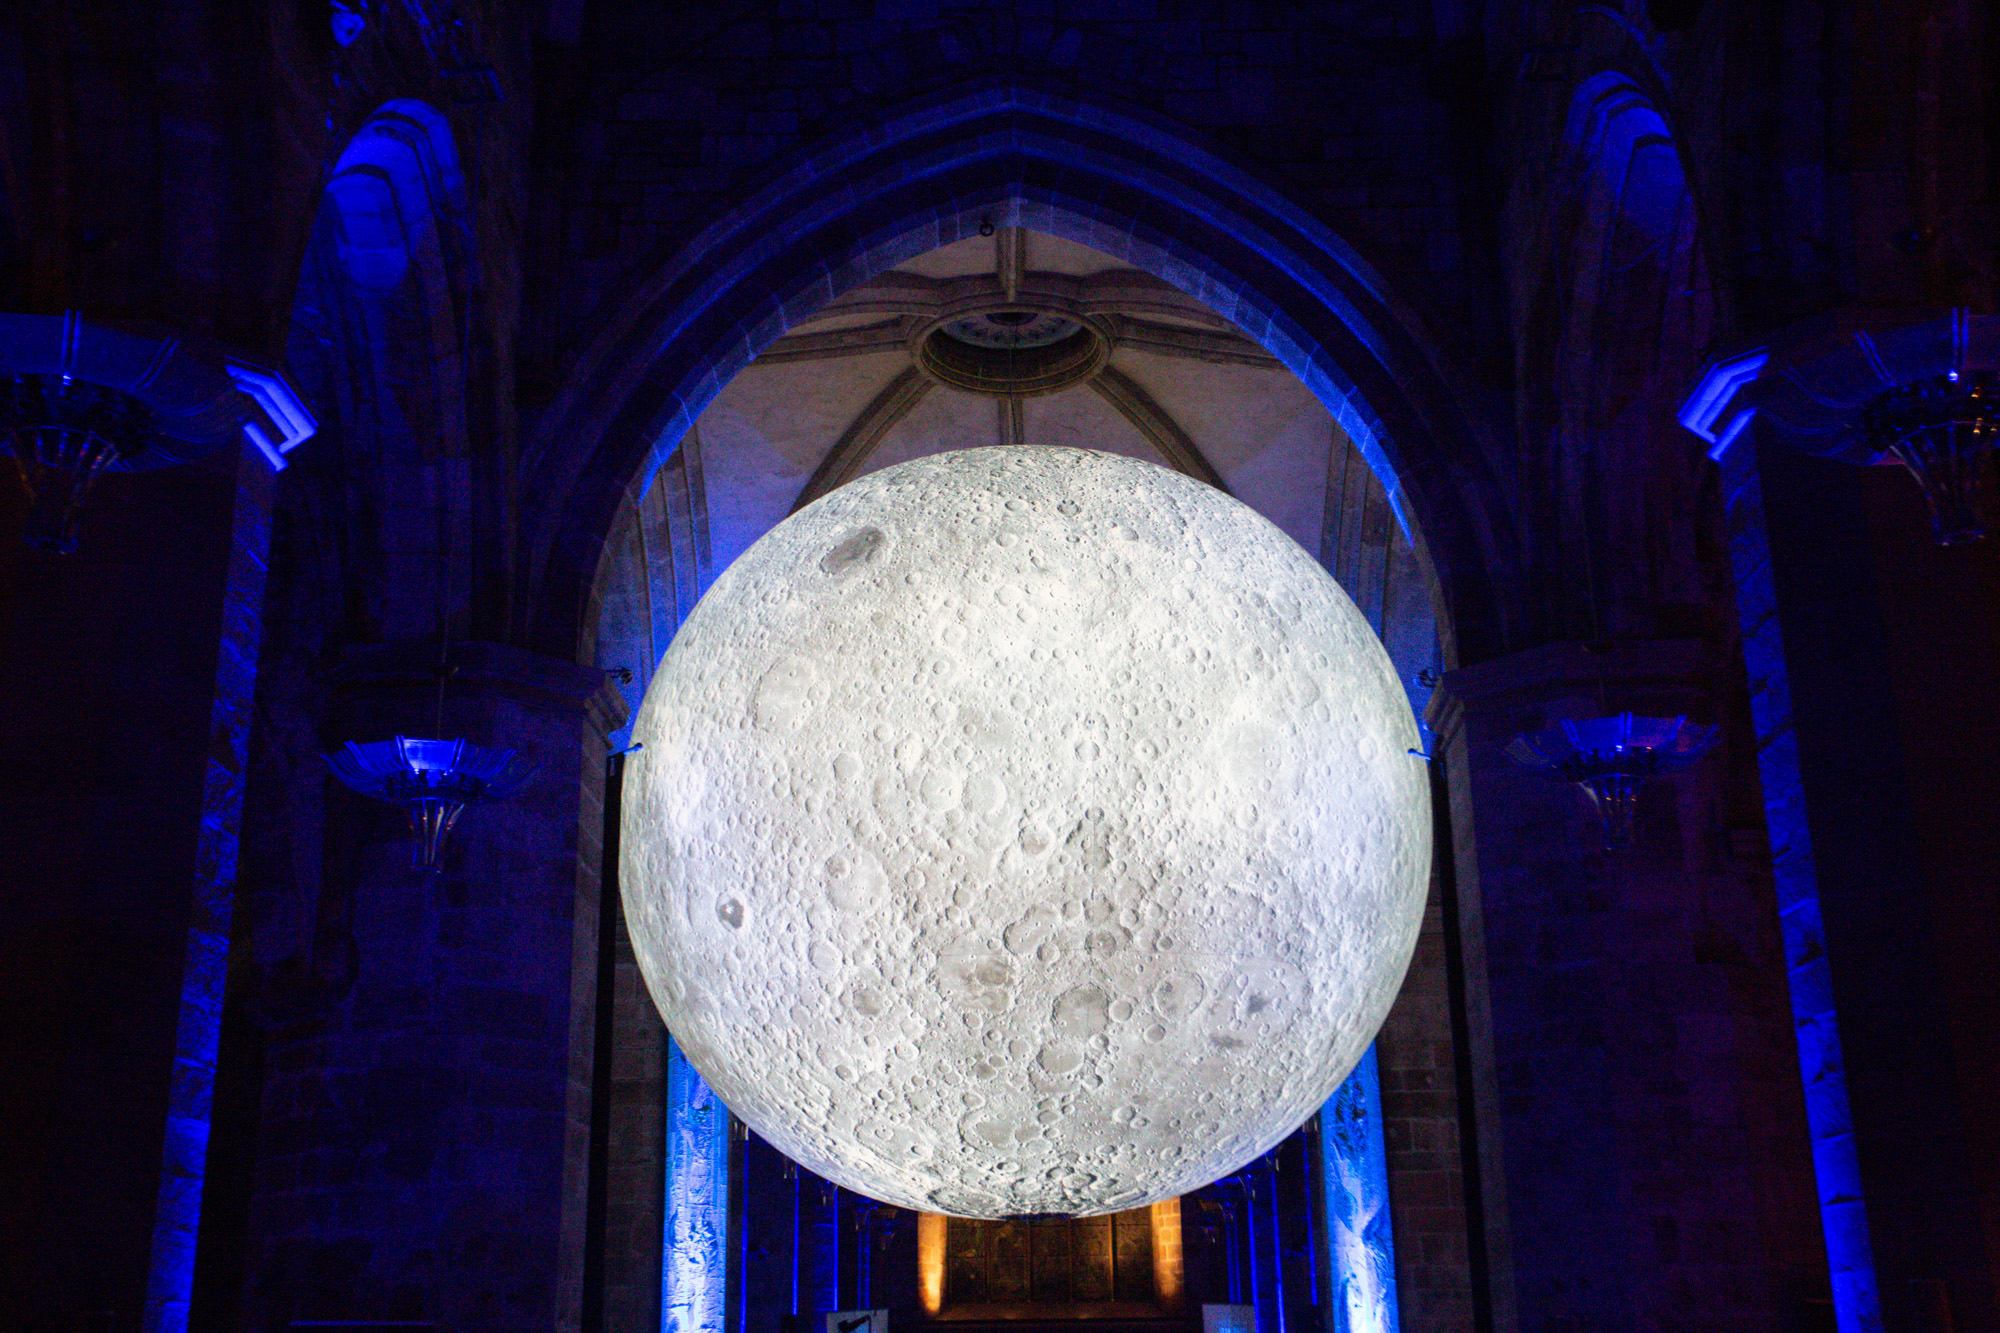
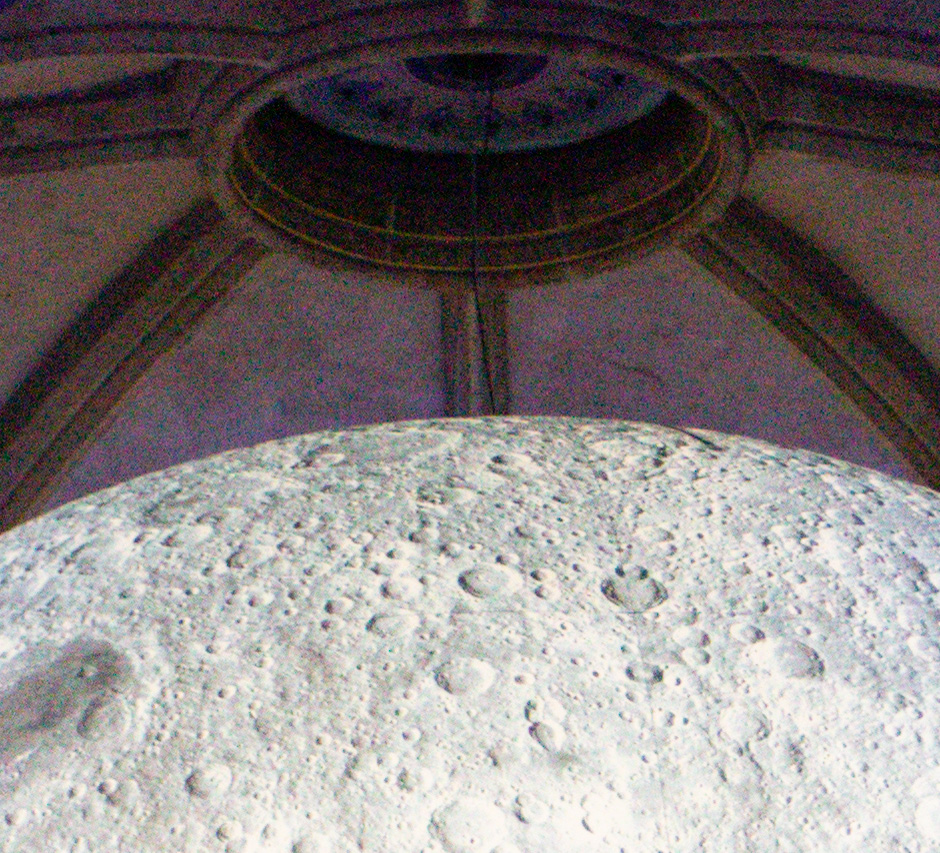
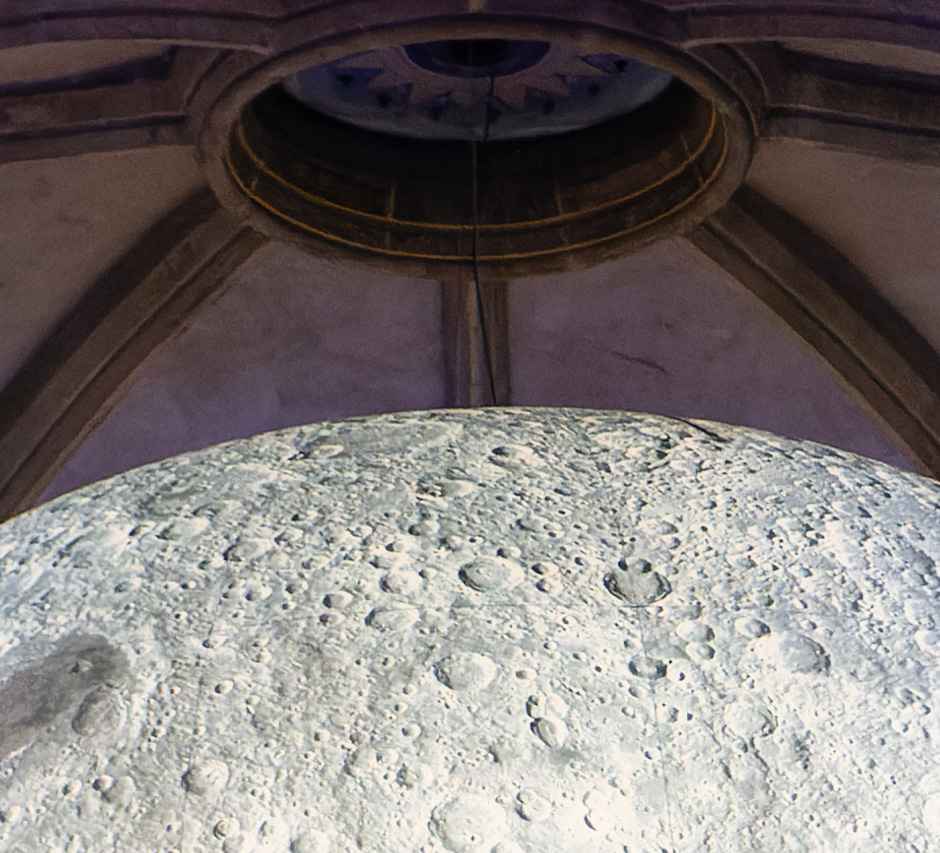

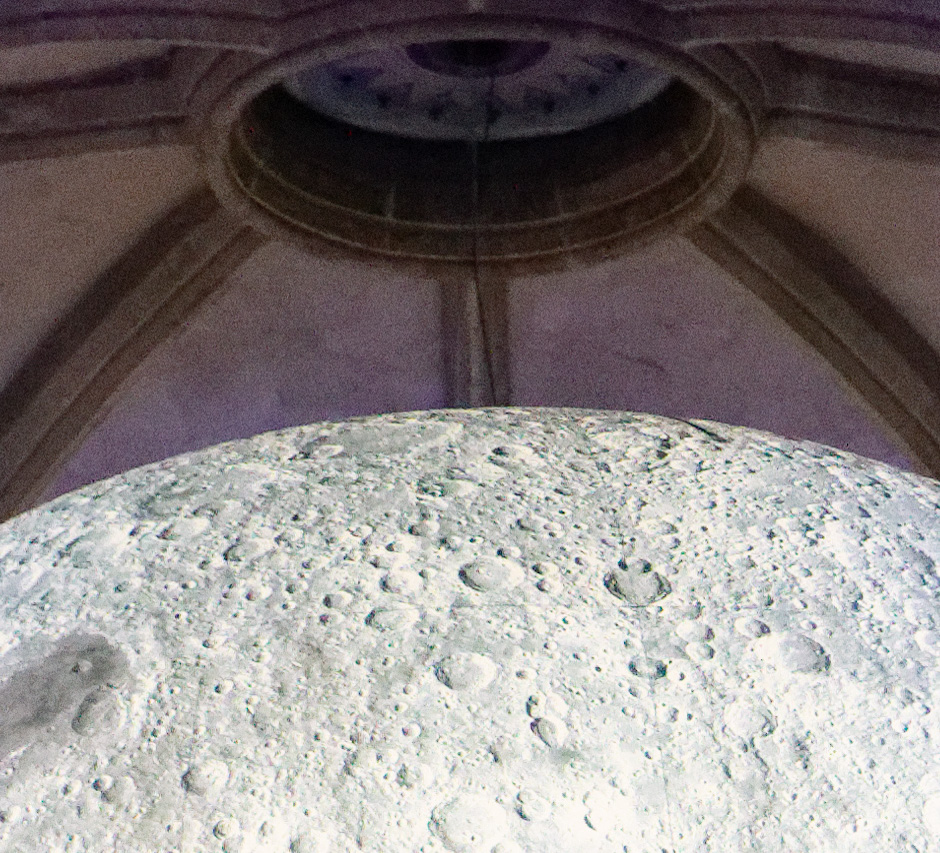
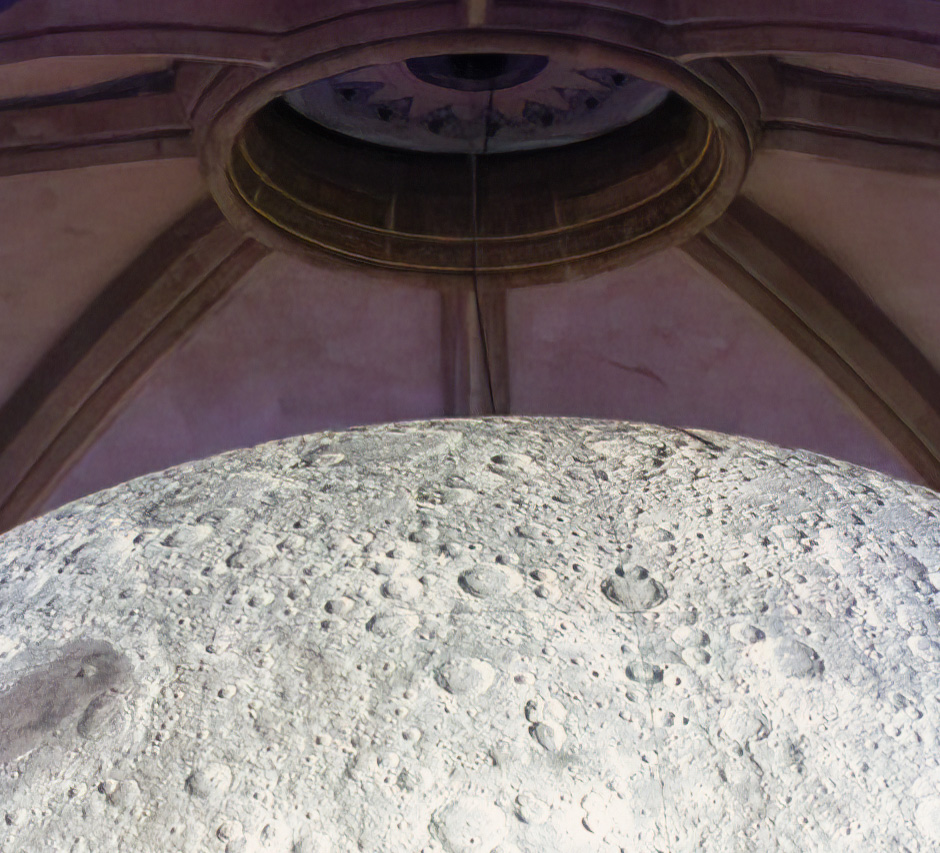
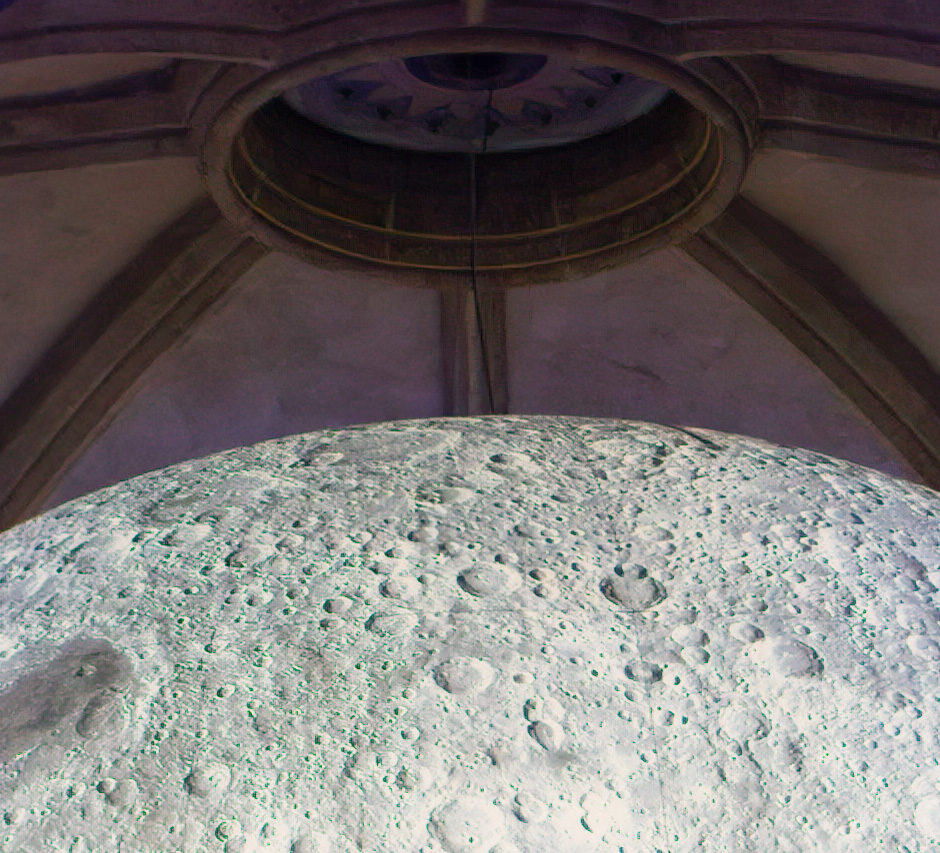
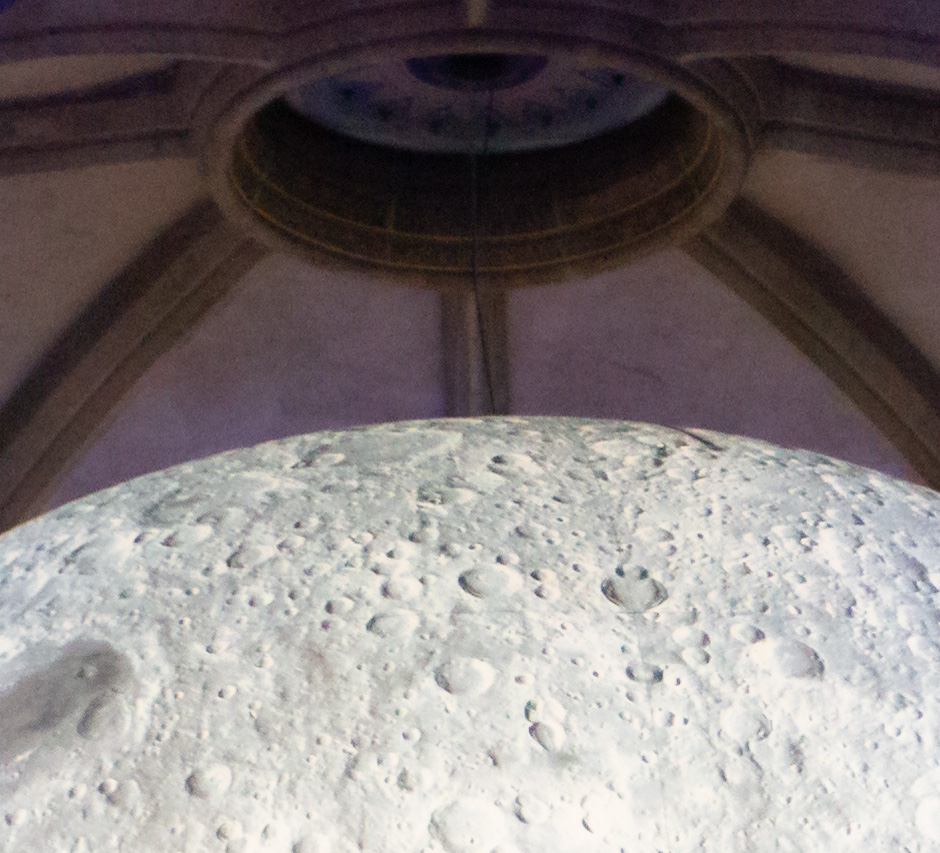
Of those photographs, my order of choice was as follows
- DxO PureRAW DeepPrime
- Topaz DeNoise AI
- DxO PureRAW Prime
- DxO PureRAW HQ
- Adobe Lightroom
- On1 NoNoise AI
It was difficult to decide on between the DxO PureRAW DeepPrime and Topaz DeNoise AI variations, however finally I barely most well-liked the DxO PureRAW DeepPrime model. DeNoise AI beat out the PureRAW Prime model. On1 NoNoise AI turned all of the moon craters inexperienced, which was a bit bizarre.
Noise Discount Software program Outcomes Conclusion
I undoubtedly encourage you to attract your individual conclusions, each based mostly on my testing and likewise utilizing your individual picture recordsdata.
My conclusion although is that by way of high quality, DxO PureRAW in DeepPrime mode typically produces the most effective outcomes, carefully adopted by Topaz DeNoise AI and PureRAW in Prime mode.
On1 NoNoise isn’t fairly nearly as good, while PureRAW HQ is finest on much less noisy recordsdata. Lightroom requires much more work utilizing masks and filters if you wish to get a clear picture, and I’ve struggled to get it to provide outcomes nearly as good because the devoted choices.
Noise Discount Velocity
Picture high quality is after all crucial issue in terms of assessing noise discount instruments, however it’s not the one consideration. In case you are processing massive numbers of photographs, then you’ll want to take into account how lengthy that course of will take, and the way massive the ensuing file sizes shall be.
Let’s have a look at how every software carried out by way of pace of processing. I used the identical six photographs, and timed how lengthy every software took to course of utilizing a stopwatch. After all, efficiency will differ relying on numerous components, so somewhat than specializing in the precise time, I’d recommend taking a look at them comparatively.
In each case I used the RAW file straight out of my Canon digital camera. The primary three had been shot on a Canon EOS R5, with the final one on a Canon EOS 6D.
Observe that every software works a bit of otherwise.
DxO PureRAW hundreds the picture file with out displaying a preview, so there’s no preliminary processing and due to this fact this stage takes no time in any respect. You simply select the processing mode and set it going.
Topaz DeNoise AI generates a preview of a zoomed in space of the picture with noise discount utilized, which takes 3-5 seconds on my system with GPU acceleration.
You may then modify the settings, and pan across the picture. Any adjustment or panning requires the preview to be generated once more, which takes a number of extra seconds. Lastly, you save the picture, which takes extra time. For my numbers, I’ve included each the time to load the preview picture initially, after which the time to put it aside.
On1 NoNoise AI analyses the entire picture file on load, so it takes longer to load than the opposite instruments. Nonetheless, as a lot of the processing is finished up entrance, subsequent changes and the saving course of are quite a bit faster than the opposite instruments.
For reference, I’m utilizing a desktop laptop with an AMD Ryzen 5800X processor, an 8GB Nvidia GeForce RTX 3060TI and 64GB of system reminiscence. Photographs had been saved on an SSD for max learn pace.
As I stated, I used a stopwatch to time the outcomes, so there shall be a small margin of error. Among the instruments like Topaz additionally present a time after they course of, however this tends to be below the precise processing time by a number of seconds in my testing, therefore the usage of a stopwatch for consistency throughout all of the instruments.
Picture 1, Robin on Department
Canon EOS R5. 45-megapixel picture, ISO 6400.
DxO PureRAW
- DxO PureRAW DeepPrime – 19 seconds (GPU accelerated)
- DxO PureRAW DeepPrime – 1 minute 1 second (CPU solely)
- DxO PureRAW Prime – 26 seconds (CPU or GPU)
- DxO PureRAW HQ – 15 seconds (CPU or GPU)
- DNG file output: HQ: 187 MB; Prime: 166 MB; DeepPrime 161 MB
Topaz DeNoise AI
- Topaz DeNoise AI – 4 seconds to load preview, 14 seconds to course of (GPU accelerated)
- Topaz DeNoise AI – 11 seconds to load preview, 59 seconds to course of (CPU solely)
- DNG file output 262 MB
On1 NoNoise AI
- On1 NoNoise AI – 14 seconds to load picture, 6 seconds to save lots of (GPU accelerated).
- On1 NoNoise AI – 26 seconds to load picture, 9 seconds to save lots of (no GPU acceleration)
- DNG file output 125 MB
One factor to notice is that DxO solely actually makes vital use of the GPU for the DeepPRIME processing.
Picture 2, Duck in Water
Canon EOS R5. 45-megapixel picture, ISO 5000.
DxO PureRAW
- DxO PureRAW DeepPrime – 18 seconds (GPU solely)
- DxO PureRAW DeepPrime – 59 seconds (CPU solely)
- DxO PureRAW Prime – 30 seconds (CPU / GPU)
- DxO PureRAW HQ – 12 seconds (CPU /GPU )
- DNG file output measurement: HQ: 201 MB; Prime: 181 MB; DeepPrime 176 MB
Topaz DeNoise AI
- Topaz DeNoise AI – 4 seconds to load preview, 13 seconds (GPU accelerated)
- Topaz DeNoise AI – 11 seconds to load preview, 57 seconds to save lots of (CPU solely)
- DNG file output measurement: 256 MB
On1 NoNoise AI
- On1 NoNoise AI – 13 seconds to load picture, 7 seconds to save lots of (GPU accelerated).
- On1 NoNoise AI – 26 seconds to load picture, 11 seconds to save lots of (no GPU acceleration)
- DNG file output measurement: 148 MB
Picture 3, Crane
Canon EOS R5. 45-megapixel picture, ISO 6400.
DxO PureRAW
- DxO PureRAW DeepPrime – 18 seconds (GPU solely)
- DxO PureRAW DeepPrime – 1 minute 3 seconds (CPU solely)
- DxO PureRAW Prime – 26 seconds (CPU / GPU solely)
- DxO PureRAW HQ – 15 seconds (CPU / GPU solely)
- DNG file output measurement: HQ: 199 MB; Prime: 173 MB; DeepPrime 171 MB
Topaz DeNoise AI
- Topaz DeNoise AI – 4 seconds to load preview, 13 seconds to save lots of (GPU accelerated)
- Topaz DeNoise AI – 8 seconds to load preview, 59 seconds to save lots of (CPU solely)
- DNG file output measurement: 256 MB
On1 NoNoise AI
- On1 NoNoise AI – 13 seconds to load picture, 7 seconds to save lots of (GPU accelerated).
- On1 NoNoise AI – 26 seconds to load picture, 9 seconds to save lots of (no GPU acceleration)
- DNG file output measurement: 136 MB
Picture 4, Individual by practice
Canon EOS 6D. 20.2 Megapixel picture, ISO 6400
DxO PureRAW
- DxO PureRAW DeepPrime – 8 seconds (GPU solely)
- DxO PureRAW DeepPrime – 28 seconds (CPU solely)
- DxO PureRAW Prime – 12 seconds (CPU / GPU)
- DxO PureRAW HQ – 5 seconds (CPU / GPU)
- DNG file output measurement: HQ: 79.1 MB; Prime: 69.5 MB; DeepPrime 67.4 MB
Topaz DeNoise AI
- Topaz DeNoise AI – 3 seconds to load preview, 7 seconds to save lots of (GPU accelerated)
- Topaz DeNoise AI – 7 seconds to load preview, 29 seconds to save lots of (CPU solely)
- DNG file output measurement: 114 MB
On1 NoNoise AI
- On1 NoNoise AI – 6 seconds to load picture, 3 seconds to save lots of (GPU accelerated).
- On1 NoNoise AI – 13 seconds to load picture, 3 seconds to save lots of (no GPU acceleration)
- DNG file output measurement: 56.5 MB
Picture 5, Individual at Marriage ceremony
Canon EOS 6D. 20.2 Megapixel picture, ISO 6400
DxO PureRAW
- DxO PureRAW DeepPrime – 9 seconds (CPU / GPU solely)
- DxO PureRAW DeepPrime – 29 seconds (CPU solely)
- DxO PureRAW Prime – 13 seconds (CPU solely)
- DxO PureRAW HQ – 5 seconds (CPU solely)
- DNG file output measurement: HQ: 86 MB; Prime: 76.3 MB; DeepPrime 75 MB
Topaz DeNoise AI
- Topaz DeNoise AI – 3 seconds to load preview, 7 seconds to save lots of (GPU accelerated)
- Topaz DeNoise AI – 7 seconds to load preview, 29 seconds to save lots of (CPU solely)
- DNG file output measurement: 114 MB
On1 NoNoise AI
- On1 NoNoise AI – 6 seconds to load picture, 3 seconds to save lots of (GPU accelerated).
- On1 NoNoise AI – 13 seconds to load picture, 3 seconds to save lots of (no GPU acceleration)
- DNG file output measurement: 65.6 MB
Picture 6, Indoor low Gentle scene
DxO PureRAW
- DxO PureRAW DeepPrime – 8 seconds (GPU solely)
- DxO PureRAW DeepPrime – 28 seconds (CPU solely)
- DxO PureRAW Prime – 13 seconds (CPU solely)
- DxO PureRAW HQ – 4 seconds (CPU solely)
- DNG file output measurement: HQ: 73.4 MB; Prime: 66.9 MB; DeepPrime 65.1 MB
Topaz DeNoise AI
- Topaz DeNoise AI – 4 seconds to load preview, 8 seconds to save lots of (GPU accelerated)
- Topaz DeNoise AI – 8 seconds to load preview, 30 seconds to save lots of (CPU solely)
- DNG file output measurement: 114 MB
On1 NoNoise AI
- On1 NoNoise AI – 6 seconds to load picture, 3 seconds to save lots of (GPU accelerated).
- On1 NoNoise AI – 13 seconds to load picture, 3 seconds to save lots of (no GPU acceleration)
- DNG file output measurement: 58.7 MB
Common Relative Velocity
Taking all of the numbers, right here’s how every software carried out on my laptop on common.
- DxO PureRAW DeepPRIME GPU: 13 seconds
- DxO PureRAW DeepPRIME: 45 seconds
- DxO PureRAW Prime: 20 seconds
- DxO PureRAW HQ: 9 seconds
- Topaz DeNoise AI GPU: 14 seconds
- Topaz DeNoise AI CPU: 53 seconds
- On1 NoNoise AI GPU: 15 seconds
- On1 NoNoise AI CPU: 26 seconds
And right here’s a chart to point out the distinction. Smaller bars imply sooner efficiency.
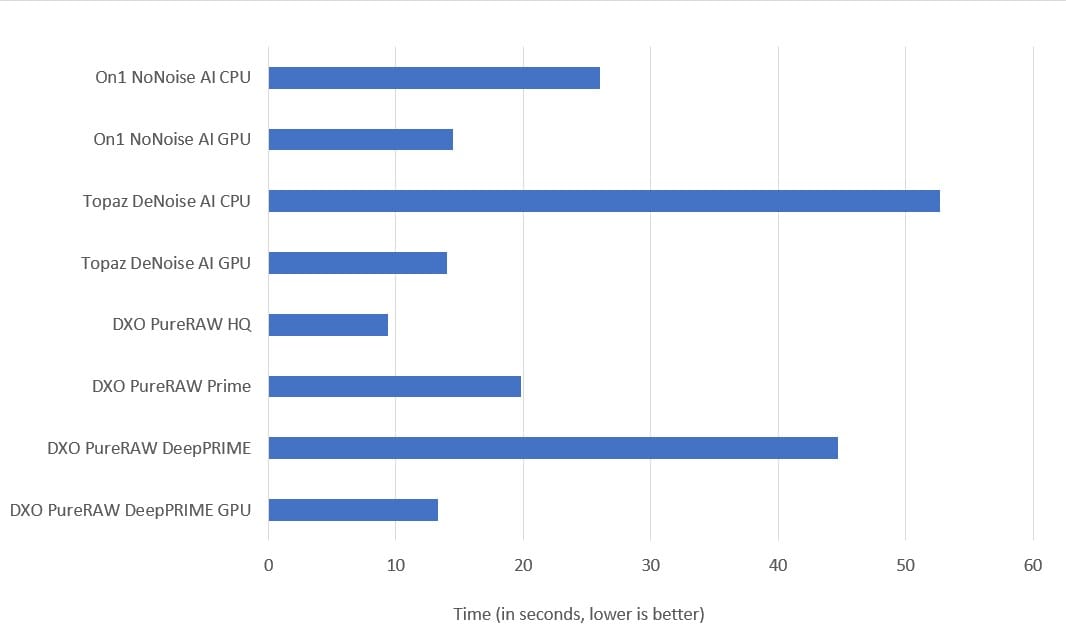
In abstract, you’ll be able to see {that a} good GPU makes a distinction. In my setup, there’s not an enormous distinction between the three merchandise when utilizing a GPU, they’re inside a second or two of one another. They’re all considerably slower when simply utilizing the CPU, even a excessive finish desktop processor.
Once more, I wish to make is obvious that these outcomes are going to differ relying on a variety of things, from the RAW file format by means of to the scale of the pictures you employ and your laptop specs and {hardware}.
While these numbers do present the relative efficiency of those instruments on my setup, your outcomes are very more likely to differ relying in your setup. I extremely suggest testing efficiency in your system and utilizing your picture recordsdata with a trial model prior to creating any monetary dedication.
Common File Sizes
One other issue you may take into account is the file sizes that the software program outputs. One factor that shocked me was how totally different these had been for a similar enter photographs.
Topaz DeNoise AI constantly produced the most important output DNG recordsdata, whereas On1 NoNoise AI produced the smallest. DxO PureRAW was within the center, with the DeepPRIME producing smaller recordsdata than PRIME, which produced smaller recordsdata than the HQ mode.
Right here’s how these seemed as a median throughout my outcomes. Discover the output file sizes had been the identical no matter whether or not GPU or CPU was used, which is to be anticipated as the ultimate outcome is similar. Additionally, this contains each 20.2MP and 45MP enter recordsdata, so the comparability is simply relative.
- DxO PureRAW DeepPRIME: 130 MB
- DxO PureRAW Prime: 133 MB
- DxO PureRAW HQ: 148 MB
- Topaz DeNoise AI: 200 MB
- On1 NoNoise AI: 106 MB
And right here’s a chart to point out the distinction. Smaller bars imply smaller file sizes.
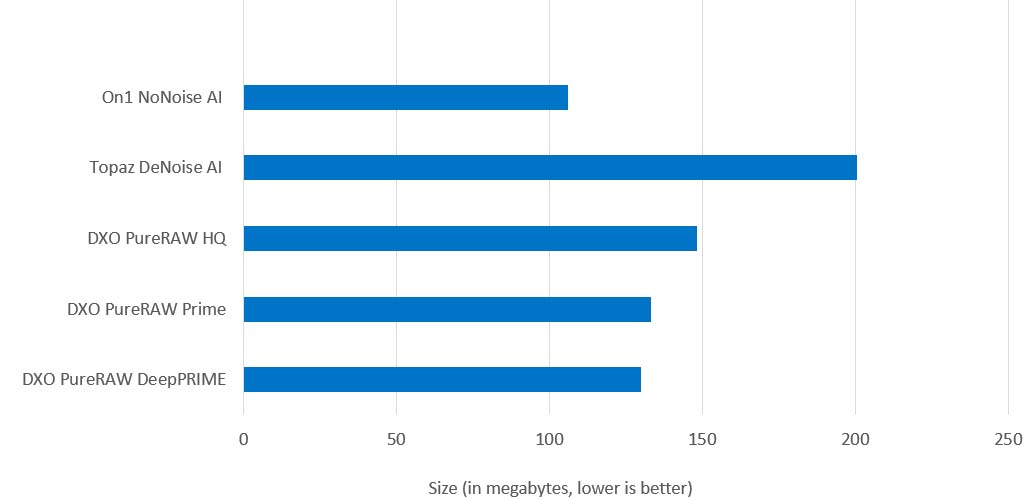
I’m not suggesting you base your resolution on which software produces the smallest file sizes, as laborious drive area is comparatively low cost. Nonetheless, if it’s an in depth resolution between two instruments, this may be a decider. Personally, I used to be fairly shocked as to how a lot larger the recordsdata output from Topaz DeNoise AI had been. This was a constant outcome throughout all the pictures I used.
Which Noise Discount Software program is Finest?
In my private expertise, it comes all the way down to a alternative between DxO PureRAW and Topaz DeNoise AI.
PureRAW produces nice outcomes, particularly with the DeepPRIME mannequin, nonetheless you get restricted controls and it solely works on RAW recordsdata. It’s additionally the costliest standalone noise discount software in our roundup.
Nonetheless, the outcomes had been my favorite generally, and the file sizes had been additionally glorious compared to Topaz DeNoise AI. It was the quickest (fractionally) in DeepPRIME mode, though the outcomes for the GPU accelerated processing throughout all of the software program had been very shut.
You additionally get batch processing and glorious lens correction and sharpening throughout an enormous vary of digital camera and lens combos.
Topaz DeNoise AI typically produces related outcomes to PureRAW, to the purpose you’ll solely actually discover the distinction should you dive in on the pixel degree. I just like the choices it supplies for customisation, and it carried out nicely, particularly with the GPU enabled.
I additionally like that you just get previews of the output and extra customisation, in addition to the batch processing characteristic. It additionally integrates nicely with Lightroom. Nonetheless, it did produce the most important file sizes by a substantial margin, so that is one thing to consider if laborious drive area is a consideration. It could possibly additionally take longer to get every picture proper, and panning round and adjusting settings generally is a bit time consuming.
I actually just like the pace and file output sizes of On1 NoNoise AI, however I didn’t really feel that the outcomes had been fairly adequate to suggest it. That stated, should you’re in search of a price efficient multi function product, you’ll be able to choose up On1 Picture RAW which serves as a wonderful Lightroom alternative and the noise processing is definitely adequate.
Adobe’s Lightroom is okay for primary noise discount, however I really feel that if you wish to get probably the most out of your photographs, one other software goes to make a distinction.
Personally, I take advantage of each Topaz DeNoise AI and DxO PureRAW (with this third-party free plugin for Lightroom).
I primarily use DxO PureRAW because it tends to be the quickest and best possibility. If I would like extra management, I’ll use Topaz DeNoise. Actually although, each of those are good choices, and you’d be pleased with both I think. It actually depends upon should you desire to maneuver sliders and tweak, or simply let the AI do its factor.
As well as, if I didn’t have already got modifying software program, I might have a look at investing in DxO PhotoLab and get a complete product which has superior built-in noise discount.
DxO PureRAW vs Topaz DeNoise Abstract
Select DxO PureRAW if:
- You desire a easy click on and go possibility for noise discount
- You need a number of the finest in school noise discount
- You aren’t too bothered about wonderful grained management, you simply need it to do the job and get out the way in which
- It helps your digital camera and lens mixture
Select Topaz DeNoise AI if:
- You need to have the ability to tweak the noise discount, and don’t thoughts spending time doing so
- You need to have the ability to cut back noise on extra than simply RAW recordsdata
- You need extra seamless Lightroom integration
- It helps your digital camera and lens mixture
Once more, each of those items of software program works very nicely on the job they’re designed to do, so it largely comes all the way down to your workflow and strategy to modifying.
Listed below are hyperlinks to every noise discount software on take a look at so you’ll be able to obtain them and check out them out your self with your individual photographs.
A Phrase of Warning about AI instruments and Picture Contests
I simply needed to briefly make some extent about noise discount software program and pictures competitions. As these instruments get increasingly highly effective, some pictures competitions have began to forbid the usage of instruments like this.
For instance, the Audubon Pictures Society award have the next rule which forbids “AI and machine-learning-based software program used for upscaling, sharpening and vital noise discount”.
I’m after all not saying that you just shouldn’t use these instruments. Nonetheless, should you plan to enter any competitors, be sure to comply with the foundations as set out, as in any other case you can lose. Presently, a software like Lightroom would seemingly be a greater possibility than considered one of AI powered choices.
Additional Studying
That’s it for my comparability of a number of the extra common noise discount purposes available on the market at the moment. When you discovered this convenient, you may get pleasure from a few of my different pictures content material. Listed below are some articles to get you began.
- I’ve a information to my favorite photograph modifying purposes, in addition to the most effective alternate options to Lightroom
- We have now a information to the right way to use a compact digital camera, the right way to use a DSLR digital camera, and the right way to use a mirrorless digital camera. We even have a information to how a DSLR works
- Realizing the right way to compose an incredible photograph is a key pictures talent. See our information to composition in pictures for plenty of recommendations on this topic
- We have now a information to what depth of subject is and if you would wish to use it.
- We’re massive followers of getting probably the most out of your digital photograph recordsdata, and do to that you will want to shoot in RAW. See our information to RAW in pictures to grasp what RAW is, and why it is best to swap to RAW as quickly as you’ll be able to in case your digital camera helps it.
- You’re going to want one thing to run your photograph modifying software program on. See our information to the most effective laptops for photograph modifying for some recommendations on what to search for.
- When you’re in search of extra recommendation on particular suggestions for various situations, we additionally have you ever lined. See our information to Northern Lights pictures, lengthy publicity pictures, fireworks pictures, suggestions for taking photographs of stars, and chilly climate pictures.
- Colour accuracy is vital for pictures – see our information to monitor calibration to make sure your display is ready up appropriately.
- When you’re in search of an incredible present for a pictures loving pal or member of the family (or your self!), check out our pictures present information,
- When you’re available in the market for a brand new digital camera, we now have an in depth information to the finest journey cameras, in addition to particular guides for the finest cameras for mountain climbing and backpacking, the finest compact digital camera, finest bridge digital camera, finest mirrorless digital camera and finest DSLR digital camera. We even have a information to the finest digital camera lenses.
- If you would like a digital camera or lens, however the costs are a bit excessive, see our information to the place to purchase used cameras and digital camera gear for some funds financial savings choices.
- We have now a information to why you want a tripod, a information to selecting a journey tripod, and a round-up of our favorite journey tripods
Seeking to Enhance Your Pictures?
When you discovered this submit useful, and also you wish to enhance your pictures general, you may wish to try my on-line journey pictures course.
Since launching the course in 2016, I’ve already helped over 2,000 college students learn to take higher photographs. The course covers just about every thing you could know, from the fundamentals of how a digital camera works, by means of to composition, mild, and photograph modifying.
It additionally covers extra superior subjects, together with astrophotography, lengthy publicity pictures, flash pictures, and HDR pictures.
You get suggestions from me as you progress, entry to webinars, interviews and movies, in addition to unique membership of a Fb group the place you may get suggestions in your work and participate in common challenges.
It’s accessible for an incredible one-off worth for lifetime entry, and I believe it is best to test it out. Which you are able to do by clicking right here.
And that’s it! I’d love to listen to about your favorite noise discount instruments, and am blissful to reply any questions you have got. Simply pop them within the feedback beneath and I’ll get again to you as quickly as I can.

